Sunday, December 27, 2009

C Frame ram on top and male dimple die no the bottpm


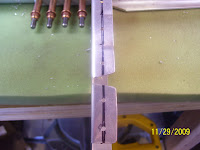
A slightly blurry pic of the dimple die inserted in the bottom of the table as previously described. A level table and a precisely positions dimple die are very important to creating a correct dimple,so care must be taken to set this up correctly before hammering away. Just a final note that the time spent solving the not-wide-enough work bench problem, and finishing the construction of the dimpling table, took a bout 2 days for me to complete. Unfortunately those were the 50 degree days that I might hve been able to finish priming all my parts,which is the last step before final riveting takes place. The cold weather is not helping, and I do have to say that right now I am extremely jealous of those that build airplanes that choose to live in more temperate climates, where they do not have to deal with the cold like we do here in Colorado. Oh well, I just stay patient and find other things to do when its super cold outside! I will show you how parts are cleaned and primed, and the skins are dimpled, in upcoming posts.

C Frame Setup and leveled


This shot is intended to show the setup of the C frame. You can just see the male dimple die, inserted into the same rivet set shown previously, now inserted in the bottom of the C-Frame., which is under the table. The male die just sits slightly above the rest of the table so that the hole in the skins can be inserted. The female die is placed in the ram, and a hammer is used to strike down on the ram which creates the dimple in the skin. All done by hand..... one hole at a time.

Saturday, December 26, 2009

Dimpling the end rib of the left HS


This probably helps visualize everything previously described the best. Here I am dimpling the last 2 holes on the most forward part of the end rib of the left stabilizer frame. The flange is placed over the top of the femaile dimple die clamped to the table, and the rivet gun containing the male dimple die is inserted into the hole of the rib flange from the top side. Just a few second burst from the gun is all that is needed and the dimple is created.

Special Rivet Set and Male dimple die


This is a special rivet set that came with my C-Frame which I also purchased from Cleveland Tools. The male dimple die is inserted at the tip. The other end of the shaft fits into the rivet gun. This is a really great tool for close quarter dimpling or riveting, and it works in tandem with the other tool as needed.

Dimpling in tight places


This is yet another tool I purchased well in advance from Cleaveland Tools. It was not part of the standard tool kit,but it did not take long to understand why it is needed. Especially on the HS, many of the ribs are not very broad or large,and this makes it hard to dimple and rivet certain holes. This tool is known as a close quarters dimpling tool,and allows one to be able to dimple holes in areas where there is 1/4 inch or less width to work with. You simply slide the rib flange over the female dimple die shown at the tip of the tool, and use the rivet gun with the male die inserted to "drive" the dimple into the hole from the top side. My friend Ron purchased a pair of locking plier dimple dies for the same purpose, and so far I have not needed to borrow those, but we'll see Ron! :)

IF you are building an RV adn you do not have one of these, you need to get one!!! Simply one of the best tool investments I have made!!!!!

Dimples


Not a very clear pic. I wanted to show the dimples in the rib flanges. The dimples are necessary to allow the flush rivet heads to sit down flush with the top surface of the part, which is effectively dimpled or countersunk to match the dimension of the flush rivet head, which in this case is always 100 degrees. A set o fdimple dyes are used to create the correct sized dimple for the correct sized rivet. The idea is that the rib flanges are dimpled, and the holes in the skins are also dimpled, and the rivet will sit flush on top of both parts.

2x4 supports for the workbench extension for the C Frame table


Used the same hinges for the supports. Now you can see how they fold up against the frame of the workbench and allow the extension to be stowed.

Workbench extension for C-Frame table Support - underneath


The underside of the solution. This also shows the 2 inch overhang that I purposely built in to my workbenches,so that I could easily clamp things to the bench without the need for a really deep clamp. The 2x4 support is also shown. The hinge for this is on the other side. So, when I do not need the extension, I unlock the bolts, and fold the supports up against the frame, and drop the extension down. Works pretty well.

The problem and the solution


The bench was not wide enough to fit the table!! (30 inches vs. 3 feet,or 36 inches! Whoopie! Now I get to go back and work on solving a workroom problem instead of working on the airplane. I was bummed, but went to work to figure out how to solve this dilemma. As shown, I took a 2x6 and some hinges and created a foldable extension that I can extend or remove as needed. It is supported in the middle by two more hinged 2x4s. I also installed 2 barrel latches, (right side shown) to keep it alllocked into place. As with most all wood that you buy from Home depot these days,it is anything but flat on the edges, bu the middle was flatenough for my needs. Perhaps a couple more hinges on the outside would straighten this out, but its good enough for now. Just enough room for the table legs to sit on a solid surface so that the table can be leveled.

Dimpling table and a required extension mod to my workbench - ARGH!


View from center. Again a reminder,you can double click on the photo to get a much larger view of the photo thatmuch greater detail. From here you see the C-Frame in the center of the table with the ram on top. What you may not be able to see yet is the set holder that holds the other dimple dye on the bottom. This sits flush with the table. The table itself is made of Oak, is 3ft wide x 4 ft in length, has a heavy cardboard surface on top, followed by some very short carpet that is glued onto the cardboard top to keep from scratching the surface of the skins as they are worked on. Note the dimensions of the table, and then note the original width of my workbench, which I designed to be 30 inches,and then all you math wiz types out there can tell me what problem I encountered that I needed to solve. HINT: notice the 3 adjustable legs on the bottom of table, and where they are located.

Back to the work bench!


I mean back to the workbench - literally! This is a pic of a special table kit that ordered from Cleveland Tools. It provides a level surface to dimple and perhaps rivet large parts together such as aluminum skins. The black arm sticking up in the middle of the table is called a C-frame. This is the tool that allows one to dimple or rivet the holes drilled in the skins. The parts shown are all of the ribs and spars that make up the left side of the HS. They have all been dimpled.

Wednesday, December 16, 2009

Found my paint scheme!


I would be remiss if I did not include a picture of an RV-8 called Nifty. This is extremely close to the paint scheme that I invisioned for my aircraft. Luckily I found a pic of one that is already flying. I will have some different trim details, and nose/tail art on my aircraft, but this is what I had in mind for the most part. I found this on the RV-8/8-A forum on Vans Air Force. This is the most concentrated gathering of RV aircraft folks on the planet, and a great source of information for those interested in building and flying RVs.

Thawing out from the cold spell - built my C frame table kit

The Colorado cold spell lasted for about 2 weeks, so between the snow and the sub-zero temps I did not get much done on the plane. I have managed to get all the holes deburred on the left side HS, and prepped the skins for dimpling. I purchased a dimpling table from Cleaveland Tools a while back for my C-frame tool. I will attach pics in a later post that will make all this a bit more clear. The C frame is used to reach holes in larger pieces that cannot be dimpled or riveted with the typical hand tools. The table helps support the parts during this process.

The prep work involved is what takes all the time to complete the aircraft. The actual assembly of parts does not really take that long at all. The tasks ahead are dimpling, cleaning, priming, and riveting. Then on to the Vertical Stabilizer assembly.

Wednesday, December 2, 2009

RIght side HS inner rib attach points drilled - edge distance OK again


The infamous 4 hole drilling exercise - this time on the right side of the HS. This one turned out pretty good as well. I don't think I mentioned previously that these 4 holes are predrilled to 3/32" or a #40 drill bit first, and then enlargened with a 1/8" or a #30 drill bit after that. So, between the the two sides, I had to drill these holes a total of 16 times before they were done.

THis pic is taken from the rear of the HS looking forward, which is exactly how I drilled the holes. Note the reference lines showing where the trimmed flange of the nose rib on the other side of the forward spar. Used the same process as in earlier posts working on the left side in order to ensure that holes were in the proper position to ensure correct edge distance.

62 hours on the hobbs now. Center section of HS skeleton coming together


A shot of the center section. All this gets riveted together eventually, and much much later on these two center sections get bolted onto the fuselage. Sounds corny, but I actually dream about that moment - hopefully about 2 years from now or so......

View of HS from the non-skinned side


....and a view from the other side. The wings will each be just a bit longer than this, but that's a bit farther down the road yet.

One skin on, the other skin off - almost a complete airplane part!


So once the left side was driled, it was time to do the right side. The plans do not call for this, but I felt like having some fun, so I took the frame from the left side, and attached it to the right side,just to see what the whole thing looks like for once. The whole assembly for the HS is just over 8 feet long.

Line drawn on the HS702 Forward Spar Flange


Another shot of a line drawn on another part. This one turned out better. The trick is to hold the sharpee in your fingers with one finger pressed up against the bend-side of the flange, and the tip of the sharpee on the center line. Then you simply drag the finger all the way down until you get to the end of the flange. The quicker you do it the less chance there is of the line "wandering." Make sure you hold you guide finger along the BEND-SIDE of the flange, and not the open end. The reason for this is that the bend side remains a relatvely constant reference line that will not change very much as the part is worked during assembly. The other side of the flange will be deburred, adn metal will be removed from this side, changing its characteristics, as well as the center point along the flange.

Drawing a center line on the rib flange - EAA HInts for Homebuilders is GREAT!


So I still need to practice a techique to draw a center line on a flange without measuring every little thing. I learned it on the hints for homebuilders videos produced by the EAA. As shown by the double line, I still need to eyeball the center a bit better. The holes that are drilled are pretty much centered along this line though,so it worked out fine. Edge distance is the concern here. Not enough nad the part can weaken and fracture, too much and the edge curls up and will also not be very strong.

Look ma, its an airplane part!!!


So one of my "followers" asked me to stand back and provide some scale so they can see things better. Just a word of warning here - the only time you will see pics of a part that actually resembles something from an airplane is when they are close to being finished. I will try my best to provide a clear description of each pic. If you have trouble understanding what I am showing, let me know and I will be glad to elaborate or clarify. :)
Here is the left horizontal stabilizer, stood on its rear end end this time - it takes up about 4 feet of my work bench.

Match drilling holes through the skin into both inboard HS ribs


Another shot showing the holes drilled into the front rib. Also shows a nice straight rivet line going down the center section of the skin.

Rear side of the inboard HS ribs shows correct edge distance of drilled holes


The other side of the holes are shown here. It turns out that my approach to lining up the front rib and main rib that I described in earlier posts worked out beautifully. The large forming hole that you see between the two center holes in the vertical flange lined up perfectly with the same hole in the other rib. I will be posting details of how I approached this part of the assembly because it was just a bit different than what others have tried to do, but I found it to be much easier and more precise than what many others are trying to do. I don't know if my procedure will work for the RV 7 or other tail assemblies, but it works great for the RV8. I'm pretty proud of the fact that I did not need to order new parts or rework due to botching this part of the build, as many, many others before me have had to do.

HS 404 and 405 Inboard ribs - holes drilled and clecoed to the forward spar


A shot of a critical rib attach point. The 4 vertically placed clecoes are the focus of this pic. I had to use a 12 inch long drill bit to drill these 4 holes. The instructions said that using an angle drill is best, and I have one of these for my air drill. But, I could not get the drill bit to line up correctly when using the angle drill, so I opted for the long drill bit.
This step is the source of lots of controversy and discussion about how to do it correctly. Van's does not pre-drill any of these holes, and two of them go through two additional layers of metal to connect the ribs to the forward spar flange and the two angle support brackets, so correct measurements and precise trimming of parts, as well as precise drilling of the holes, is absolutely critical here. I had to bend and support the long drill bit with one hand, while running the drill with the other, which also means that the entire part had to be completely secured. I was able to put the leading edge up against the peg board wall to keep it from moving while I applied pressure on the the drill bit against the rib, drilling it from the rear side, or opposite side than the one shown here in this pic. I want to thank Ron and all the others on Van's Air Force that provided valuable info about how this should be done.

Left HS - Inboard RIbs


Remember to click on the photos to make them bigger - you can see much more detail that way. This is another shot of the inboard rib that shows the flutes as well two cleco clamps that come in very handy when clamping parts together. Also notice the pre-drilled holes in the skin. The blue stuf is the vinyl coating to protect the metal from scratches.

Left HS - Inboard Side - RIbs Clamped into Place


The inboard side. A lot of prep work takes place to get this rib all lined up and drilled correctly/

58 hours on the hobbs


A 4 day holiday weekend for Thanksgiving with awesomely warm weather resulted in a lot time to work on the plane. I did not get as far as I wanted to, but, as my friend Ron has already stated in his blog when he got to this point, this where it starts to get fun. This a a pic of the left side horizontal stabilizer with the skin pulled down off the shelf and clecoed to the frame. Lots of hole drilling, dimpling, priming,and riveting yet to do, but getting ever closer.......

Wednesday, November 25, 2009

Fluting and straightening the ribs


These are fluting pliers and the resulting fluted rib. What is fluting you may ask? This is a process where small crimps are made in the flange of each rib to help bring the flanges to 90 degrees perpendicular to the web or main flat part of the rib, and to correct the bow in the web or flat part of the rib that results from bending the top and bottomflanges of each rib. The process of attempting to bend two 90 degree flanges on a thin piece of aluminum causes the larger flat part of the metal to bow in one direction. Fluting the flanges is necessary to straighten the bow in the metal by counter-acting the bending moment that occurs. Easier to see than to explain. Since I have already straightened all the flanges and fluted all the HS ribs, I will try to show a pic of the Vertical Stab ribs later on so you can see how pronounced the bow really is, and how fluting works to straighten it out. It really does work nicely.

HS 404 and 405 Continued - marking the rivet hole locations


SO these are the marks for the rivet holes that ensure that they have enough edge distance. 4 holes are required for the main rib flange, while only two are required for the flange on the nose rib. The whole point of the exercise of clamping the two rib sections together was to determine where the edges of the flange of the nose rib will line up with the flange on the main rib as shown in this pic. It is otherwise difficult to figure out where these holes go since the front spar fits in between the two ribs.

The vertical lines represent the edges of the trimmed flange of the nose rib and where it will be positioned in relationship to the main rib once positioned on the other side of the front spar. This allowed me to "transfer" the position of the shorter flange of the nose rib onto the larger flange of the main rib so that I can better determine where the center rivet holes needed to be drilled to maintain proper edge distance. Van's wants everyone to locate these holes themselves, so they do not pre-drill any of the holes in either flange.

This was a major pain in the ass to figure out, but I am confident that all the holes are now properly marked. Basically the marks all represent rivet hole locations that 1/4 inch away from all edges of each flange in each rib. The distance needs to be 2x the diameter of the rivet used. IN this case, they are 1/8 inch thick rivets, so 2x 1/8 inch is 1/4 inch to meet minimum edge distance.

HS 404 and 405 rib flange aligment continued.....Mounting hole alignment shown


A better shot showing the two forming holes underneath the clamp that I used to alig the two rib sections. Alslo shows the finished front rib after the nibbling and edge smoothing was completed.

Also don't forget to radius the inside corners where the flange is trimmed or nibbled away. Another thing to notice from this pic is the reference line drawn with a sharpie next to the area that has been trimmed away. Always perform major trimming or cutting so that you are not quite to the final trim line. Then perform final sanding, trimming, or grinding up to the established trim line. It's always easier to trim a little more metal away than it is to replace it after it's gone! Many builders have had to order new parts here, either due to improper trimming, or because they mess up the edge distance when trimming the flange or marking and drilling the holes. Thanks to Ron Duren's posts about these problems in his site, I was able to avoid this problem, and my finished parts all came out fine.

HS 404 adn HS 405 Rib flanges aligned and clamped, and center lines marked


Not a very clear pic, but it shows the alignment of the two rib sections.

Drilling holes correctly in the HS 404 and HS 405 flanges - my method


This is the source of great controversy, discussion, and advice as to how to go about marking and drilling the holes for the rivets that end up attaching this main rib to the front spar and subsequently to the nose rib - sort of a 3 layer sandwich of thin alumimum that must be solidly attached by riveting them all together. The controversy revolves around measuring and marking the holes to be drilled, while maintaining proper edge distance from the material. Setting a rivet too close to the edge can cause cracks or failures in the part, so this does have to be done correctly.
After spending lots of time reading and studying the plans, I had an epiphony of sorts. Realizing that the front spar is just the middle layer of the sandwich, the real challenge was to get the rivet holes of the ribs in the right spot, while making sure that the two rib pieces line up correctly. I also realized that the mounting holes in each rib that are used when forming each part appear to be in alignment with each other. As shown here, I simply clamped the two pieces together, lining up the two forming holes as closely as possible, while checking the outer edges to ensure they also were aligned.

I also used two pieces of aluminum from the trim bundle and placed them on both sides of the ribs where the flanges join to further ensure that the ribs are in proper alignment. Then youn really need to pay attention to the lovely drawing in the plans, which, much to my disappointment, is a bit too small to properly show all of the detail regarding how the edge distance and marks for each hole are determined. Be careful, and spend quality time here to fully understand how each set of refernce lines for each rivet hole are determined. Posts on VAF also very clearly discuss this problem.

More nibbling......


Your's truly nibbling away at the rib.

Nibbler tool


The nibbler tool, and some scrap aluminum showing my less than great cuts made with the dremel cutoff wheel, and the rib undergoing the trim...

Tuesday, November 24, 2009

Nibbling the HS 404forward rib flange to clear the angle support brackets


On to the ribs! I used a nifty tool called a nibbler to trim away the metal outside of the marks as shown. Others have used a dremel with a reinforced cutoff wheel to do this work, but I did not seem to have very good control when practicing with my Dremel tool on some scrap aluminum. This nose rib has to be trimmed to clear the reinforcement angles on the front side of the spar. The tape is "frog tape," which is mainly used for masking very clean trim lines when painting. As it turns out, it also makes a good straight edge for marking lines. Note the chunk missing on the right side which has been "nibbled" away a little at a time.

HS 702 Bend Angle

So this pic is rotated 90 degrees - cannot figure out how to rotate it in the blogger tools. Anyway, this is a clearer pic that shows the detail of what concerned me about the bend line. I was not sure if I would be creating a stress riser since the bend line and the corner radius of the flange intersected. Turned out it was no big deal for a 6 degree angle, but may very well have become a big deal requiring additional fabrication and trimming of metal if the angle for the bend was greater.

Using angle template to check angle of bend on HS 702 Spar


Checking the angle - 6 degrees on the nose! One of the things I found out while talking to Ron about this is that the RV7 construction is a bit different. The RV7 plans require some fabrication of the front spar where this bend line occurs, but the RV8 HS front spar does not.. Many folks try to purchase completed tail sections from other Van's aircraft, thinking that they will fit their RV because "they are all the same." This is not true.

Hobbs now about 40 hours - bending the HS 702 Front Spar Web

Probably should have removed the blue vinyl covering before making this bend, but it did not seem to matter. I took 2 pieces of particle board, cut them so that they were slightly smaller than the actual width of the spar at the bend line, clamped them together as shown, and made the 6 degree bend.

Saturday, November 14, 2009

Tribute to Patrick Swayze

Hey Ron Duren, if you are following along - ditto on your post a while back about the loss of Patrick Swayze - a fellow pilot and great actor. I could not add anything more to what Ron stated in his post. Check out his blog entry for more.

POST MORTUM NOTE AFTER RESEARCHING THIS WELL AFTER I HAD LEFT IT ALONE!! This may vary for each different model of Vans Aircraft. I have since found out that the RV-8 plans do depict relief holes in the this area, but only in the pictures. The instructions in the plan book make absolutely no mention of putting relief holes on this location, so this is an area where Vans really needs to update their instructions for the RV 8.


So, another great thing about Chapter 301, they have a lot of active RV buildes and fliers. I found one post on the Van's Air Force website where someone mentioned the need to trim this area of the front spar, and I became even more perplexed. I contacted the Chapter 301 president to ask him who I could contact about the bend line problem I posted earlier. He put me in touch with Bill Truax, a really nice person and Technical counselor who has build at least 13 airplanes I think. He took the time to come to my work shop and look at the problem in person. He told me that it probably would not be a problem and to go ahead and make the bend. So that is what I did, and it all worked out fine. On to the next step......

Joined Chapter 301

So, after attempting for the past 6 months to visit another local EAA Chapter, Chapter 301, I finally made it. What a great time that was - I met the pilot of "Rare Bear," a highly modified F8F Bearcat fighter aircraft from WWII. This is a long time crowd favorite of the Reno Air Races. If you think what I am doing is crazy, you should have heard all of the things they have done to that aircraft just to get a few more knots of airspeed out of her to win the race - it would boggle your mind. I got his autograph. More importantly, I joined Chapter 301. I also met some old friends - including Jack Buschmann, a former Civil Air Patrol Colorado Wing Commander, and a old CFI that I used to work with named Roger. Jack announced that he just finished his DAR final airworthiness inspection after working on a quickbuild RV7 for the past 2 years, and just got his signed paperwork that same day! Now he has to finish putting it back together and conduct the test flying period required by the FAA. I can only imagine being at that stage of the build for my own aircraft. Totally cool.

Bending the HS702 Front Spar Web to Match the Angle Support Brackets


This is the nature of the entire project - you finish one sub assembly and move on to the next challenge or problem at hand. The next step was to bend the center flange of both front spar halves to the same 6 degree angles as the support brackets. If you look closely I have drawn a mark with a black shrpie to show where the bend line is supposed to be, and took this photo to show that the bend line seems as though it might interfere with the radius of the 90 degree bend of the flange at the top of this photo. I stressed over this for some time, since I was not sure if I would have to trim this flange so that it would not interfere with the bend line.

Scotch Brite Tool - An amazing piece of 3M Technology


The angle fabrications work was finished up by using this..... a scotch brite polishing wheel. This is a specialty tool designed for aluminum. I installed it on one side of my grinder. It does not bind up with aluminum, which is what happens to a normal grinding wheel.

Sanding Dust after grinding down the angle support brackets


.....It leaves an awful lot of fine aluminum dust particles - probably not the best thing to be breathing.

My table sander


.....My electric sander. I think I had and 80 grit belt and disk which came with the sander - All they had been used for up to this point was several Pinewood Derby cars throughout the boys cub scout years. This actually worked pretty well, but........

Finished taper on angle support bracket after sanding


One of finished edges after utlizing my sanding method of removing the aluminum........
I believe it was an 80 grit belt, followed by the Scotch Brite wheel, and then again with 220 and 320 aluminum oxide sand paper, sanding by hand to remove any silicon particals from the sanding belts, which can cause corrosion, and to create the final smooth form of the tapered edges of the angles.

Marking Material to remove from Angle Support Brackets


This is a bit blurry - was still trying to figure out my wife's digital camera. These are the marks to show the taper line and the amount of aluminum that needed to be removed from the ends of each bracket. Many have used a band saw for this, which I don't currently possess (Xmas is just around the corner!). Some have used a dremel cutting wheel, but my attempts to do this on some practice pieces proved to be less than satisfactory. The wheel was too hard to control on such thick aluminum.

Used my Sander to grind these down - worked very nicely but left a lot a metal dust - recommend wearing a respirator when you do this.

HS810 and HS 814 Angle Support Brackets Bent

Upper and lower support brackets for the front HS spar with 6 degree bends on both sides. I decided to deviate from the instructions a bit by performing the bend before tapering the ends of both suppot brackets. There was more surface to bang the mallet on and less chance of warping the aluminum during the bend.

Hobbs now at about 35 hours


So it has been a while again - I just cannot bring myself to entering daily posts for some reason. About 35 hours in now - about to start final drilling the frame and skins for the horizontal stabilizer. Winter building in the garage is going to be challenge. This is a pic of a small electric heater I bought from Home Depot to help heat up my work area, since I have no ducted heat in my garage at this time. Between this heater and several 150 watt flood lamps, I am finding that the work area gets pretty comfortable, even with the snow falling outside, as long as I keep the garage door closed.

Thursday, October 22, 2009

Template for Measuring the 6 Degree Bend Angle


Using a protractor, measured a 6 degree angle on a piece of card board. After bending the ends of both angles, used this to verify if they were at 6 degrees per the plans. You have to pay attention to the plans here, because the angle is based on the forward portion of the 1/8 inch thick angle. I am learning that you must study every detail of the plans, including the origin and termination points of every line in the drawing.

Bending HS 810 and HS 814 Angle Support Brackets for the HS


One of two angle support brackets mashed between the two wood form blocks in my vise, with the ends to be bent sticking out. Can't see it here too well but the block on the back side has the 1/8th inch radius on the corner, per the plans. a 6 degree bend is required, and this needs to be accurate so that both sides of the front spar will have the correct angle for the ribs and the skins. All it takes is a rubber mallet applied squarely at the root of the aluminum to start the bend. It only took a few wacks to get it bent as far as it needed to go. Much easier than I thought it was going to be. How did I know when I reached the 6 degree angle you might ask. Read on for the answer.....
Oh, and thanks to my buddy Ron Duren for reminding me to make the bends in the right direction. It is very easy to make a mistake if you do not think everything through at least twice before actually doing it.

Step Drilling to final Mounting Hole size in Center Hinge Bearing


The drill bits I used to increase the size of the holes in the center hinge assembly

Enlargening Center Hinge Bearing Sub Assembly Nounting Holes


Another shot of the center hinge assembly - this time attempting to enlarge the holes from 1/8inch to 10/32 per the plans. These are the mountinh holes that will be secured to the rear spar with bolts instead of rivets. This was a pain in the ass - I had to use about 5 different drill bit sizes since this hole goes through 3 different layers of material - one steel, one thick aluminum, and one thin aluminum sheet. Note the huge burr that I will need to remove on the lower left hole. I will do this with a file or dremel tool to clean up all the holes. Also note the different colored clecoes. The darker copper ones are for 1/8 inch holes,and the gold ones are for 3/16th inch holes. These worked fine for holding the hinge assembly in place as I enlarged each hole. The drill its kept binding in the metal, so I finally had to put 3 in one light oil on the bits to alow them to keep cutting the metal. What a major pain this was.

Pneumatic Squeezer - I call mine BIG BERTHA


Here is the $700.00 beast that takes rivets and mashes them down like they were grapes, with no effort on my part except to activate a trigger that drives a ram. This is a pneumatic squeezer that can be used to squeeze rivets that are within a few inches of an edge. It is a bit bulky and heavy, and you need to ensure that the work is securely clamped to immovable objects. You put different sets ior dyes n the ends of the black jaws depending on if you are riveting or dimpling the metal. The ram is adjustable and screws in or out to adjust for the proper length of travel. It delivers about 3000 psi,so you don't want to get your fingers caught in this when it activates. Note the air hose attached to the other end. My compressor is set to 90 PSI,so this tool takes that air pressure and bumps it up to 3000 psi in the blink of an eye - impressive!