Tuesday, November 28, 2017

Coming up with a Better Mousetrap for Deburring Rib Flanges

Tonight I set out to debur the inner rib flange holes of all 7 tank ribs, and reassemble the tank with the baffle plate. After suffering through yet another trip to the dentist where they had to shoot me up 3 times to refill a cracked filling, and then biting my tongue pretty bad in the process, when the drug finally wore off I was not feeling quite 100%. So I decided to keep the plan activity to a minimum by only deburring the rivet holes in the rib flanges.

However, this seemingly small task re-opened another nagging problem that I have encountered before, but never really managed to solve. That task is trying to find a tool with a 90 degree angle that has a small enough profile to be able to insert a deburring bit and properly debur the holes in the inner rib flanges. The problem is that there is only about 5/16ths of an inch clearance from the rib web to the rivet hole, and although this task must be performed a rather significant number of times, nobody seems to make a custom tool specifically for this purpose. So everyone seems to come up with their own creation to try to accomplish this task.

In my case, I was simply going to take my deburring bit in my fingers and clean each rivet hole manually, and then spend the next several days recovering from the pain in my fingers, just like I did for the similar rivet holes in the main wing ribs a long time ago. Then, just as I got started on the first rib, I had a moment of clarity. For some reason I was thinking about back riveting the rib flange holes and the top main wing skins, and the fact that I still needed to order a 12 inch extended shaft back rivet set in order to do this.

That's when I had the brilliant idea that could use a similar extended shaft with a hex insert for the deburring bit. There would still be a slight angle of the bit against the rivet hole, but the low angle still allowed the holes to be deburred adequately. I taped the bit in place in the extension to keep it from falling out:
Before I settled on the above solution, I was also pondering a couple of other ideas. The first one was to use my drill-driven 90 degree angle drill attachment that I ordered with my tool kit when I started this crazy project. It has a fitting that will accept the screw shaft of that 3 flute deburring bit on the end of the yellow-handled tool I reviewed in my previous post. Unfortunately, just as I had mentioned at the beginning of this post, the width of the tool is just too wide to allow the bit to reach the hole properly:
And then I had another thought. I had also ordered a set of quick disconnect bits with a chuck that was designed to replace the chuck in my air drill. I have never used any of them because I never got around to deciding to remove the standard chuck from the air drill. These last two pics are of the bits that came with the 90 degree drill attachment shown above, and then the quick disconnect bits. The quick disconnect chuck and collets have a design that is very similar to my edge deburring tool. The collet shaft has a set of divets in it that fit the ball bearings inside the chuck and locks the collet in place. the pic below shows the 1/4 inch collet with one of my 1/4 inch drill bits inserted and secured with the collet nut. Think of it as a big Dremel tool attachment with a special shaft insertion and locking design with multiple collets of different sizes for different sizes of commonly used drill bits.

These would certainly be easier and quicker to change out than having to use the manual chuck key to change bits each time. The only problem is that they use a specialized chuck, and once you remove the standard chuck and replace it with this chuck you pretty much have to use the collets for that chuck from that point on. Luckily I now have two air drills, so I can keep the standard chuck in one of them and the quick disconnect chuck in the other one:

Unfortunately the quick disconnect set does not come with a deburring bit, nor does the 90 degree angle drill set. Anyway, it had been way too long since I had even looked at these other tools so I decided to break them out to "refresh" my memory about them. I may decide to get brave and figure out how to replace the standard chuck in one of my air drills with the quick disconnect chuck. I seem to recall that I have instructions for that lying around somewhere - I'll have to look.

So I managed to get the inner rib flange holes deburred, and I also manged to use my edge deburring tool to smooth the edges of the remaining tooling holes in each rib. Apparently I discovered that I had deburred the larger holes in the inner ribs that are designed to allow fuel to pass through from each bay of the tank as it empties from the most outboard bay near the fuel cap toward the inboard bay where the fuel pick up tube resides.


Monday, November 27, 2017

Deburred the tank rib flange to skin holes

Today I managed to start deburring the rivet holes for the tank rib flanges and the tank skin. The first order of business was to start removing the ribs one at a time with the tank in the cradle. This fuel tank has been clecoed together for over 3.5 years. This is the first time (aside from the removal of the inboard and outboard ribs to drill the tank baffle to the Z brackets) that the fuel tank has been completely disassembled since that time.

After removing all the tank ribs, I was bit surprized by the amount of "residue" sitting in the bottom of the tank skin. This is the result of all the match drilling and deburring that had taken place so far:
If only that were gold dust in there!

The next shot was simply to show the removal of the blue vinyl along the rivet lines for the ribs. I am leaving most of the vinyl covering over the holes for the stiffeners until those have been match drilled.
And of course this next pic has to come out blurry. I was trying to get a shot of a problem area that I will actually have to call Vans about tomorrow. Unfortunately, long ago when I was first wrestling the tank together, this resulted in some unsightly scratches that extend a bit wider than the typical inch or so on either side of the rivet hole center lines where I scuff and clean the line for primer. This usually does not phase me too much because I can always scuff the scratches out and prime over then since the alcad layer is removed during the scuffing process.

For the fuel tanks, no primer or other anti-corrosion treatment can be applied because it might not ply well with 100LL avgas. So now I need to find out just how wide I nee to scuff everything, because I HAVE to do it to prepare for proseal, but what I don't know is if I am supposed to ONLY scuff enough material to be as wide as the rib flanges, but no wider than that. Most other builders logs the that I review show that they have scuffed quite a bit more material, much wider than the width of the rib flange, but I don't think that proseal is applied to the area that is wider than the rib flange. Anyway, I have to check this because worst case is I will need a new tank skin.
Next is the stack of ribs that were already marked for each position inside the skin. As I pulled then out of the skin it was obvious that I need to do a bit more deburring and maybe touch up a few edges here and there on certain ribs.But the main task for tonight was to get as many holes deburred as possible.
I was able to debur the both sides of the fuel tank skin for each rivet line of each rib. I did the outer holes with the skin still in the cradle. For the inner holes, I wanted to try to continue to use my standard deburring bit in my electric screw driver, but to do so meant that I needed to remove the skin frm the cradle and place it on top of the dimpling table on my work bench. This would allow the skin to open up enough to be able to use the screwdriver to debur the holes.

I also was able to finish deburring all of the #19 screw holes for the joiner plate attachment on the outboard edge of the tank skin as well as the holes along the top and bottom edges of the skin where they attach to the main wing spar flange. To do this I used a combination of my standard deburring bit, and my edge deburring tool. These screw holes are about the same size as the tooling holes that are used to hydroform each of the ribs at the factory. I found that they were large enough that I could use the edge deburring tool to go around the edges of each hole to make sure they are truly smooth and free of burs.

Why is this so important? If the edges of these holes are not extremely smooth, when you try to dimple them with the #8 dimple die they can crack or end up having rough edges that could lead to stress cracks later on. So it is vital that these holes are super smooth. Here are the tools I am talking about:

The one on the left is my standard deburring bit from Cleaveland tools. It fits in my small electric screwdriver (NOT DRILL!!) DO NOT use this in a drill - only a screw driver with a slow setting. Usually 2 squeezes of the trigger does the job for #30 and #40 holes. It only has one single flute on the tip.
The center tool is the edge deburring tool with a fine hardened small blade. It is normally used for deburring straight edges in skins, but works pretty well in these larger sized bolt and screw holes.

The tool on the right is a speed deburring bit, similar to the one on the left, but with 3 cutting flutes instead of one. All I can say about this tool is to AVOID using it all costs. It tends to chatter when used, leaving uneven edges around the hole, and it can also take off too much material too quickly, which will leave the hole basically countersunk instead of deburred if you are not careful. Needless to say I don't like this tool very much and therefore do NOT use it very often.

I'm sure I have reviewed the use of these tools before, but it never hurts to do a refresher now and then. I managed to debur the outer flanges of all 7 tank ribs, so tomorrow I still need to debur the inner flanges, which, unfortunately, I have found I need to do by hand with my standard deburring bit. This is because I have not found a good reliable method for using an angle drill that would actually fit in the small space without marring up the rib web in the process. So I just do these holes by hand, painful as it sounds.

Lastly, I did some research on the T-405 tank attach bracket. Turns out there are some tricks to this assembly that also need to be taken into account when this is fabricated and positioned inside the nose section of the inboard tank rib.

Questions for Vans that need to be asked tomorrow are:

1. Scratches in the tank skin beyond the edges of the rib flanges - can I scuff those out without compromising the skin?
2. Z bracket prep for proseal and primer - do I plan to proseal the entire T-712 Z bracket flange that will sit against the rear baffle plate, or do I prime this flange, but only in the areas where proseal is not applied, i.e. about 1/2 inch around each rivet hole.
3. Method for clearing rivets when fabricating and positioning the T-405 tank attach bracket? Notches? Reduce the edge enough for dimple and rivet shop head clearance where the skin attaches to the rib?

After I get all the inner rib holes deburred, I need to put everything back together so I can countersink the rear baffle plate holes where they attach to the tank skin. I kind of did this out of order from the instructions because I wanted to remove all the burs first before I countersink these skin holes, to make sure everything is fitting together properly. I probably should have just countersunk the holes in hindsight before I removed the ribs - oh well - so it goes.

So deburring the inner rib flange holes and hopefully rough cutting the stiffeners are next on the list for tomorrow.

KPR

Friday, November 24, 2017

Drilling and Deburring the Remaining Fuel Tank Rivet and Screw holes

Spent almost a whole day match drilling and deburring the remaining rivet holes for the left fuel tank. It never seems like much work until you start doing it, and you suddenly realize just how many holes there are.

I also decided to go ahead drill the #19 holes for the all the remaining screw holes along the bottom of the fuel tank skin that attach it to both sides of the main wing spar flanges. This has come up in several build logs over the years as something that many are not sure how to tackle. Some will step drill these holes until they get to the final #19 bit, and others will just drill using the #19 bit without any upsizing the hole whatsoever. I chose to do the latter. The reason why some decide to step up the hole a little at a time is because if you follow Vans instructions, they would have you believe that you just run a drill bit through the skin without any kind of backing behind it.

Problem is - anyone who has been building for a while, which would be most of us if you are at this stage of the build, would know from experience that drilling aluminum sheet without anything backing it up is prone to leave some very nasty burs on the back side of the hole. Some of them can be a pain to remove. So, as a rule, it is always best to have something behind the metal when you drill to help prevent this from happening, or at least keep the burs as small as possible. SO was my solution to this problem. I found a piece of wood lying around the garage that was just ling enough and wide enough to fit behind the fuel tank skin just above the rear baffle.


I was able to match drill all the screw holes, and almost all of the rivet holes. The only rivet holes I have not drilled yet are for the stiffeners on the bottom of the fuel tank skin. I have not fabricated the stiffeners yet (on my list of to-do's for this weekend). So I don't want to drill those holes in the skin until I have the stiffeners clecoed in place per the instructions. However, I did manage to get all the rib flange to skin rivet holes drilled.

So next steps at this point are to fab the tank skin stiffeners and cleco and match drill them to the skin. Then I can start deburring the rib holes and the stiffener holes after I disassemble the ribs. I was able to debur and disassemble the rear baffle plate, and this allowed me to also resolve another pesky problem I encountered after going through all that "special method" to position and drill the rear flanges of the inboard and outboard ribs and baffle plate holes to the Z brackets on the wing spar.

When I reassembled the tank assembly and tried to cleco all the rib flange holes back to the skin, the forward most hole on the top and bottom rib flanges of the outboard fuel tank rib would not align with the holes in the skin. With the tank completely closed up it was impossible to get those small tab holes in the rib to line up with the skin holes for some reason. Usually this is a sign that more rib straightening and fluting may be necessary, but I was pretty sure 3+ years ago that all the tank ribs had been straightened adequately.Then again, with these leading edge, stressed skins, anything is possible. I did not want to start match drilling any holes in this rib until that forward-most set of holes was lined up and clecoed in place again.

Anyway, to solve this little problem, before I removed the rear baffle plate, I wanted to see if I could realign the holes in those tabs in the rib flanges without removing the rib, since I still needed it to remain in place so I could match drill all the rib flange holes.  I decided to leave the baffle plate in place, but to remove the clecoes that were holding it in place in that outboard bay along the flanges of the baffle plate, and then I removed all the clecoes from the rib flanges for that outboard rib. This meant that the tank was still closed up, but only loosely "closed" in that bay. So I could not just easily reach down from the rear and move the front of the rib around, but things were now lose enough that could manipulate the rib a bit to try to line up those forward holes with the skin.

How did I do this? Well, I thought my solution was quite ingenious. I took the largest and longest allen wrench that I own - about 3/8s of an inch as I recall, and 6 inches long. Then I realized that the rib in question was right next to the hole in the skin for the fuel tank fill port. So I was able to take that allen wrench and slip it inside the fuel port hole in the skin, and turn it so that the small "L" portion of the wrench was parallel to the rib web, and positioned it as low toward the front the rib as possible, and lightly tapped on the rib web. I'll be darned if that did not align the holes right up. SO I immediately clecoed all the rib flange holes, starting with those and working my way toward the rear.

Then I was able to match drill all the rib flange holes in that rib - FINALLY! After that the rear baffle plate was able to come off for deburring. So ends another fun-filled day of airplane building.

KPR.

Tuesday, November 21, 2017

Match Drilled the Fuel Tank skin to the top and bottom Rear Baffle Attach holes

I didn't do much on the plane this evening. I managed to match drill the tank skin to rear baffle plate attach holes along the relatively small flange of the baffle. I had also scored the vinyl covering on the fuel tank last weekend, so as I match drilled each of the many holes to #40, I also removed the bottom strip of vinyl on the outer edges of the fuel tank skin.

This means that the rear baffle can now be removed from the tank assembly so that the rear rib flanges can be deburred in addition to the holes that were match drilled tonight. Then the remaining top and bottom rib flange holes can be match drilled, and the screw holes along the top and bottom edges of both sides of the tank skin can be drilled to final size and dimpled for the #8 screws.

No pics tonight. KPR

Monday, November 20, 2017

Countersunk the Z Bracket nut plate rivet holes, match drilled the Fuel tank Baffle and rear rib flanges

Tonight I was able to countersink the rivet holes in the Z brackets for the nut plates. That's 36 holes in 6 brackets, with 6 holes per bracket. The first problem to overcome is a very familiar one. The Z bracket flanges are only about 1/2 inch wide, so they don't provide much of a base for the microstop countersink tool flange to rest on. This is not too much of a problem with the inner holes, but the two most outer rivet holes on both ends of each bracket flange are so close to the edge that it is difficult to ensure that the tool is resting flatly on the flange. So in order to provide a better base for the tool, I came up with this solution:
By butting the ends of two flanges together and clamping them on the drill board, with a gap in the middle to allow the countersink pilot to clear, I was able to rest the tool on both flanges to countersink all of the end holes in each bracket.

Here is one flange completely countersunk:
Next is a test of the rivet depth. I should also mention that before I started countersinking the bracket flanges, I tested the depth on piece of scrap aluminum. Here is a pic of a rivet sitting in one of the holes. It sits just a little deeper than flush, but a layer of primer on each bracket should allow all of these rivets to set flush when they are driven.
It is also pretty easy to see the slightly offset line of the flange on which the nut plates are to be installed. This was done intentionally to try to allow a bit more room for a pop rivet puller tool to be able to apply pop rivets into the rear baffle of the fuel tank when the time comes for that. All of he nut plate holes are about 1/16th of an inch closer to the center (vertical) Z bracket flange where the bolts will secure the tank to the wing spar. This should mean that the holes in the other flange for the pop rivets should be about 1/16th of an inch farther away from the same vertical flange, giving a little more room for the tool.

The last thing I did tonight was to match drill the remaining rear baffle plate - to - rear tank rib flanges, since the rear rib flanges had not been drilled to final size yet.All those holes were match drilled to #30 as shown by the copper colored clecoes.

There are tons more holes to match drill in the fuel tank, but I would really like to get the LE mod completed soon. I'll be giving my tech counselor a call for another visit, but the holiday is fast approaching, so I imagine I may be doing more fuel tank prep work for the time being. No worries - plenty of work to do all around in the airplane factory.

I'll need to prime the Z brackets, but I need to mask off the flange that gets riveted to the baffle plate, because I will need to apply proseal to that flange since the rivet holes are a potential area for fuel to leak out. You cannot apply any primer to any areas that may require proseal or that may come into contact with fuel, as this could contaminate the fuel or cause blockages if pieces of proseal or primer start breaking off and end up blocking the fuel pick up line. And that's not good. I think I will try to plan a primer session for the Z brackets and the top main wing skins, and will use the epoxy primer for this job as it is a bit more durable, and I think also a little more fuel resistant, than the NAPA 7220 self etching primer.

After the Z brackets are primed I will install the nut plates. Sure hope the weather stays warm enough for me to do the the priming in the next several days.

KPR.


Trick for symetrically drawing the LE cut line, Add NutPlates to Z Brackets, Remove Vinyl from the Fuel Tank

It never seems like much is getting done on the plane, but this weekend I was able to accomplish several important tasks.

The first task was to figure out a way to ensure that the cut line was symmetrical from the top of the LE, and all the way around the front to the bottom side. Previously I had measured and drawn the straight lines on the top and bottom sides of the LE where the outer skin will be cut to make way for the new modular, removable LE component. However, I had not continued the cut line all the way around the very front part of the LE to connect the lines on the top and bottom sides of the skin.

Since the wing has no taper to it, and it is all one consistently straight edge from the inboard of the wing all the way to the wing tip, and the curvature of the LE also remains consistent, the cut lines that I had drawn on the top and bottom sides of the LE skin should line up with each other as the line is extended around the very front curved part of the LE, connecting both lines together. The problem was how to draw a straight line on a curved surface that connects the other straight lines together.

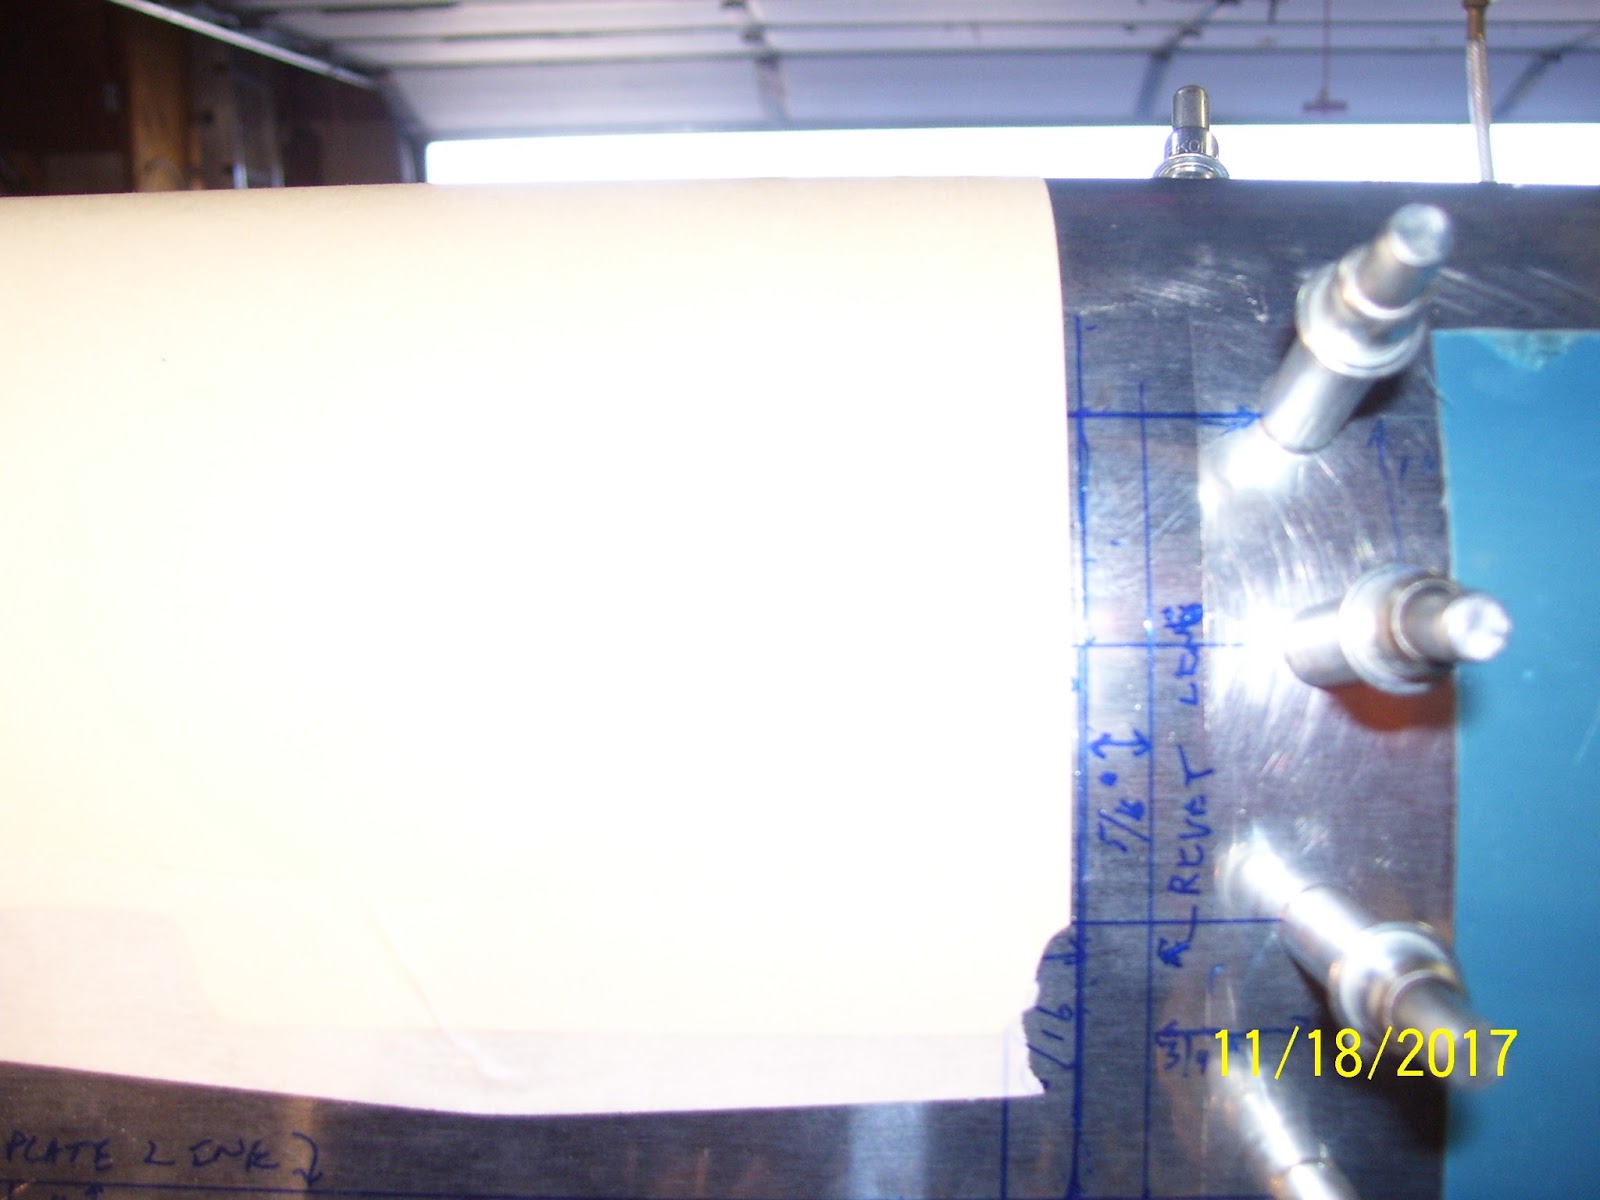
While there were several options for doing this, I decided to use half of a piece of file folder paper. this is thick enough to provide a small straight edge, straight enough because the edges of the folder are precisely cut square and straight, and flexible enough that it will hold its shape as it wraps completely around the curve of the LE. It can then be taped into place, and the lines from either side of the LE can be extended around the curve and over to the line on the other side.

If my measurements were done correctly, this method should result in the top and bottom lines connecting seamlessly together when the line is drawn around the curve, following file folder edge. the actual results were close, but not as close as I would have liked. The following series of photos shows the straight edge of the file folder lined up with the cut line on the top of the LE, taped in place at the bottom with masking tape, then wrapped around the curve of the LE, and taped into position on the bottom side.


The end result of this exercise was that the inboard side of the LE lined up pretty well from top to bottom, the outboard side was as much as about 1/16th of an inch off. This means that my measurements on one side or the other were a bit off. I was using the "center" of the rivet holes along each of the ribs as my origination point for taking measurements. obviously these measurements got a little off at some point. SO I think I am going to redraw the lines again, but this time I am going to use a common origination point for ALL measurements that will be the inboard edge of the skin, instead of trying to eyeball the center of a rivet hole.

If I do this, then I am confident that when I draw the connecting lines the next time they will all line up as expected. This is why you always try to measure many times, and cut only once, to make certain that everything is laid out exactly as it is supposed to be. If I screw up here and cut too much material away in the wrong spot, I can't get it back, and months of work will be ruined.

Next, it was time to remove the fuel tank and get back to the Z-brackets. As I began this session I realized that the Z Brackets for the left fuel tank had not been positioned or removed from the wing spar since 2014. They have been temporarily bolted into position all this time. An odd feeling came over me as I realized that, because had I decided just to continue with the steps to do a stock build, and NOT undertake this modification, I would have removed the Z brackets for the next step in the process a long, long time ago.

The basic goal was to mount nut plates on 6 of the 7 total nut plates where they had been temporarily secured to the wing spar with lock nuts so that the rear fuel tank baffle plate could be positioned and the rivet holes for the bracket-baffle-tank ribs could be drilled. Now that this task had been completed, it is time to drill the necessary rivet holes for the nut plates that will go on most of the  Z brackets for the bolts that will attach each bracket to the wing spar. The only way to do this is to remove the Z-brackets from the wing spar.

I found that using a 3/8 open end wrench on the lock nuts to hold them in place, and a small 1/4 inch screw-driver-like ratchet driver on the bolt heads on the bottom of the wing spar to remove the bolts, was the easiest way to do this. In fact, I think this is precisely the way that I attached them over 3 years ago.

Here is a pic with the bolts for all 7 brackets removed. Important to note here is that I made sure that top, bottom, and position of each bracket was remarked with a Sharpee on the upper flange of each bracket. I did not want to go through another episode like I did with the LE ribs where two of them became out of sequence and were installed in the wrong location, causing issues. So I made sure each Z bracket was clearly marked to avoid the same confusion.
There are 6 brackets that require nut plates, 3 bolt holes per bracket, so that is a total of 18 nut plates, and 36 rivet holes to attach them all (2 per nut plate). Here they are waiting to be installed - all 18 K1000-3 nut plates
With the brackets now free from the wing spar, I was also able to debur the holes on the underside of the flanges where the holes were previously match-drilled with the rear baffle plate. I also rechecked all the other holes and deburred those where necessary.

In order to do so many nut plates, the question becomes how to do this efficiently and quickly. The good news is that all the bolt holes have been drilled and reamed a long time ago. That exercise was painful enough. I decided to use the same method that many other builders have used, by taking a "throw away" K1000-3 nut plate, and run a standard 10-32 tap through the bolt hole to widen it and allow the bolt to be threaded on it much quicker and easier. This allows you to use a "throw away" AN3-4 bolt and washer that can be quickly threaded onto the nut plate, which will serve as a drill jig of sorts for drilling all of the #40 rivet holes for each nut plate on each Z bracket.

Nut plates are designed at the factory to have a slightly squashed bolt hole so that the threads of the bolt remain tightly secured. You do NOT want to use a tap to loosen these nut plate holes on the ones you intend to permanently install, because you will lose the gripping strength. This is especially important for structural applications. While others may argue, I tend to believe that the bolts and nut plates holding each of the fuel tank brackets to the wing spar are "structural" in nature, so these have to be tightly secured. That is why you sacrifice a nut plate and a bolt for this operation. Once this has been completed, the bolt and the nut plate should be discarded, or placed in a junk drawer where they should remain completely separated from the "good" hardware.

Here is an untapped stock nut plate. You can see the slightly ovalled shape of the thread shaft in the middle. Bolts are actually EXTREMELY hard to thread onto these nut plates.
Here is how I tapped the threads of the nutplate I used as the template for the rivet holes in each bracket:
This next pic shows how I decided to set up each bracket on the work bench to drill the rivet holes with a #40 drill. Note that this pic shows the drill guard in place. After I started drilling the rivet holes I noticed that the allen screw on the guard was hitting the bracket, so I decided to remove the guard for all remaining holes.
Here is the setup with everything clamped down and the drill guard removed:
As I reused the same bolt, washer, and nut plate as the jig for drilling each set of rivet holes, I became a little concerned about wallowing out the holes in the nut plate, especially after having the same problem with the rivet holes in the LE in certain spots. SO as I neared the final set of holes, I decided to take one of the normal nut plates and cleco it into position on the Z bracket, and then take a bolt and attempt to get it started into the nut plate through the bolt hole in the bracket, just to make sure everything still appeared to be aligned properly. The last two pics show the clecoed nut plate, and the condition of the jig nut plate after I was done drilling all 36 holes.

So the holes in the nut plate did get enlarged a little, but as best I can tell, all the nut plates will fit properly onto the Z brackets when they are finally riveted on. Next steps are that I have to countersink the rivet holes on the underside of each bracket so that the manufactured heads of each rivet are flush with the bottom side of each bracket flange that will rest on the wing spar web. so that's 36 countersunk holes to do. Oh yay!

Those will have to wait until tomorrow. Then I probably have some primer prep work to do before I rivet the nut plates onto the Z bracket. Other than that, once I get some confirmation of the integrity of my plans to cut the LE and apply the necessary rivets and nut plates, I will be ready to do that. If I get held up on the LE stuff I can at least keep going on the fuel tank. Since it is back in the cradle now I can start match drilling all the rivet holes, fabricating the stiffeners, drilling the screw attach holes out to #19 and dimpling them and the joiner plate attach holes for a #8 screw, etc., etc. There is no shortage of stuff to do - that's for sure!

All for now.
KPR

Saturday, November 18, 2017

Drilled the Screw Holes in the Joiner Plate to Final Size and checked the Clearance

After a lot more stressing over the fit of the edges of the fuel tank and LE skins and presence of any gaps, I finally got tired of trying to make this "perfect" and decided that it was time to do the best I could to ensure that the skin edges were as "perfect" as I could make them, and then drill the attach holes for the #8 screws to their final size with a #19 drill bit. Here was the outcome:
While it's a little hard to see in the above pic, the black colored clecoes in the middle are where the attach holes have been final drilled.

Just prior to doing that I was trying to get a pic of the gap between the LE and Fuel tank rib to verify that I had about a 1/16th inch gap between the end of the joiner plate and the fuel tank rib. even I am able to see the inside of the gap through the new access plate opening in the LE, it was difficult to get a good picture of this. I am still trying to figure out why i seems as though I have a correct gap on the top side of the LE and Fuel tank ribs, but the gap on the bottom side seemed to be quite a bit smaller. In fact, this gap is so small that the edge of the joiner plate appears as though it almost touches the flange of the fuel tank rib. None of that makes much sense to me.

The only way to view this gap is with a mirror. It is possible that I am dealing with an optical illusion, but I don't think so.

Trying to hold the mirror in one hand and the camera in the other, and insert it into the access panel hole is a bit of a challenge. Anyway, you get the idea. There is a diagram in the plans that shows this gap between the joiner plate flange and the fuel tank rib flanges, and it should be about the same on the top and bottom sides.

After the holes were drilled, I removed all the clecoes securing the fuel tank and removed it from the wing frame. I then deburred all the holes.


I was a little concerned about the edge distance of these holes once they were final drilled into the joiner plate, because I was not able to maintain the 11/16th of an inch measurement all the way around the LE. In some spots it does meet that measurement, but in others it is about 1/16th of an inch shorter, which leave less space for the nut plate and dimple for the #8 screw that will occupy these holes. After trial fitting a nut plate in several locations I don't think I have anything to worry about. the dimples and nut plates should have plenty of room.

I called Vans today to ask about the forward-most hole, after realizing that there is a bit of a curve in the flange of the joiner plate that causes the nut plate for this hole not to sit flush with it. Vans told me that you could either slightly bend the flanges of the nut plate, or clamp the joiner plate down as flat as possible and drill the rivet attach holes. they have seen builders do it both ways and I was told that it does not seem to make much difference whichever method is used.

Next steps are to get with my Tech counselor to review the plans for the cut in the LE skin. Then once that is finalized, it's time to drill the rivet holes and screw holes for the planned nut platesin the subskin, and then remove the LE and disassemble the subskin so I can make the cuts in the outer LE skin. Then I will need to smooth out the edges of the cutout in the outer skin, and fabricate a new .025 inch thick skin. This will become the "removable" LE that will fit exactly in the new cutout area.

Then I will need to and mark and drill the holes in the new removable skin by starting at the bottom and wrapping it around to the top, drilling and clecoing as I go, to make sure that it sits tightly around the subskin, and that all the edges line up perfectly with the edges of the outer skin. How to mark the holes in the fabricated replacement skin is something else that I also need to think through.

I still can't believe that the time for this near-final phase of the mod is actually almost here.

Sunday, November 12, 2017

More LE Prep and Other Stuff

Been busy doing several things since the last post. For starters, I finally replaced the stupid hydraulic jacks with a proper screw jack assembly. I already had one of these from a previous builder/s wing stand, but I could not find the other one, so off to HD I went to get some hardware. To make these you need a 12 inch long by 3/8  x 16 threaded rod, one 3/8 inch nut, and I chose use 2 3/8 x 1.25 inch wide washers. then you need a wood base that is tall enough to ensure that you can adjust the rod without over extending it too much.

I already had my wood base, and that did not change, except that I had to drill a 3/8 inch hole in the base wood to allow the rod to freely rise and fall inside as the nut is adjusted. Here are some pics. The first is of both the old hydraulic (worthless) jacks now sitting on the shelf doing nothing:

These have been replaced by 2 screw jack assemblies using the previously mentioned parts. After the holes were drilled in the base wood, I needed to drill and tap the piece of wood I have been using in order to secure the other end of the rod. I used a 5/32 drill bit to drill a pilot hole not all the way through the support wood, and then I used a 3/8 x 16 tap to create some threads. then I screwed the rod into the the support wood until is was securely in the hole.

When everything is done all you have to do adjust the height is screw or unscrew the nut to raise or lower the threaded rod, which raises or lowers the support wood resting against the rear spar web. No more having to keep re-pumping up the hydraulic jack every time I go out to the garage. SO why did I not do it this way a long time ago? Well, if you look at the drawing from Vans plans that shows this assembly, they show a rather simplistic but OBVIOUS picture of what looks like a bottle jack holding up the middle of the frame while it is on the stand. So I thought OK, I'll do that too. What a crock. Anyway, it's done now, and the left wing assembly was checked for level again by running the fish line across the holes in the main wing spar flange and adjusting the nut until the line runs through the middle of the spar flange rivet holes. Here is the left and right assembly in place:

Since I intentionally set my frames to rest a bit high in  the stand, I have to use quite a bit of wood to raise everything up to the correct level. I did that so that I could suspend the flaps or the ailerons from the trailing edge of the wing and still clear the floor.

the next thing I did was take a mirror to check the clearance of the joiner strip and the outboard fuel tank rib. I have reported in several prior posts that my "strip" did not exactly end up being 11/16th of an inch from the LE rib web as called for in the plans. In some places it ended up slightly less, and in others slightly more. This seems to have been confirmed after I was able to set a flashlight inside the new access hole and used my mirror to check the gap between the rib and the joiner plate. On the top side I ended up with more than enough clearance, but on the bottom side the clearance is just barely there, meaning that the joiner plate edge just about touches the fuel tank rib flange.

The reason that this is important is that at some point that fuel tank rib flange is going to be sealed with proseal and riveted in place. A combination of excess proseal in this area where the joiner plate is supposed to be flush with the fuel tank skin might be interfered with from the excess proseal. There is supposed to be a 1/6th inch gap all the way around, but mine obviously are not that way. I don't have pics of it but will try to get some for the next post. it is always interesting trying to use the mirror to check certain things. You could give a demo class on this subject alone, because it is more of an art than a science to figure out how to position the mirror just right so that you can see exactly what you want to see.

My plan for this is to continue with all the other stuff I need to do on the LE, and then when I am ready to take it off the wing again I will leave that LE rib and the plate attached, while I remove the rest of the LE (You know, the way I SHOULD HAVE done it the last time I tried to take it off), so I can more easily check the clearances of the joiner plate with the fuel tank rib. Trimming excess material is never a problem, but I want to better understand the reason why there is such a difference between the top and bottom sections first.

The other reason why it was important to double check this was because this may also have been contributing to the gapping problem between the outer LE and fuel tank skins that was giving me fits the other day. Need to check clearance with skins, ribs, Z brackets, and the baffle plate to make sure nothing is interfering with the fit.

Now that all that madness was done, it as time to remove the blue vinyl from the first bay of the LE so that I could make some final measurements and draw the final lines on the skin that will be used to mark the rivet lines, cut lines, and nut plate lines for this lovely time-consuming mod of mine. taking pics of bare metal is always a challenge, so these dd not come out exactly the way I wanted them to, but they will suffice for now.

Here is the bottom of the LE skin with the basic drawing of the planned cutout. I decided to use .75 inches as the rivet line mark from inside each existing rivet line for the rivets that will attach the ribs to the skin. The next decision was to use 5/16ths of an inch as the edge distance from the new rivet line. This will become clearer when I start drilling the new holes for everything. I decided on 5/16th of an inch because in other areas that could be construed as a "splice joint" per AC 43.13, such as the main wing skin overlap, the vertical edge distance of those wing skin rivets is 5/16ths of an inch. What's good enough for the goose is good enough for the gander, as they say.


I am using a 1/2 inch radius for the rear side of the removable LE, similar to the same radius used for the new access panel cover. In  fact, I took one of those covers that already had that radius built in to it to trace it onto the LE skin.

These last couple of pics show a line that drew on the top side of the LE skin between the 5th rivet hole from the front of the LE. After spot checking the rivet hole layout of the LE ribs on the top and bottom flanges, I discovered that the 5th rivet hole on the top is almost directly vertical to the 4th rivet hole on the bottom. The concern about using the 5th rivet hole on the top as the line where I will make the cut, is that there is still a pretty substantial amount of bend in the skin at that point. one of things I need to be careful about is to make sure that the removable part and the remaining LE skins will retain that curvature after they are fastened with screws or rivets to the subskin. I can perform some tricks that will apply a slight curve to the edge of the removable part if I need to, but I was hoping not to have to perform too much of that sort of magic.

The other, much more important concern about this, is if a crack forms or a screw come loose from a nut plate on the top of the LE. If this happens, and the skin is allowed to rise up into the slip stream, it basically turns into a spoiler, that will disrupt flow over the top of the wing, and, at best, will cause me to loose lift. At worst it can cause that part of the wing to stall, or for part of my aileron authority to be lessened, or lost entirely. (THIS is that part of the safety concern about this mod that I have been talking about ever since I thought it up.) Needless to say, my pre-flight inspections  will always consist of a significant amount of time devoted to checking ALL of the rivets and screw attach points on the top and bottom of this area, before I even think about getting in the airplane. All screws will be checked for tightness and the overall condition of this area will be scrutinized heavily.

I need to finish drawing more reference lines on the top and bottom side of the LE, and then I will mark all the additional rivet holes that will need to go through both the outer skin and the subskin and drill those. Then I need t make some final decisions about the number of screw holes along the sides and trailing edge of the areas in question, and drill #30 pilot holes through the outer skin and the subskin. Right now I am thinking about 4 screws along the back side, and 2-3 screws along the inboard and outboard edges of the bay. So I am finally and literally at that crucial point in all this prep work. If I screw any of this up now, there is no turning back. I may ask a tech counselor to come by one more time now that I have made some decisions about edge distance and rivet spacing.

Till next time,

KPR


Thursday, November 9, 2017

Preparing to Cut the Outer LE skin

I'll start this section with a huge disclaimer. I am not, nor have I ever been - a certified aeronautical engineer or aviation mechanic. Any changes that I am applying to my aircraft are entirely of my own design. I do try my best to research all aspects of making substantial design changes to an aircraft, and evaluate and address all safety concerns. I try to apply recommended procedures to any modification that I make that may differ from the original kit designer's plans.

If anyone decides to utilize any part of the information I provide in this blog to apply similar changes to their aircraft, they do so at their own risk. Each builder must evaluate their own research, skills, abilities, and experience, and must reach their own decisions as to the safety and applicability of any change applied to a tried and tested aircraft design.

I am embarking on a modification that, if it should go wrong while in flight, can have serious consequences. Having said that, I have done my best to ensure that all safety precautions are being taken, and that standard or recommended procedures are being followed for all modifications I am making. So, now you have been warned!

With the LE and fuel tank skins finally butting up to each other properly, it is now time to figure out once and for all just exactly where the new rivet holes, screw holes, and holes for the nut plates will be located for the removable LE. While most other builders would simply view what I am about to do as something very similar to installing a Duckworks support bracket assembly through a small opening in the LE skin for installing a landing light, they would only be partially correct.

There are some key differences in what I am about to do and the duckworks landing light bracket assembly:

1. For the duckworks installation, this takes place in the last or next-to-last bay in the leading edge, closest to the wing tip. For my installation I am using the opposite or most inboard bay of the LE. Higher loads are experienced in this inboard area of the LE than those that occur out at the wingtip.

2. The opening in the outer LE skin for the duckworks installation for the landing light is not as wide as the entire bay, whereas my removable LE assembly will span almost the entire width of the bay - somewhere in the neighborhood of 7 or 8 inches in a bay that spans 10 inches from one rib rivet hole to another rib rivet hole.

3. I don't think that the duckworks mod cuts the skin back as far as I am going to cut mine. Again the key difference here is that I will have a large section of LE skin that will be completely removable. All you are doing with the duckworks mod is cutting a hole that is big enough for the landing light support, mounting bracket, and the light itself to fit through.

4. The only "subskin" that the duckworks mod utilizes is the flanges of the support spar that rest against each rib web. I don't even think that the top or bottom flanges of the support bracket even touch the LE skin at all. My subskin rests against both the top and bottom of the LE skin and inserts between the ribs and the outer LE skin.

So while there are some similarities to the duckworks LE/Landing light mod and what I am doing, there are still some significant differences.

Here are some pics from tonight that show the joints between the LE, Fuel tank, and top main wing skins where they all butt up to each other. The seam between the LE and fuel tank skins is barely visible running vertically in the center of the pics, and the top wing skin seam is on the bottom.

The first several pics above are of the top side, and the last one on the bottom. Apparently I did not take any pics of the gap issues I mentioned in my previous posts, but lets just say it was extremely noticeable. In the above pics, it simply does not exist - exactly the way it is supposed to be.

For my final "before cut" measurements, I think I may have hashed at least some of this out in a previous post from several months ago, but doing it again here to make sure I have captured all the latest detail. Here is what I am dealing with:

Each 408 rib has a top and bottom flange where the LE skin is attached to the LE rib.

Those rib flanges are about 5/8 of an inch wide, or 10/16th of an inch

The rivet holes in each rib are pretty much centered in the rib flange, at about 5/16ths of an inch.

This leaves the remaining rib flange edge width of 5/16ths of an inch that I must  account for in my removable skin measurements.

While discussing this with my tech counselor, he agreed that I will need to leave a certain amount of LE just past each rib flange on both ends, and I will then need to add new rivets on this additional portion of the skin that will hold down the edges of the outer LE skin very close to the cut line for the removable section of the skin.AC 43.13 is almost no help with the details of how to apply rivets in this situation, however I learned from my tech counselor that the overall objective of a mode like this is to try to ensure that any loads imposed on the structure are allowed to pass through the structure in a similar manner that they would have if the repair or mod was not needed or applied. So you can't build up a set of rivets that will cause load paths to shift to other weaker areas of the structure, so this requires some careful planning and understanding how these loads were originally designed to be handled by the kit manufacturer.

After toiling over all this stuff again, I decided to follow a particular paragraph in AC 43.13 on page 4-26, paragraph 4-58, SubPart e, that describes how "repairs" to "damaged" skin should be made, which states that
" The repair seams are to lie along stiffening members, bulkheads, etc.; and each seam must be made exactly the same in regard to rivet size, splicing, and rivet pattern as the manufactured seams at the edges of the original sheet."

Then it references figure 4-16, which shows several examples of skin patches and repairs and how the rivets are to be applied.

Since I am actually the "manufacturer" of this plane, and Vans is actually the "designer" of the kit, this loosely translates to ensuring that any major skin "repair" matches the original designer's rivet layout as much as possible. To that end, I now know that I will add another row of rivets  in parallel with all the rivets already attaching the skin to each LE ribs. The details of this are:

Top side:
The first 3 rivets in top flange of each LE rib are 1 inch a part. Then all remaining holes are 1.25 inches apart.

The outer LE skin starts to truly flatten out (not as curved) after about the 8th rivet hole from the front of the LE. This is almost 2/3 of the total distance from the front to the rear of the LE skin. This is a lot further back than I was planning to go to make the cut line for the top side of the removable LE. So I need to ponder this a bit more.

Bottom side:
Only the first 2 rivets in each rib are 1 inch apart.This is because the bottom of the LE is obviously flatter than the top and is not quite as stressed as the curvature on the top part of the LE is. The remaining rivets after this point are once again spaced about 1.25 inches apart.

The LE bottom skin starts to flatten out after the 4th rivet.

SO I will be creating a parallel set if new rivet holes that will mirror the existing rivet holes in each rib. As far as where how far back to cut the LE skin is concerned, I have to decide if I will stagger this so that the span-wise cut line will be the same on both top and bottom (5th rivet hole from the tip) or go to the 5th rivet hole on the top and the 4th rivet hole on the bottom. I'll have to eyeball this a bit more.

This post is more than long enough, so I'll pick up where I left off tomorrow.

KPR