......But to look at the pics you wouldn't think that I got too much done. I have a lot to post tonight with a large number of builder tips. Hopefully builder that read this will find them useful.
It started with a review of Vans instructions regarding the leading. I reinstalled the Left wing LE ribs to the skin in the cradle, and then I realized that I was going to need to remove more vinyl from along the edges of the skin that overlap and attach to the main wing spar. Some older videos/DVDs cover a process to attach the LE to the wing by using cargo straps to wench down the skin onto the main wing spar, saying that this is needed due to the extreme tight fit of the LE to the wing. Well, the cargo strap technique is not used quite so much any longer since all the building of the LE and the fuel tanks is done in the cradle, but the extreme tight fit to the wing spar is definitely still there.
I moved the LE to the correct position on the wing,which I had done before, and clecoed all the rib-to-spar flanges to the wing spar from underneath, except for 2 that I will explain later. Up till now I had only clecoed the end rib to the wing spar just to get an idea of the fit. I had not clecoed the skins to the wing spar, and that is where things get very, very tight. Then I clecoed the skins to the wing spar, starting with the bottom skin holes. In retrospect I probably should have started with the top skins first, but I don't think it would have made any difference. Once the first few clecoes were in place it got easier, but was still very tight. Then, when I tried to cleco the other side, this was almost impossible. I almost thought about getting the straps out to cinch then down far enough for the clecoes to fit, but eventually I was able to get them started without needing the straps. This was still very difficult to do, and after having done it I can now appreciate when they tell you that the LE is put on very very tight.
Vans instructions say that the flange of the 2 LE ribs just outboard of the tie down bracket does not match the holes in the wing spar, so this is yet another case of using the holes in the wing spar to drill the new holes in the rib flange and abandon the others. A note to other builders - 3 of these holes still DO match the same holes in the wing spar. They are the ones in the center. Only the two holes on the ends do not have pre-drilled holes in the rib flange. So you can cleco the holes in the middle to keep the flange secure while you drill out the other holes on the ends.
So how do you drill them out. Well this is where it gets interesting. You have to drill them out from the botttom of the wing spar.Also, to avoid the contact of the drill chuck with the main wing ribs, you have to use a drill bit extension. This actually turned out to be fairly easy, but you do have to pay attention. I used one hand to guide the drill bit and the other to run the drill while bending it just the right amount to keep the drill away from the rib flange. Here are some shots of the clecoes:
And here is the problem rib. Can you see the problem?
For all you future builders - make a note - when you figure out where to drill your holes for the angle used to mount the wing to the stand, make sure you position the bolt holes so they are not directly underneath a rivet hole. I was only able to drill out the three holes with the clecoes for now, and I will have to remove the bolts one at a time while ensuring that the wing remains properly on the stand. Since the wing is also secured on the bottom support angle of the wing stand this should not be a big deal - we'll see.
Here is the 12 inch #30 drill bit extension I used to match drill the holes.
Here are the clecoes for the LE skin on the bottom side. Vans says to cleco every third hole.I can never figure out if this means third hole AFTER the one that is clecoed, or third hole including the one that is clecoed, which basically means every other hole. Either way, it works.
Here they are on the top side of the wing, where they butt up right next to the top wing skins, exactly like they are supposed to. This never ceases to amaze me - that the match drilling and cnc holes are so precise that everything just lines up the way it is supposed to. I really liked seeing this. The skin with the vinyl removed is the lower wing skin, and the topis the LE skin:
And now for the less than fun part of the day - fitting the inboard 408-1-L rib and the joiner plate together. This rib has absolutely no holes in it whatsoever, the position/clamping/securing of this part is critical to ensuring that the holes get drilled in the correct location on the flanges. This becomes difficult when you try to position the joiner strip between the rib and the skin. You end up losing reference of the location of the rib and the edge of the skin because the joiner plate gets in the way and extends well beyond the edge of the inboard LE skin. You are trying to make a sub-skin that the fuel tank skins will slide over when the fuel tank is fitted to the wing right next to the LE. The two skins should butt right up next to each other. This joiner plate also gets nut plates attached to it later on.
All I can tell you is that this was a pain in the ass. The joiner plates is made from 1.5inch x 36.5inch long .032 inch thick aluminum sheet. I deburred the edges, and then marked a line 1/2 inch from one edge, per the instructions. This line is a guide line for the holes in the LE skin so you can line up both the joiner and the rib correctly.
Here is the strip with the reference line drawn;
The hard part of all this was getting the strip to fit in between the rib and the LE skin. I ended up doing something different than the plans by using the rib on the work bench as a form and then taking the strip and forming it around the rib to establish the necessary curve around the nose of the rib. The ends of the strip should end up matching the end of each side of the rib flange after it is all in place, but you are not sure where they will end up when you start fabricating everything. Once the strip is pre-bent to the shape of the rib, I placed the strip inside the wing skin, and then I took the rib and started inserting it from the nose first, followed by the base, which is different than how Vans tells you to insert the rib. This most likely resulted in the bending of my rear rib flange just a bit, but was not too bad, so I left it that way when I drilled it. I will bend it back into shape after I remove it for deburring later on.
The plans tell you to line up the plate by moving it until the line shows up under the rivet holes in the wing skin. Then you verify the position of the rib by ensuring that the distance between the rib web and the end of the joiner strip is 11/16 of an inch. I must have measured, clamped, remeasured, repositioned, and re-did everything all over again about 20 or 30 times. I used my ruler to verify the 11/16 inch measurement, and when I thought I had it all lined up and put a couple of clamps on as shown below to keep it from moving:
I found this to be very perplexing because you cannot clamp the rib flange to the main wing spar at all,and I wanted to make sure that the flange would not move when I started drilling it. So clamping the skins was the only way I could try to secure the assembly and keep it from moving. Then, when I was satisfied that i had everything as lined up as it was going to be I started by drilling the holes for the spar flange:
That seemed to go OK so I then started drilling all of the skin/joiner plate/rib holes from the top side and then around to the bottom side. I was very worried that the holes may not be lined up on the rib flanges correctly, and I do think that they are a bit on the inside and too close to the rib web, but I will know more when I remove the rib after all the drilling is done.
And finally, here are some shots of both sides after all the drilling was done:
And one last shot of the wing with a mostly drilled out LE:
Tomorrow I finish drilling all the remaining holes, and then I start working on the right wing leading edge adn do everything all over again, hopefully better than I did this time.
Monday, June 23, 2014
Saturday, June 21, 2014
Starting to work on the Leading Edges
I have not posted anything in a while because the work I have been doing has just been duplication of the left wing deburring on the right wing skins and ribs. I finally finished all that deburring today, so the wing skins and ribs will be ready for dimpling soon, after I manage to prime the insides of the skins. I removed the bottom wing skins from the left wing per Vans instructions, and left the top skins on.You need to have access under the wing spar for fitting and drilling the leading edge ribs to the spar, so the bottom skins are removed to allow this.
The next step was to remove all the vinyl from the inside of the leading edge skin. Being my usual frugal self I decided to use my soldering iron to remove the vinyl only from the rib lines, leaving the rest to protect the skin from any scratches or dings. I have had the left wing leading edge in the cradle now for a very long time, with the ribs clecoed in place. I remember I wanted to see how easy or hard the ribs could be clecoed to the LE skin. THis also verifies how well you straightened all the LE ribs. Contrary to Vans instructions at that time I left all the vinyl in place on the skins. Some of the holes were difficult, but I managed to get all ofthem installed.
Either Vans or some other builder also suggests to knock down the flanges that are cut into small separate flanges that go around the circumference of the very front part of the leading edge skin. I had straightened all of these separate small flanges long ago, but had not done any further prep work to debur or smooth out the fronts of the ribs. Because of this, and the need to remove the vinyl for correct fitting of the ribs to the skin, I needed to remove all the clecoes and remove each LE rib. This went pretty well, but some of them were difficult since the holes have not been match drilled yet.Before I removed the clecoes from the ribs I took the soldering iron and used each rib flange as a guide to melt the vinyl. This also worked pretty well.
You are supposed to knock down the rough edges of each of these small flanges because if you don't small bumps will appear in the LE skin that apparently are somewhat visible after painting. There is also a possibility that stress risers will forming that area and possibly cause the skin to start cracking. If run your finger around the front of each rib you can feel the high spots created by the bends and relief holes of each of these flanges, and so the acid test for smoothing these out is to feel no sudden stops with your finger and everything should feel smooth as your finger follows the contour of each rib.
The only question now was what method to use to smooth them out. I had already tried using the scotch brite wheel to do some of this, and it just did not work very well. Tonight I decided to try using 220 grit aluminum oxide sandpaper. My past experience with using the sand paper for removing or smoothing large areas with significant amounts of material to remove is that this takes forever to do,even with 220 grit. You also need to be careful because you do not want to remove too much material.
So after the first rib I gave up on the sandpaper, and switched to a standard sized flat file, and two other smaller jeweler files that I have used in the past for the smaller ribs for the tail section. The flat file actually did a nice job of knocking down the high spots and smoothing out the transition between each small rib flange on the nose of each rib. I kept running the file over each adjacent set of flanges until the entire rounded surface felt smooth. I used a round jewelers file to smooth out the relief holes.
I managed to smooth out all of the ribs for the left wing LE, and now that I have all of the vinyl removed as well, tomorrow I will re-cleco all of the ribs back into the LE skin and fit it to the left wing spar per the instructions. Then I will be able to match drill the holes. There are some questions that I may need to ask Vans about next week. I am not sure if I will need to kerf the LE skin so that it does not curl up on the edge against the spar, and I am not sure how much,if at all,I am supposed to debur the edges of the skins,since part the process for all this is to ensure that all the separate skin sections for the wing, LE, and fuel tanks all butt up against each other without any gaps. Gaps between the skins sections will generate drag, which the enemy of speed.
Anyway, all for now, more fun work to do tomorrow. Man am I glad that all that deburring is done. My fingers are shot from doing the back sides of the wing ribs by hand.
The next step was to remove all the vinyl from the inside of the leading edge skin. Being my usual frugal self I decided to use my soldering iron to remove the vinyl only from the rib lines, leaving the rest to protect the skin from any scratches or dings. I have had the left wing leading edge in the cradle now for a very long time, with the ribs clecoed in place. I remember I wanted to see how easy or hard the ribs could be clecoed to the LE skin. THis also verifies how well you straightened all the LE ribs. Contrary to Vans instructions at that time I left all the vinyl in place on the skins. Some of the holes were difficult, but I managed to get all ofthem installed.
Either Vans or some other builder also suggests to knock down the flanges that are cut into small separate flanges that go around the circumference of the very front part of the leading edge skin. I had straightened all of these separate small flanges long ago, but had not done any further prep work to debur or smooth out the fronts of the ribs. Because of this, and the need to remove the vinyl for correct fitting of the ribs to the skin, I needed to remove all the clecoes and remove each LE rib. This went pretty well, but some of them were difficult since the holes have not been match drilled yet.Before I removed the clecoes from the ribs I took the soldering iron and used each rib flange as a guide to melt the vinyl. This also worked pretty well.
You are supposed to knock down the rough edges of each of these small flanges because if you don't small bumps will appear in the LE skin that apparently are somewhat visible after painting. There is also a possibility that stress risers will forming that area and possibly cause the skin to start cracking. If run your finger around the front of each rib you can feel the high spots created by the bends and relief holes of each of these flanges, and so the acid test for smoothing these out is to feel no sudden stops with your finger and everything should feel smooth as your finger follows the contour of each rib.
The only question now was what method to use to smooth them out. I had already tried using the scotch brite wheel to do some of this, and it just did not work very well. Tonight I decided to try using 220 grit aluminum oxide sandpaper. My past experience with using the sand paper for removing or smoothing large areas with significant amounts of material to remove is that this takes forever to do,even with 220 grit. You also need to be careful because you do not want to remove too much material.
So after the first rib I gave up on the sandpaper, and switched to a standard sized flat file, and two other smaller jeweler files that I have used in the past for the smaller ribs for the tail section. The flat file actually did a nice job of knocking down the high spots and smoothing out the transition between each small rib flange on the nose of each rib. I kept running the file over each adjacent set of flanges until the entire rounded surface felt smooth. I used a round jewelers file to smooth out the relief holes.
I managed to smooth out all of the ribs for the left wing LE, and now that I have all of the vinyl removed as well, tomorrow I will re-cleco all of the ribs back into the LE skin and fit it to the left wing spar per the instructions. Then I will be able to match drill the holes. There are some questions that I may need to ask Vans about next week. I am not sure if I will need to kerf the LE skin so that it does not curl up on the edge against the spar, and I am not sure how much,if at all,I am supposed to debur the edges of the skins,since part the process for all this is to ensure that all the separate skin sections for the wing, LE, and fuel tanks all butt up against each other without any gaps. Gaps between the skins sections will generate drag, which the enemy of speed.
Anyway, all for now, more fun work to do tomorrow. Man am I glad that all that deburring is done. My fingers are shot from doing the back sides of the wing ribs by hand.
Wednesday, June 11, 2014
Right wing top skins deburring progress
Just more of the same - stripped the vinyl off of the larger outboard top skin for the right wing tonight. I have also been watching episodes from the series "From the Ground Up," which, if you have read my early posts, you know that this is one of the catalysts that convinced me to take this journey of building my own airplane. This series is always good motivation for me to continue on, no matter how mundane or insane my current tasks appear to be. At the end you get to watch the finished product (An RV-8) take to the skies for the first time.
Tomorrow I will debur the holes in both top skins, all 80 million of them. OK,so I am exaggerating just a bit, but it sure seems that way. Here is a pic of the right wing top skin with the vinyl removed:
Next is a pic of the way that I left the bottom skins mounted temporarily to the left wing. As soon as I finish deburring the right wing skins the bottom skins of the left wing will be removed per the instructions so I can begin the process of fitting the left wing leading edge. Sure will be nice to switch from the main skins to the leading edges.
Since they will be coming back off soon I only clecoed the top rows of the skins in place. No need to lock down the entire skin since they will becoming back off soon.
Really getting the itch to go flying soon,but I still have some things to take care of first.
On a sadder note, it looks like my washing machine, hot water heater, sprinkler system plumbing, and probably my car have all decided to breakdown at the same time. Sucks to be me I guess. Unfortunately no Oshkosh trip for me this year - just can't swing it financially. I am, however, still planning a trip to Boise Idaho in the fall to visit my brother and his family, and to hook up with one of the transition training pilots listed on Vans website to see if I can get some time in an RV-7A to familiarize myself with the flying characteristics. Looking forward to that.
Tomorrow I will debur the holes in both top skins, all 80 million of them. OK,so I am exaggerating just a bit, but it sure seems that way. Here is a pic of the right wing top skin with the vinyl removed:
Next is a pic of the way that I left the bottom skins mounted temporarily to the left wing. As soon as I finish deburring the right wing skins the bottom skins of the left wing will be removed per the instructions so I can begin the process of fitting the left wing leading edge. Sure will be nice to switch from the main skins to the leading edges.
Since they will be coming back off soon I only clecoed the top rows of the skins in place. No need to lock down the entire skin since they will becoming back off soon.
Really getting the itch to go flying soon,but I still have some things to take care of first.
On a sadder note, it looks like my washing machine, hot water heater, sprinkler system plumbing, and probably my car have all decided to breakdown at the same time. Sucks to be me I guess. Unfortunately no Oshkosh trip for me this year - just can't swing it financially. I am, however, still planning a trip to Boise Idaho in the fall to visit my brother and his family, and to hook up with one of the transition training pilots listed on Vans website to see if I can get some time in an RV-7A to familiarize myself with the flying characteristics. Looking forward to that.
Sunday, June 8, 2014
Bottom skins of the left wing all deburred
I managed to get both sides of the bottom left wing skins deburred - even before my back decided to give out,which I thought would happen a couple of times. On the tables and saw horses I was using, sitting in a chair would not quite work, and standing put me just a bit higher from the work surface than I wanted to be. You can't just prop up these skins vertically like you could with the other skins from the tail, so this was a little more back breaking. Anyway, at least I can report that the drilling an deburring of the wing skins in 50% complete. I still need to do all 4 skins for the right wing, but progress is progress.
Here is pic of the larger outboard bottom wing skin with the vinyl all stripped.
It was kind of a dreary day here - filled with nothing but rain. Sure am tired of that. Next task is to debur the dreaded bottom half of the wing ribs. At that point I have some decisions to make. I can start on the right wing and repeat everything I have done on the left wing up to this point, or I can continue with the left wing and work on the left wing leading edge. The one thing I do NOT want to do is to start the edge deburring and dimpling of the wing skins until I have fit and drilled the leading edge ribs and skins. It is easy to jump too far ahead and start doing the wrong thing at the wrong time, so this is a point where reading ahead in the plans and instructions will help determine what steps you should and should not take.
There is still an amazing amount of work to do.....but at least it's getting done.
Here is pic of the larger outboard bottom wing skin with the vinyl all stripped.
It was kind of a dreary day here - filled with nothing but rain. Sure am tired of that. Next task is to debur the dreaded bottom half of the wing ribs. At that point I have some decisions to make. I can start on the right wing and repeat everything I have done on the left wing up to this point, or I can continue with the left wing and work on the left wing leading edge. The one thing I do NOT want to do is to start the edge deburring and dimpling of the wing skins until I have fit and drilled the leading edge ribs and skins. It is easy to jump too far ahead and start doing the wrong thing at the wrong time, so this is a point where reading ahead in the plans and instructions will help determine what steps you should and should not take.
There is still an amazing amount of work to do.....but at least it's getting done.
Saturday, June 7, 2014
Can you guess what this is?
Had a bit of a surprise this afternoon while I was outside going over some car-related info with my son Adam who recently received his Colorado Driver's license. (Way to go Adam!)
It looked something like this:
While I was busy going over the finer points of jumper cable operation with Adam, he suddenly looked up to see what the deep droning noise was coming from the north. He then said - Isn't that plane flying a little low? Not hearing the engines I looked up and for a split second I agreed, and I thought we were looking at an airplane in trouble, heading right for the house! But then my attention focused on what has become a familiar sound to me over the years, and I realized that this this had to be Aluminum Overcast - the EAA B-17 back once again on its annual pilgrimage around the country just before Airventure arrives on Oshkosh Wisconsin in July.
BTW, the above pic does not do the airplane justice, because it WAS flying very low almost directly over the house. I became less worried when I realized that I could hear all 4 of those wright-cyclone engines purring along just fine, and it was maintaining a constant altitude. I assume it was low to avoid the low overcast ceiling that has invaded the Denver area over the weekend.
I am blessed to live where I live, because the path directly over my house is a natural navigation point from south to north for everything from jets flying over mile high stadium before a Bronco game, to Aluminum Overcast and a whole host of other historic warbirds that occasionally fly almost directly over the house. The bird should be here for the next 2 weeks giving rides and promoting EAA. And all this on the heels of the 70th anniversary of D-Day. I certainly paid my respects, and I hope you all did as well. I will NEVER forget.
Now back to the airplane project.....
I spent time today getting the top skins of the left wing installed after deburring both sides of the rivet holes in the skins, as well as both sides of the holes in the top half of each wing rib. Deburring the back side of the rib flanges has to be one of my top 5 least liked things about building an airplane, because ready-made power tool can get into that location to do the job. I had to take my deburring bit and debur all the back side flange holes by hand.Getting in between all those inboard ribs that are very close together was a pain.
Prior to re-installing the skins on the frame, I vacuumed out all the tiny remnants laying on the trailing edge from all the drilling. With the top skins back on I could now remove the bottom skins and begin the process of removing vinyl and deburring all those holes. Here are a couple of pics of the bottom skins after the vinyl was removed.
I removed the vinyl from the joggled areas for the inspection plates so that I can prime those areas continue to drill out the holes for the nut plates that will eventually need to be installed. I also deburred the edges and corners on the wing walk doubler since those were still pretty rough. Tomorrow I plan on removing the vinyl from the larger outboard bottom wing skin and beginning the deburring process. Then I'll get to do it all over gain for the right wing. (UGGHHH!).
It looked something like this:
While I was busy going over the finer points of jumper cable operation with Adam, he suddenly looked up to see what the deep droning noise was coming from the north. He then said - Isn't that plane flying a little low? Not hearing the engines I looked up and for a split second I agreed, and I thought we were looking at an airplane in trouble, heading right for the house! But then my attention focused on what has become a familiar sound to me over the years, and I realized that this this had to be Aluminum Overcast - the EAA B-17 back once again on its annual pilgrimage around the country just before Airventure arrives on Oshkosh Wisconsin in July.
BTW, the above pic does not do the airplane justice, because it WAS flying very low almost directly over the house. I became less worried when I realized that I could hear all 4 of those wright-cyclone engines purring along just fine, and it was maintaining a constant altitude. I assume it was low to avoid the low overcast ceiling that has invaded the Denver area over the weekend.
I am blessed to live where I live, because the path directly over my house is a natural navigation point from south to north for everything from jets flying over mile high stadium before a Bronco game, to Aluminum Overcast and a whole host of other historic warbirds that occasionally fly almost directly over the house. The bird should be here for the next 2 weeks giving rides and promoting EAA. And all this on the heels of the 70th anniversary of D-Day. I certainly paid my respects, and I hope you all did as well. I will NEVER forget.
Now back to the airplane project.....
I spent time today getting the top skins of the left wing installed after deburring both sides of the rivet holes in the skins, as well as both sides of the holes in the top half of each wing rib. Deburring the back side of the rib flanges has to be one of my top 5 least liked things about building an airplane, because ready-made power tool can get into that location to do the job. I had to take my deburring bit and debur all the back side flange holes by hand.Getting in between all those inboard ribs that are very close together was a pain.
Prior to re-installing the skins on the frame, I vacuumed out all the tiny remnants laying on the trailing edge from all the drilling. With the top skins back on I could now remove the bottom skins and begin the process of removing vinyl and deburring all those holes. Here are a couple of pics of the bottom skins after the vinyl was removed.
I removed the vinyl from the joggled areas for the inspection plates so that I can prime those areas continue to drill out the holes for the nut plates that will eventually need to be installed. I also deburred the edges and corners on the wing walk doubler since those were still pretty rough. Tomorrow I plan on removing the vinyl from the larger outboard bottom wing skin and beginning the deburring process. Then I'll get to do it all over gain for the right wing. (UGGHHH!).
Labels:
Airventure,
Flying Tail Draggers,
Miscellaneous,
Motivation,
Wings
Thursday, June 5, 2014
Busy working on the second "D" of the 3D process
Nothing too exciting to report today. I managed to get the vinyl stripped on the top wing skins of the left wing (both front and back sides). I decided I would go ahead and work on the second D of the 3 "D"s - you know the DEBUR part! Man I feel like I have deburred about million holes - and those were just both sides of one side of one wing - man sometimes it just seems like it never ends. I am now starting to understand why builders are so happy to finally start working on the fuselage kit - no more ribs to straighten or other airfoil-related surfaces to deal with.
As long as the vinyl stripping and deburring continues to go well, I expect to be working on the leading edge by next week. Need to order some parts from Vans to incorporate the necessary mods for the special project.Priming and dimpling the wing skins is not too far down the road either.
Also saw that Ron Duren picked up his newly painted bird from GLO systems in Texas yesterday- I am sooooooo jealous!
As long as the vinyl stripping and deburring continues to go well, I expect to be working on the leading edge by next week. Need to order some parts from Vans to incorporate the necessary mods for the special project.Priming and dimpling the wing skins is not too far down the road either.
Also saw that Ron Duren picked up his newly painted bird from GLO systems in Texas yesterday- I am sooooooo jealous!
Sunday, June 1, 2014
Removing wing skins and stripping vinyl, and pics of recent visit of two almost completed RV projects
I removed the top outboard wing skin of the left wing and began the process of stripping the vinyl. After the drilling is over you kind of start to dread the deburring part a bit because this must be done on both sides of the skin. SO there are a total of 8 separate wing skins for the top and bottom of both wings(4 per wing), but you have to debur holes on both sides, so that is all the holes on each wing skin times 2 for the front and back. Then you have to debur the holes in the rib and spar flanges - again that is also both sides of each of those. If you focus too much on the large number of holes then you can become overwhelmed sometimes, so it is best just to get started and see how long it takes to get through a certain number of them. Then you will know how long it will take to do the rest of them. When the time comes dimple the skins I will take my time to ensure that I do not create any figure 8 holes in the skins.
Anyway, here is one side of one wing skin with the vinyl removed. The new soldering iron worked much better, but it was not perfect:
Next is another important pic. When you remove the skins, you realize just how much material was removed during the match drilling exercise. The silver speckles are the chips of aluminum. These all need to be removed.
And then I took this pic of my makeshift movie night movie screen. It was such a nice weekend after having been such horrible weather around here for the past several weeks that I just felt compelled to get out the king size bed sheet and use some of my clamps for something other than mashing metal parts together. I rig a projector on the opposite end of the garage and connect that to my laptop to show some movies every once in a while. Works pretty well. My seating capacity in the garage is a bit reduced with both wings on the stands, but it still holds a few folks.
Next are some pics I promised a while back. Thanks to John Tedder and Lyn Langer whose RV-7As are well on their way to becoming real flying machines. I am really interested in Lyn's aircraft because he has a 180 HP IO-360 from Superior with their extremely popular Millineum Cylinders. I just noticed on their website that they have come out with a 195 and 200 HP version that I can build myself by attending their 2 week class. I took a ton of pics but will include a few of them here.
Here is Lyn's engine:
And the rest of the aircraft. I can't wait until mine is looking like this someday:
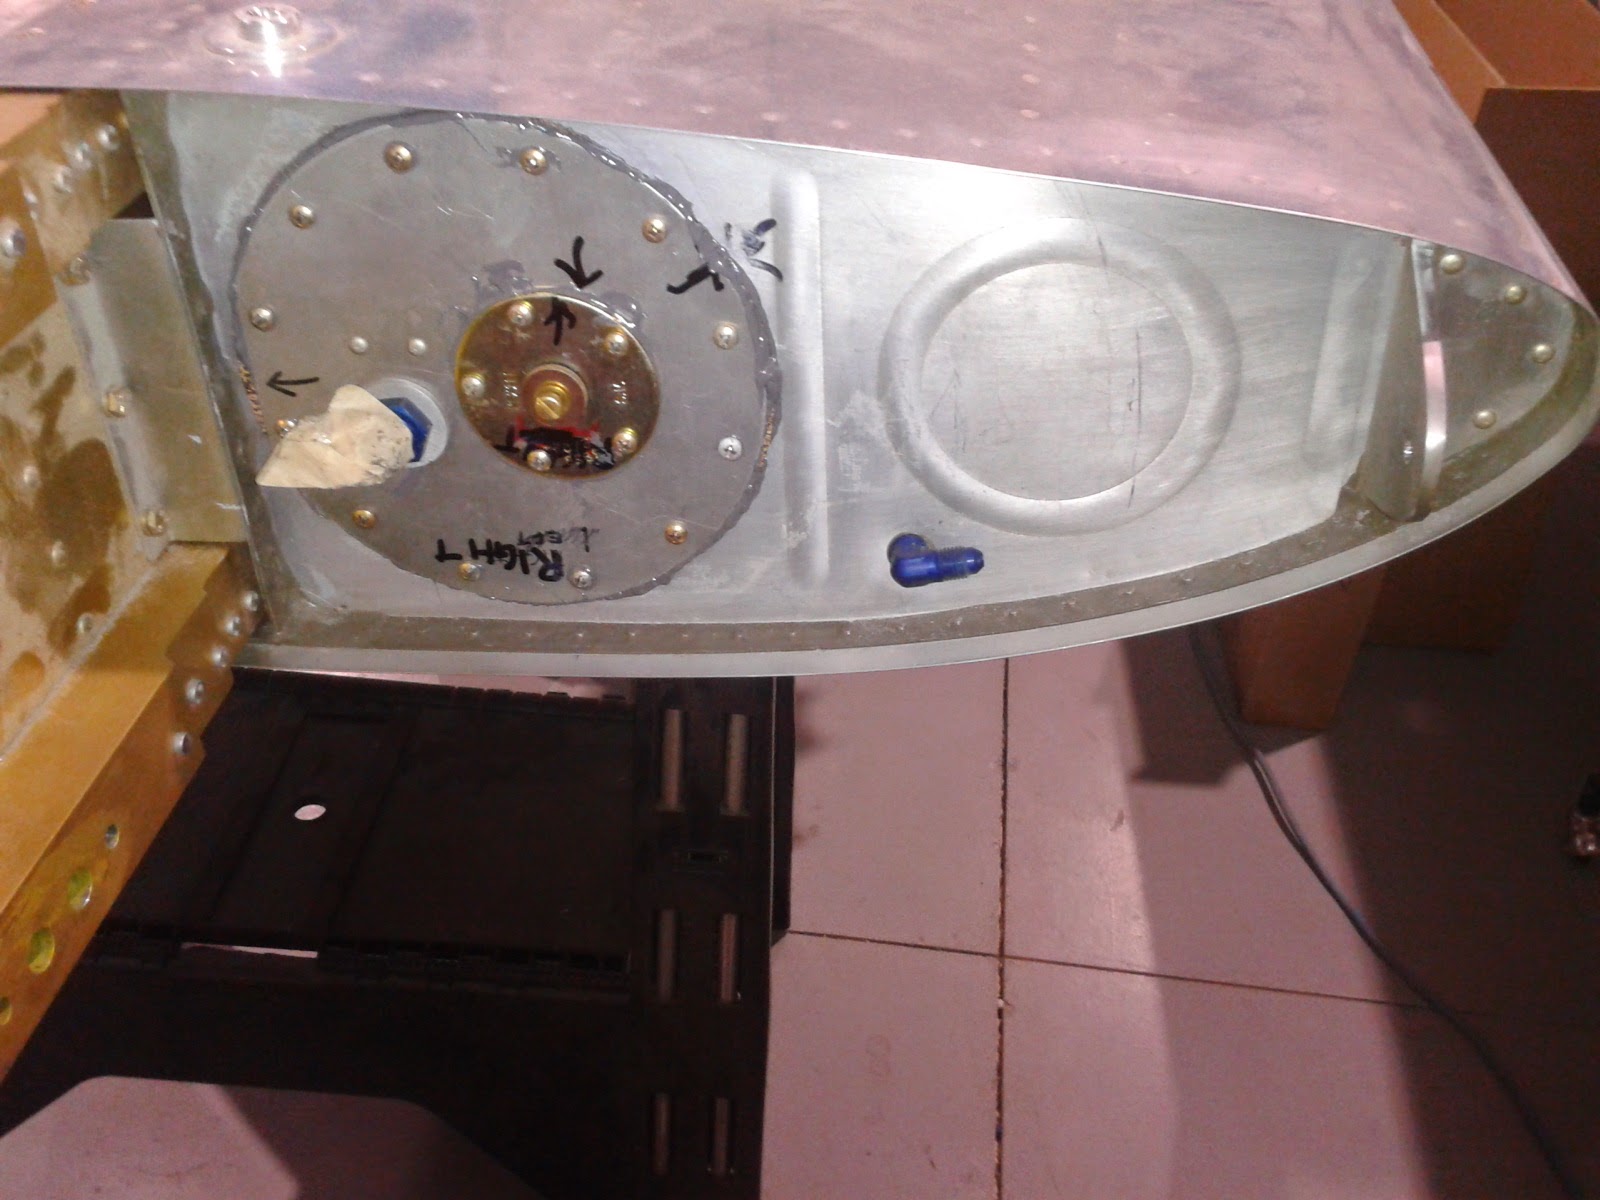
John had his wings off while he works on his avionics. I checked out his wing wiring, fuel tanks, and landing light installation....
NOthing beats seeing things assembled up close. If you get these opportunities you need to take tons of pics because they will help later. I captured most of Lyn's fuel system routing from the firewall to the fuel servo to the injector manifold and out to the cylinders. Perhaps I'll post some of those pics later on.
All for now. I hope to have all wing skin and rib holes deburred by the end of this week.
Anyway, here is one side of one wing skin with the vinyl removed. The new soldering iron worked much better, but it was not perfect:
Next is another important pic. When you remove the skins, you realize just how much material was removed during the match drilling exercise. The silver speckles are the chips of aluminum. These all need to be removed.
And then I took this pic of my makeshift movie night movie screen. It was such a nice weekend after having been such horrible weather around here for the past several weeks that I just felt compelled to get out the king size bed sheet and use some of my clamps for something other than mashing metal parts together. I rig a projector on the opposite end of the garage and connect that to my laptop to show some movies every once in a while. Works pretty well. My seating capacity in the garage is a bit reduced with both wings on the stands, but it still holds a few folks.
Next are some pics I promised a while back. Thanks to John Tedder and Lyn Langer whose RV-7As are well on their way to becoming real flying machines. I am really interested in Lyn's aircraft because he has a 180 HP IO-360 from Superior with their extremely popular Millineum Cylinders. I just noticed on their website that they have come out with a 195 and 200 HP version that I can build myself by attending their 2 week class. I took a ton of pics but will include a few of them here.
Here is Lyn's engine:
And the rest of the aircraft. I can't wait until mine is looking like this someday:
John had his wings off while he works on his avionics. I checked out his wing wiring, fuel tanks, and landing light installation....
NOthing beats seeing things assembled up close. If you get these opportunities you need to take tons of pics because they will help later. I captured most of Lyn's fuel system routing from the firewall to the fuel servo to the injector manifold and out to the cylinders. Perhaps I'll post some of those pics later on.
All for now. I hope to have all wing skin and rib holes deburred by the end of this week.
Subscribe to:
Posts (Atom)