I also turned down the air pressure on the gun to about 30 psi, compared to the 45 psi I was using last night. This seemed to help prevent the orange peel problem I had last night. Just have to keep trying different things until you get the right combination of paint flow, air pressure, distance of the gun from the part, and speed of each pass of the gun.
This pic shows the gun all ready to go. Note the run on the easel paper that I used for testing. I did this on purpose to determine how long it would take to deliver too much paint in one spot before the run would occur. Short answer is "not very long."
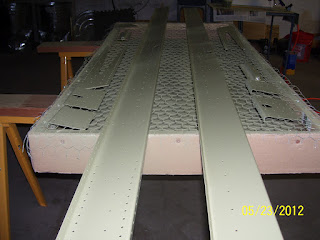
Both rear spars, the doublers, and the support brackets are all primed!
I really do like this gravity fed HVLP (High Volume, Low Pressure) spray gun. Just wish I had a smaller one for little parts. The touch up gun I used for the empennage parts is not an HVLP, and is not gravity fed either, and I had trouble getting enough primer to flow through that gun, even after opening the paint flow knob all the way. All of the knobs on the HVLP gun work as advertised. HVLP is supposed to do a better job of applying the paint, with less bounce back, less waste and overspray, and better coverage. As far as I am concerned, that is exactly what it does.
I am fairly pleased with the parts I primed tonight. They turned out better than the ones from yesterday. Anyway, time to slam some rivets. I just have to be careful about the rivet call outs and not to put rivets in holes that need to wait for other assemblies to be added later on.


No comments:
Post a Comment