The sequence of events over the past week was basically:
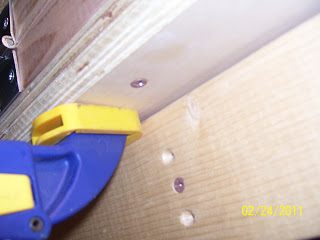
1. Secured the bending brake to the work bench by screwing it down onto te bench from underneath. The clamps are simply holding one of my flat boards on top of the brake after I had screwed it down on the bench So that I had a place to set the rudder to keep it flat. Don't be confused by this pic - the clamps have nothing to do with the bending brake, since it has already been screwed down from underneath, as the next pic shows.
4. Had to fabricate a bunch of parts out of stock aluminum sheet per the plans- namely the two metal attach strips for the bottom fiberglass fairing of the rudder, a spacer or shim for the steering support assembly that attaches to the bottom of the front spar, and the support bracket that basically acts like a truss to strengthen the forward spar and the bottom rib where all the rudder cables will be attached. This area needs additional support, so it is beefed up quite a bit to handle the forces and loads that will be experienced when applying the push/pull action of the rudder pedals. This will happen mostly during takeoff, landing, and during ground handling maneuvers like taxiing, etc.
4. I chose to Duct Tape edges of the rudder to prevent them from moving freely. I also added a 2x4 to the forward section of the rudder to help support it, since the back part is the only part of the rudder skin that is being supported after inserting it into the short 2x8 space of the bending brake. Another block was added next to the break to support the top part of the rudder skin, which is at an angle to the rest of the rudder while inserted into the bending brake.
5. The only thing in question at this point was if I was going to flip the rudder to complete the bend, which is what Steve did to his. Bob told me that they did not flip the rudder when they did his. So, command decision time - we would bend it and check everything after about half way there, and make the decision to flip it or not at that time. After the preliminary bend check, I decided that everything looked fine as is, and so I finished the bend without flipping the rudder over.
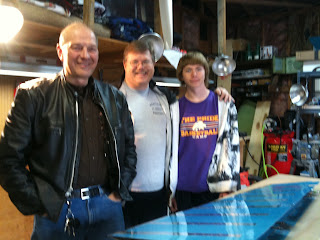
Long story short, I butted the traling edge of the rudder up against the hinges just as both Steve and Bob had done with theirs, I taped down the edges to kepp them from moving freely, supported the forward section of the skin so it would not influence the rudder TE to move out of position, and then we did the deed. Slow equal pressure was applied, with me on one side and Bob on the other side of the brake. We went a bit more than half way before we stopped. The entire edge appeared to have "moved" out from the hinge line about an eight of an inch or so, but we reasoned that this was simply due to the act of the forcing the metal to bend over, and decided that this was not hurting anything. So we got back on the brake and continued for the last couple of inches.
A word to those that are going to try this for the first time just I have - The first part of the bend goes pretty easily, but the last part of the bend does take considerable pressure to finish up those last couple of inches. As you can tell from past pics of myself, I am NOT what you would consider to be a "light" or small person. I had to basically put both forearms on the brake, and was also leaning over the top of it to finish the bend. I also felt the point where the stiffeners were just starting to bottom out, and the skin would not move any further. Time to stop bending at that point!
End result was that we may have over bent the rudder just a smidge, but the edge came out quite crisp and very straight. Bob even told me that it was better than his turned out, which made me feel pretty good. I could not wait to finish prepping the top and bottom ribs, and I just had to cleco everything together so that I could apply the straight edge and get an idea for how everything came out. Did I have a bulging TE? Did I bend everything too far? Was the entire TE straight? So much anticipation! Well, I am happy to report that everything seems to have worked out wonderfully.
Radius of the final bend appears to be about the same as Steve's - about 1/8 inch or so.
The only thing I noticed was that the TE where the top and bottom ribs attach to the skin seem to cause the TE of the rudder to bulge just a bit. This is a result of the angle of the ribs not quite matching the angle of the skin. the ribs seem to be just a bit fatter at the rib TEs than they should be. I know this because the rest of the skin between the two ribs came out flat as can be. I think that when I finish prepping the ribs and front spar, and straighten all the flanges, that the bulge will be barely noticeable. On to the next steps! Thanks again to Bob and Mary for the assitance.


Bryan--Rudder LOOKIN GOOD!
ReplyDelete