Next is the rudder skin. I debated about setting up the rest of the attach areas for the spars and ribs, but those holes are not drilled, deburred, or dimpled yet, and to top it off I am getting very ancy to perform the trailing edge bend so that I can get to the final assembly on this beast adn move on to the elevators. DOn't get me wrong, I do not want to rush this most important part of the airplane either. Since I am still favoring building a tail dragger for maximum coolness affect, I will be using the rudder quite a bit more for controllability of the airplane. So getting this part of the build correct is rather important. Heck, it's all important in the end.
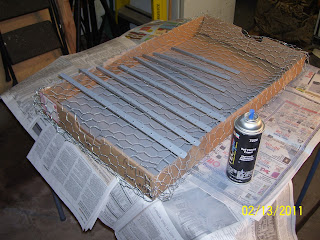
Next is a good pic of the primed stiffeners for the left and right side of the rudder, along with several spar and rib pieces in the background, and the two back rivet plate steel pieces for back riveting. Then there is the special back rivet set in the center.
And closer shot of the back rivet set and the two back rivet plates. They sent me the shorter one in the tool kit when I first started out, but I bought the longer one after reading other builder's horror stories about how the skin slid off the end of the back rivet plate and dented everything up, requiring full replacement parts. Not something I wanted to experience, so I bought the longer plate. The Scotch tape in the middle is part number 811. This is a special back riveting tape that they say to use because it is removable. I have my doubts about that after it has been pounded and compressed by the back rivet plate as I back rivet the stiffeners to the rudder, but we'll see I guess.
This next shot shows the back rivet tape applied over the rivet line after the AN426AD3-3.5 standard flush rivets are inserted in each hole. This was actually rather enjoyable - much moreso than cleaning and priming. The only challenge was that you need to line up the tape so that the rivets are on the center line as you apply it, because if you mess it up and need to remove the tape, the whole line of rivets comes back out already stuck to the tape, and you have to start over.
As soon as I decide on my method for the back rivet plate location - work bench or concrete floor - I will be able to show a pic of how this all works. Maybe even a video. Basically the rivets are taped in place as shown below, then the outside skin is placed on the back rivet plate so that the rivet line is centered on the plate as much as possible. Then the stiffener holes are inserted onto the protruding rivets on the inside, and then you take the rivet gun and the special back rivet set and pound on the rivet from the shop head side instead of the manufactured head side of the rivet.
As soon as I decide on my method for the back rivet plate location - work bench or concrete floor - I will be able to show a pic of how this all works. Maybe even a video. Basically the rivets are taped in place as shown below, then the outside skin is placed on the back rivet plate so that the rivet line is centered on the plate as much as possible. Then the stiffener holes are inserted onto the protruding rivets on the inside, and then you take the rivet gun and the special back rivet set and pound on the rivet from the shop head side instead of the manufactured head side of the rivet.
Rivets sticking up on the inside after taping them in place on the outside of the skin. Note the comics section I used for masking some of the bottom exposed skin of the rudder that I am not quite ready to commit to primer just yet. Ya gotta have a little fun when you do this stuff, so the comics page seemed to be appropriate for that I guess. :)
And one last shot of the rivets taped in place, all nice and flush sitting in the dimples, just waiting to get pounded! Although I performed the back riveting during the last Sport Air sheet metal class I attended, I remember having some problems with it adn the shop heads not coming out as well as I wanted them to for some reason. So, I will be back riveting several test pieces to get the feel for the gun pressure setting, timing, and end result that I want, before I start doing this on the real part.


No comments:
Post a Comment