
April 4 is Easter Sunday - and - as it turns out, a beautiful day in Colorado to catch up on some priming. Since I have resolved some earlier problems with applying my primer by getting a new air hose and ensuring that the mixture of primer and reducer is at the correct viscosity, I am now able to finish priming the rest of the HS parts. The trick for me is that I needed to get the primer mixed thoroughly, and then you add the reducer/catalyst, strain it into the paint cup, and then spend a couple of minutes mixing the parts together and checking the viscosity. It needs to run off the end of the stir stick without having any solids on the stick.
I bought a pneumatic paint shaker from Harbor Freight yesterday, and it seems to work fairly well. It comes with an oiler unit as part of the valve assembly, and this is the first time I have worked with an oiler. You fill it up with air tool oil, and it periodically sprays a small amount of oil into the shaker assembly to keep it lubricated.
I also bought a pressure regulator for the paint gun. That seems to be working as expected as well. It gives me the ability to keep the regulator pressure for the air compressor set to 90psi for most of the other air tools, and set the precise pressure of the gun to the recommended 50psi, without having to adjust the regulator at the compressor all the time. Pics of both will follow in later posts. I was busy trying to finish priming all of my HS parts today, and I almost got there....
Sunday, April 4, 2010

Tuesday, March 30, 2010
More Priming preparation
Some additional photos that show my painting preparation and equipment.

 A frontal view looking into the garage. Its best to enlarge this photo to see a bit more detail. Just click on it, or any other photo, to do so. This shows almost the entire strand of hanging wire. The parts you see are avouple of the ribs and one of the rear spars of the HS.

This is a pic of a poor man's funnel trick that I learned a long time ago. I tried using the plastic pour spouts from HD on the quart-sized can, but it just would niot stay attached. The last thing I need is a bunch of acid etching primer flying into my face and eyes because I used the wrong tool for the wrong job. SO, I used masking tape, and overlap it into a square just a bit larger than the circumference of the can, and trim it to size and to a point on the front. Then I take a another piece of tape, and pull the front of the tape together, to make a spout. The rest involves making it wide enough to accept the amount of primer you will pour out. Once it's done, it works very well. Keeps the top of the can clean and provide a workable pouring spout that won't leave a mess.

This is a shot of various must-haves for priming and painting. They consist of:

These are the brand of micro fiber towels I use. These are great for wiping things down with Acetone or for any other application where you need a non-abrasive cloth or rag.

A Halogen light I ahve had for many years. One thing about painting - you never have enough lighting. I am in the middle of working a solution to that very problem by getting more light focused on the parts on the hanging wire. It is very difficult to see the coverage of a gray primer applied with a spray gun on a small metal part in a poorly lit garage. The problem with these lights is that they get extremely hot, and are prone to the safety glass imploding or the bulb exploding if you drop it or bump it ever so slightly.

Not a very good pic, but these are more safety items that I use. I have three different sets of safety glasses, one for general impact, one for fluid protection, and chemical-absorbing respirator. Last but not least are the rubber gloves - lots of them.

This shows part of a length of aluminum wire in black shielding that I removed when I was getting my shop in order for the build. I decided to remove the aluminum wire and replace it with the correct copper wire, but I decided to keep the strands of old wire instead of throw them out. Good thing I did, because I am now able to tie it off across the garage to serve as a hanging wire for all the parts that I need to primre or paint. I use 14 gauge grounding wire which fits nicely through the rivet holes of the parts, and hang the other end on the aluminum wire strand as shown.

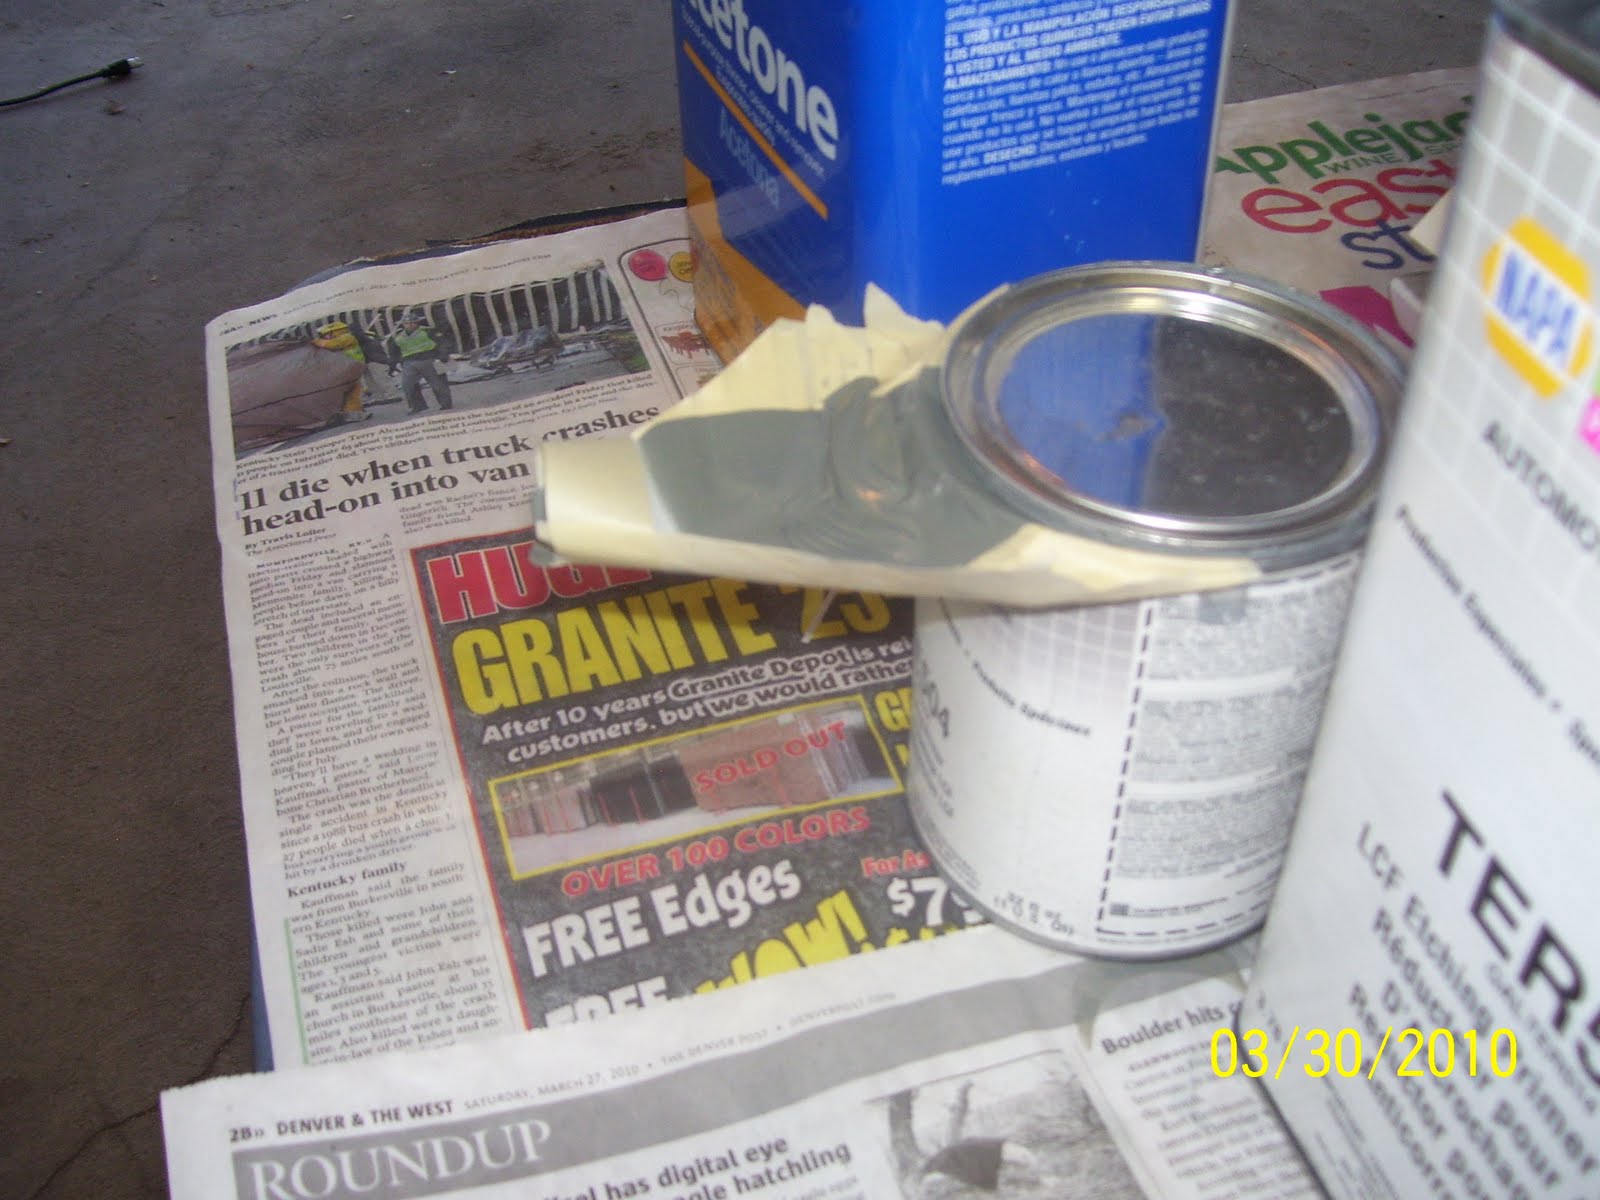
This is a pic of a poor man's funnel trick that I learned a long time ago. I tried using the plastic pour spouts from HD on the quart-sized can, but it just would niot stay attached. The last thing I need is a bunch of acid etching primer flying into my face and eyes because I used the wrong tool for the wrong job. SO, I used masking tape, and overlap it into a square just a bit larger than the circumference of the can, and trim it to size and to a point on the front. Then I take a another piece of tape, and pull the front of the tape together, to make a spout. The rest involves making it wide enough to accept the amount of primer you will pour out. Once it's done, it works very well. Keeps the top of the can clean and provide a workable pouring spout that won't leave a mess.

This is a shot of various must-haves for priming and painting. They consist of:
A card table
a Post It Note Easil with a built in stand
Newspaper - lots of that!
and a large supply of wash cloth-sized micro fiber towels.
Medium sized paper funnel strrainers
You can see the test spray pattern I made on the easel while setting up the gun. It serves as a great test platform, and you can spray a page, rip it offthe easel, and have a new clean page to work with very quickly while you adjust your spray gun settings. Its about $30.00, so it's not cheap, but still highly necessary in my opinion.

These are the brand of micro fiber towels I use. These are great for wiping things down with Acetone or for any other application where you need a non-abrasive cloth or rag.

A Halogen light I ahve had for many years. One thing about painting - you never have enough lighting. I am in the middle of working a solution to that very problem by getting more light focused on the parts on the hanging wire. It is very difficult to see the coverage of a gray primer applied with a spray gun on a small metal part in a poorly lit garage. The problem with these lights is that they get extremely hot, and are prone to the safety glass imploding or the bulb exploding if you drop it or bump it ever so slightly.

Not a very good pic, but these are more safety items that I use. I have three different sets of safety glasses, one for general impact, one for fluid protection, and chemical-absorbing respirator. Last but not least are the rubber gloves - lots of them.
This is quite a bit of stuff, but it makes the paint preparation and application go so much smoother. I find that I can set everything up in a matter of about 5 minutes, and tear it all down when I'm finished so I can put the cars back in the garage for the night.
Priming
Once everthing is deburred and cleaned, now comes the priming. I have put together a series a photos to describe the preparation and priming process that I am using for my airplane. One thing that you realize when you start this seemingly monstrous project is that the preparation is what takes up about 95% of your time. Setting up to paint and prime involves many steps, but once you repeat them a couple of times it becomes a routine. In fact, each time I go out to the garage to work on the plane I go through what has now become a bit of a ritual to turn on the lights, move things out of the way, setup my work bench, position the parts and materials, and so on. Priming also has its own relatively large set of steps, but, as with everything else, they are repeatable and routine after a while.
First comes the prep. I am doing all of this in my 2 car garage, using a small touch up spray gun from Harbor Freight, my compressor, and a self etching primer solution from NAPA/Martin Senour paints, part numbers TE504 (primer) and TER 514 (Reducer/Catalyst). This is the spray gun. It holds 7 ounces in the cup.


 Now on to the materials. I use the acetone for cleaning (Home Depot) and the TE 504 and TER 514 self-etching primer and reducer shown at center and the right of this photo.
First comes the prep. I am doing all of this in my 2 car garage, using a small touch up spray gun from Harbor Freight, my compressor, and a self etching primer solution from NAPA/Martin Senour paints, part numbers TE504 (primer) and TER 514 (Reducer/Catalyst). This is the spray gun. It holds 7 ounces in the cup.


Here is the compressor and the 3/8 inch pvc/rubber combination hose. I use brass fittings and make certain the the gun, the line, and the compressor are not leaking, as this can make the difference between a nice paint job and a botched one.

This was the old hose that I was using. After having some problems with applying the primer, inspection of the hose revealed numerous cracks and general decay of the hose. Time for a new one, so I bought the lime green one you see above to elimate this as a source of the problem.
 Now on to the materials. I use the acetone for cleaning (Home Depot) and the TE 504 and TER 514 self-etching primer and reducer shown at center and the right of this photo.
Cleaning
Cleaning involves picking the chemicals of your choosing to remove all the oil and grime from the parts. I started out thinking that I could clean with the Boeing Spec degreaser called Simple Green, but was advised not to do this for bare aluminum, even of the formula is specified as non-corrosive. Then you get into all sorts of possible solutions, ranging from dawn dishwashing detergent to MEK and Lacquer thinner. The whole point is that you need to remove the contamination that will prevent any anti-corrosion treatments or primers from adhering to the metal properly. I used microfiber cloth and Acetone - seems to work rather well, but still requires some elbow grease to get everthing properly cleaned.
Edge deburring, Cleaning and priming
Next was the process of edge deburring, cleaning, and priming all of the parts, so they could finally be riveted into place. A tool that ordered contains a special V notch cutter, which is supposed to debur both sides of an edge at one time. I found this tool to be almost useless, because all it seemed to do is mess up the alclad layer and make it more rough than it was before. So I opted for some elbow grease and some 320 aluminum oxide sand paper I got from NAPA autom parts. You want to use the aluminum oxide and not the other more common sand paper you find in your home project stores, because the silicon they use in the general purpose sand papers can promote corrosion on aluminum surfaces under certain circumstances. It took a while to get all the edges the way I wanted them, but its done.
Problems with HS forward spar and support angles

The first in a series of recent challenges has been the proper fitting of the HS forward spar flange to the support angle brackets on the top and bottom of the spar. A long while ago I had to countersink 4 holes in the brackets, and dimple the spar flange. As you can see from the photo, there is a slight bulge in the spar flange where it is supposed to sit flush against the angle. At first glance it looks flush, but the dimple is too wide for the countersunk hole, so it bows out a bit.
So I had to drill out the countersunk hole a bit more to resolve the issue. We'll see what happens when I rivet everytrhing together, but I think it will be OK now. This is important because you lose strength in the overall assembly if parts do not properly mate together when they are riveted. If left unresolved, these are areas where fatigue can start, cracks can form, or worse. SO its worth it to fix it now instead of wishing I did later.
....and the build continues.......
Another 2 months gone by. Waiting for warmer weather. oThe problem with Spring time in Colorado is that sometimes you get REALLY warmer weather (I think we broke an 1879 record for high gtemp today - got up to 82 degrees), but the wind usually accompanies the warmer temps. Some one told me once, if you keep waiting for everything to be perfect, then you will never go flying! The "work" done over the past 2 months consisted of edge deburring and cleaning all of the HS parts - ribs, spars, and skins. I chose Acetone as my drug of choice (haha) to do the cleaning, since I had first hand experience with this medium when I use it to clean everything from rust to corrosion to dirt, fuel, oil, and grease off of my RC aircraft engines. I am also acutely aware of how caustic this stuff is. I did not really appreciate how much, though, until I started repeatedly dabbing a microfiber cloth with it, and wiping down all the HS parts. Trust me, use a respirator with this stuff, no matter how little or how much cleaning you may do.
That said, I've got some new pics, and I even started priming everything, so how about some new stuff on the blog for a change?!
That said, I've got some new pics, and I even started priming everything, so how about some new stuff on the blog for a change?!
Subscribe to:
Posts (Atom)