Some additional photos that show my painting preparation and equipment.

 A frontal view looking into the garage. Its best to enlarge this photo to see a bit more detail. Just click on it, or any other photo, to do so. This shows almost the entire strand of hanging wire. The parts you see are avouple of the ribs and one of the rear spars of the HS.

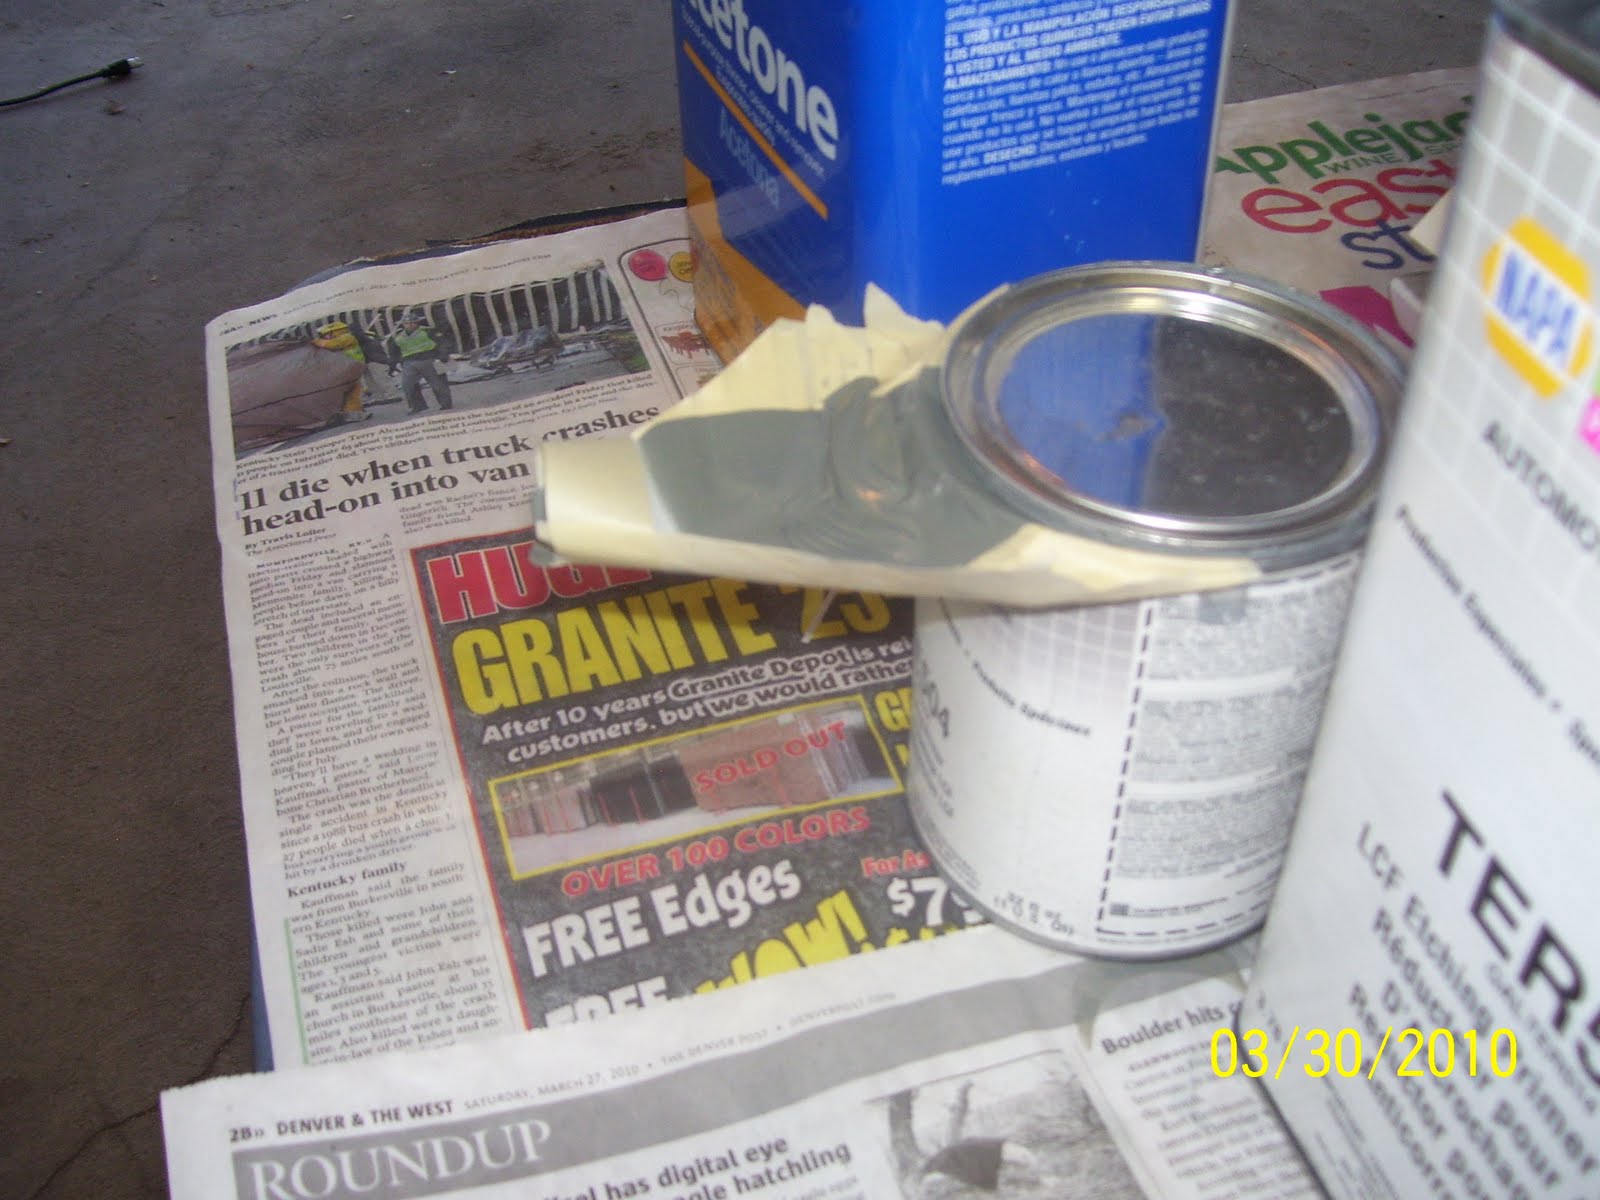
This is a pic of a poor man's funnel trick that I learned a long time ago. I tried using the plastic pour spouts from HD on the quart-sized can, but it just would niot stay attached. The last thing I need is a bunch of acid etching primer flying into my face and eyes because I used the wrong tool for the wrong job. SO, I used masking tape, and overlap it into a square just a bit larger than the circumference of the can, and trim it to size and to a point on the front. Then I take a another piece of tape, and pull the front of the tape together, to make a spout. The rest involves making it wide enough to accept the amount of primer you will pour out. Once it's done, it works very well. Keeps the top of the can clean and provide a workable pouring spout that won't leave a mess.

This is a shot of various must-haves for priming and painting. They consist of:

These are the brand of micro fiber towels I use. These are great for wiping things down with Acetone or for any other application where you need a non-abrasive cloth or rag.

A Halogen light I ahve had for many years. One thing about painting - you never have enough lighting. I am in the middle of working a solution to that very problem by getting more light focused on the parts on the hanging wire. It is very difficult to see the coverage of a gray primer applied with a spray gun on a small metal part in a poorly lit garage. The problem with these lights is that they get extremely hot, and are prone to the safety glass imploding or the bulb exploding if you drop it or bump it ever so slightly.

Not a very good pic, but these are more safety items that I use. I have three different sets of safety glasses, one for general impact, one for fluid protection, and chemical-absorbing respirator. Last but not least are the rubber gloves - lots of them.

This shows part of a length of aluminum wire in black shielding that I removed when I was getting my shop in order for the build. I decided to remove the aluminum wire and replace it with the correct copper wire, but I decided to keep the strands of old wire instead of throw them out. Good thing I did, because I am now able to tie it off across the garage to serve as a hanging wire for all the parts that I need to primre or paint. I use 14 gauge grounding wire which fits nicely through the rivet holes of the parts, and hang the other end on the aluminum wire strand as shown.

This is a pic of a poor man's funnel trick that I learned a long time ago. I tried using the plastic pour spouts from HD on the quart-sized can, but it just would niot stay attached. The last thing I need is a bunch of acid etching primer flying into my face and eyes because I used the wrong tool for the wrong job. SO, I used masking tape, and overlap it into a square just a bit larger than the circumference of the can, and trim it to size and to a point on the front. Then I take a another piece of tape, and pull the front of the tape together, to make a spout. The rest involves making it wide enough to accept the amount of primer you will pour out. Once it's done, it works very well. Keeps the top of the can clean and provide a workable pouring spout that won't leave a mess.

This is a shot of various must-haves for priming and painting. They consist of:
A card table
a Post It Note Easil with a built in stand
Newspaper - lots of that!
and a large supply of wash cloth-sized micro fiber towels.
Medium sized paper funnel strrainers
You can see the test spray pattern I made on the easel while setting up the gun. It serves as a great test platform, and you can spray a page, rip it offthe easel, and have a new clean page to work with very quickly while you adjust your spray gun settings. Its about $30.00, so it's not cheap, but still highly necessary in my opinion.

These are the brand of micro fiber towels I use. These are great for wiping things down with Acetone or for any other application where you need a non-abrasive cloth or rag.

A Halogen light I ahve had for many years. One thing about painting - you never have enough lighting. I am in the middle of working a solution to that very problem by getting more light focused on the parts on the hanging wire. It is very difficult to see the coverage of a gray primer applied with a spray gun on a small metal part in a poorly lit garage. The problem with these lights is that they get extremely hot, and are prone to the safety glass imploding or the bulb exploding if you drop it or bump it ever so slightly.

Not a very good pic, but these are more safety items that I use. I have three different sets of safety glasses, one for general impact, one for fluid protection, and chemical-absorbing respirator. Last but not least are the rubber gloves - lots of them.
This is quite a bit of stuff, but it makes the paint preparation and application go so much smoother. I find that I can set everything up in a matter of about 5 minutes, and tear it all down when I'm finished so I can put the cars back in the garage for the night.
No comments:
Post a Comment