I literally had to trial fit each stand, measure the distance between them, and check the wobble of each one and then figure out the best method of shimming each one up to remove the wobble. That process really sucked, but I managed to get it done. The only thing I was concerned about was ensuring that the 114 inches of space between the inside edges of both stands for each wing was retained. I quickly found that without the shims in place that each stand was leaning inward bit, so I was losing my 114 inch distance the higher up the stand that I measured. Anyway, I cut out several pieces of metal for 3 out of the 4 stands. One of them did not need much shimming at all, so that was good. Only problem was that it still required shimming on one side only, but the 1/8 inch shims were too thick for what I needed. I ended up using a piece of .032 aluminum from my trim bundle that I had used as a test piece for the 2 part epoxy primer I started using on the wings a long time ago. This seemed to do the trick.
Anyway, it all started with determining general placement of the stands. This involved clearing the refrigerator and freezer door travel, and, most importantly, allowing enough room for getting both cars in the garage with both wings on both stands. After this general placement was figured out, I snapped some straight lines with a chalk line, as shown below:

The stands in front of my work benches were the most challenging, because there is a separation or relief line where additional sections of garage floor were added by the previous owners of this house when they decided to make the garage larger than originally designed. I am glad that they decided to make the garage a bit larger, but I just wish that they would have re-poured the entire floor after they did it. As it is, the position of the wing stands straddles both sides of this stress relief line, so I am mounting one of the stands on two separate pieces of concrete. What a pain, not to mention a shimming nightmare.
Here is shot of the line I am talking about. The stands pretty much needed to go in this position because I needed enough room in front of the work bench to allow for working on ailerons and flaps and other work, and at the same time I had to position them so I could still get the cars in the garage. So that is why they ended up where they did. The best position for allowing other work on the benches and gettting the cars int he garage turns out to be about the worst position one might choose to mount something like this. Oh, well, par for the course for me I guess. Nothing is easy.

After the positioning and the chalk line, I used a sharpee with a thick tip to draw the outline or at least the critical lines for marking the position of each stand so that it would meet the 114 inch spacing per the plans.
Here are some tools of the trade used for the above tasks. I used the square to draw the sharpee lines so that they were exactly perpendicular to the snap line.

And here is the line for the stands along the right side of the garage. Yes, with this setup, I can still get both cars in the garage.

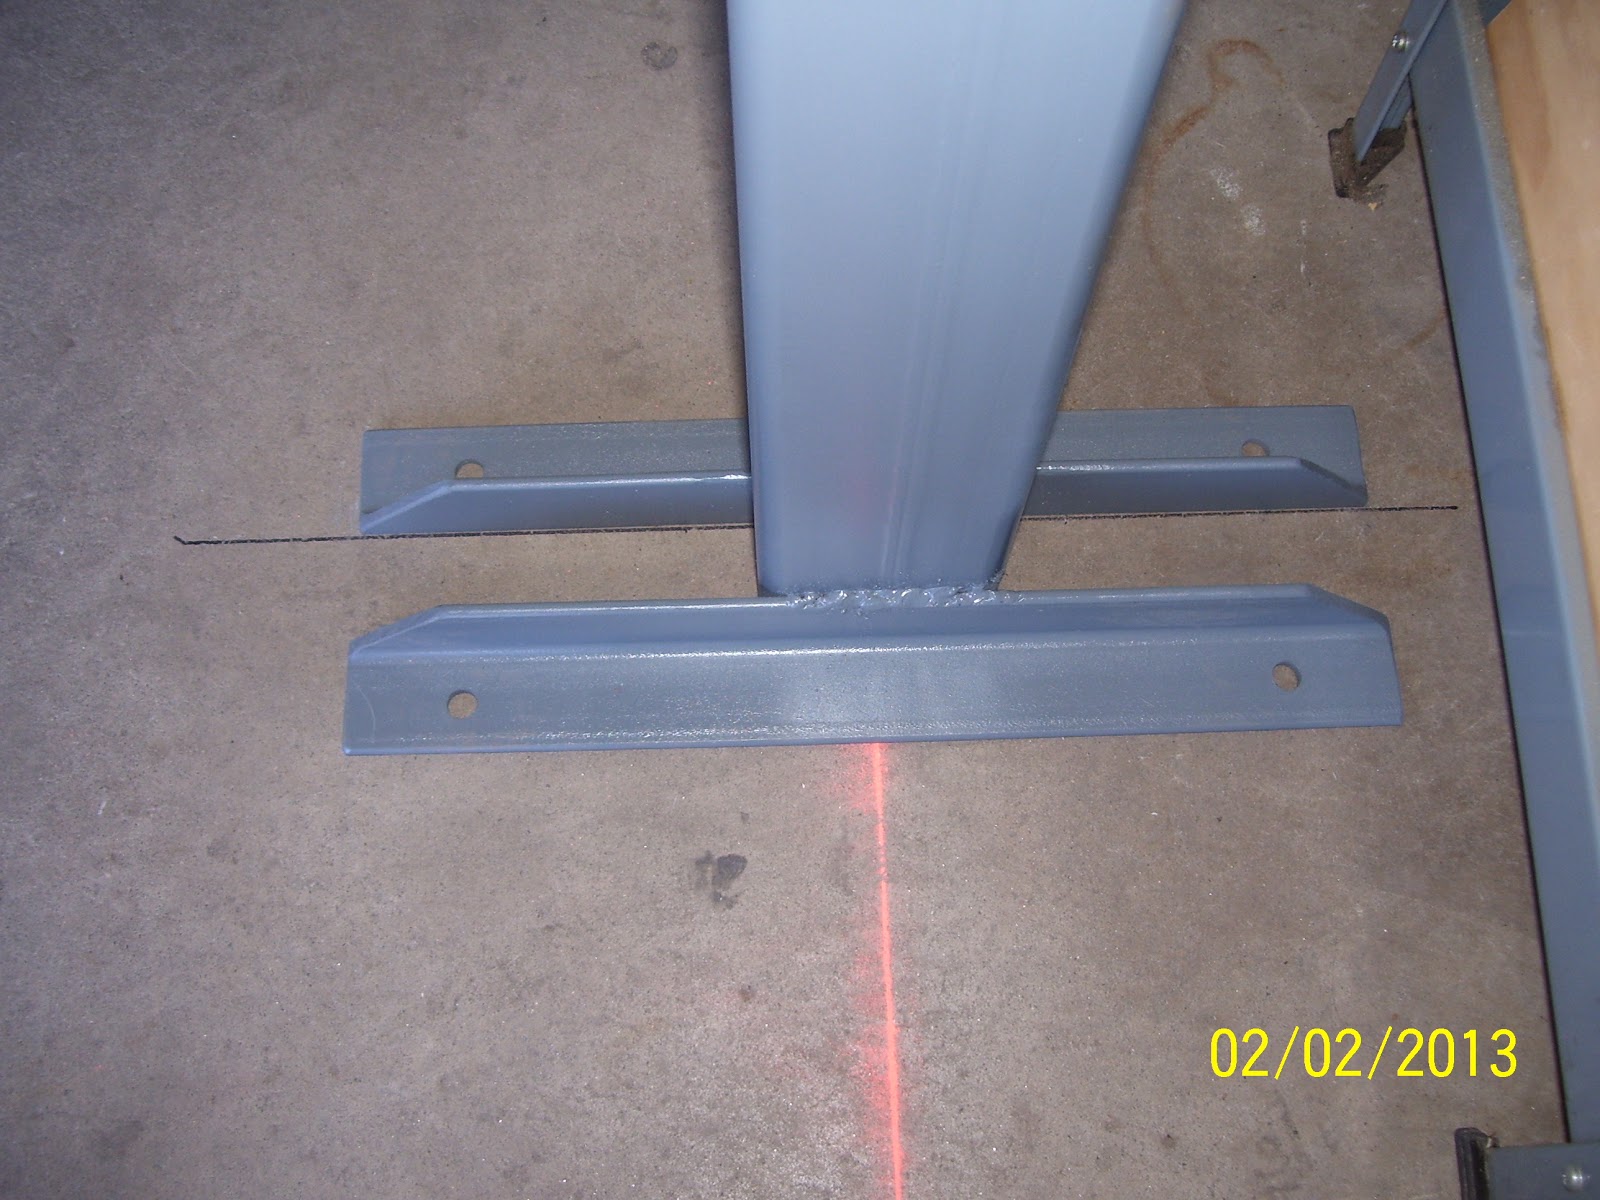
And here is just one example of the wacked out shimming job I had to perform. Note that the only thing I was concerned about was stability of the stands after being bolted to the floor so that they would maintain the 114 inch distance between the posts. I was much less concerned about the "level" attitude of the stands along the other plane, since the shelf assembly will be adjustable for level, so I can offset any leaning of the posts by adjusting the screw bolt so that the shelf will be level. At its worst the posts are about 1/4 inch to 3/8 inch off level, and I think the threaded rod will take care of that with no problem. Had I decided I wanted the posts perfectly level in all planes of existance I would certainly not be here writing about the experience now, because I would still be out in the garage trying to get everything perfectly level. Sometimes you just have to settle for less.

The above pic shows the anchors installed and the nuts torqued down to spec. The process I used to drill the holes was to use a rotary hammer drill with a six inch long 3/8 inch cobalt bit that I rented from HD. I drilled the holes with the stands in place, thanks to my trusty son Adam who held them in place while I drilled the holes. This was largely a non event, and I was quite surprised at how easily the drill cut through the concrete. Only problem is that for some reason one out of the 16 holes I had to drill either did not get cleaned out properly, or the concrete failed underneath, or the bolt anchor got messed up, or something, but it would not seat in the hole and would not grab the concrete. SO as a result I have one anchor that is unable to secure anything on one of the stands, so I will ahve to rely on the three good bolt anchors to keep that stand in place.
After all the bolts were torqued down, I check each stand for security, and I am not concerned at all about any of them ever moving so much as a muscle. They are all solidly mounted to the floor. Now I just have to drill the holes for the shelf hardware, threaded rods, and bottom trailing edge supports, adn cut the 1 1/4 inch angles to size and drill some more holes in those. As the saying goes, 90% done and 90% left to go.....
Here is the drill I used and the air tool I used to clean out each hole after it was drilled.


Many thanks to son Adam for his assistance today. While I am discouraged by the amount of time and effort I have had to expend on just meer fixtures, I am pleased that things finally look like they will be in place to allow me to meet or exceed my goal of getting both the wings about 95% done by the time Oshkosh 2013 rolls around.
No comments:
Post a Comment