I haven't been posting much lately cuz I have been busy working on the plane, (and the fence, and the new dog, etc., etc. More on the dog in a moment. I got past the dimple screw up on the elvator skin and moved on. Here is the right elevator skin dimpled and scuffed for primer:
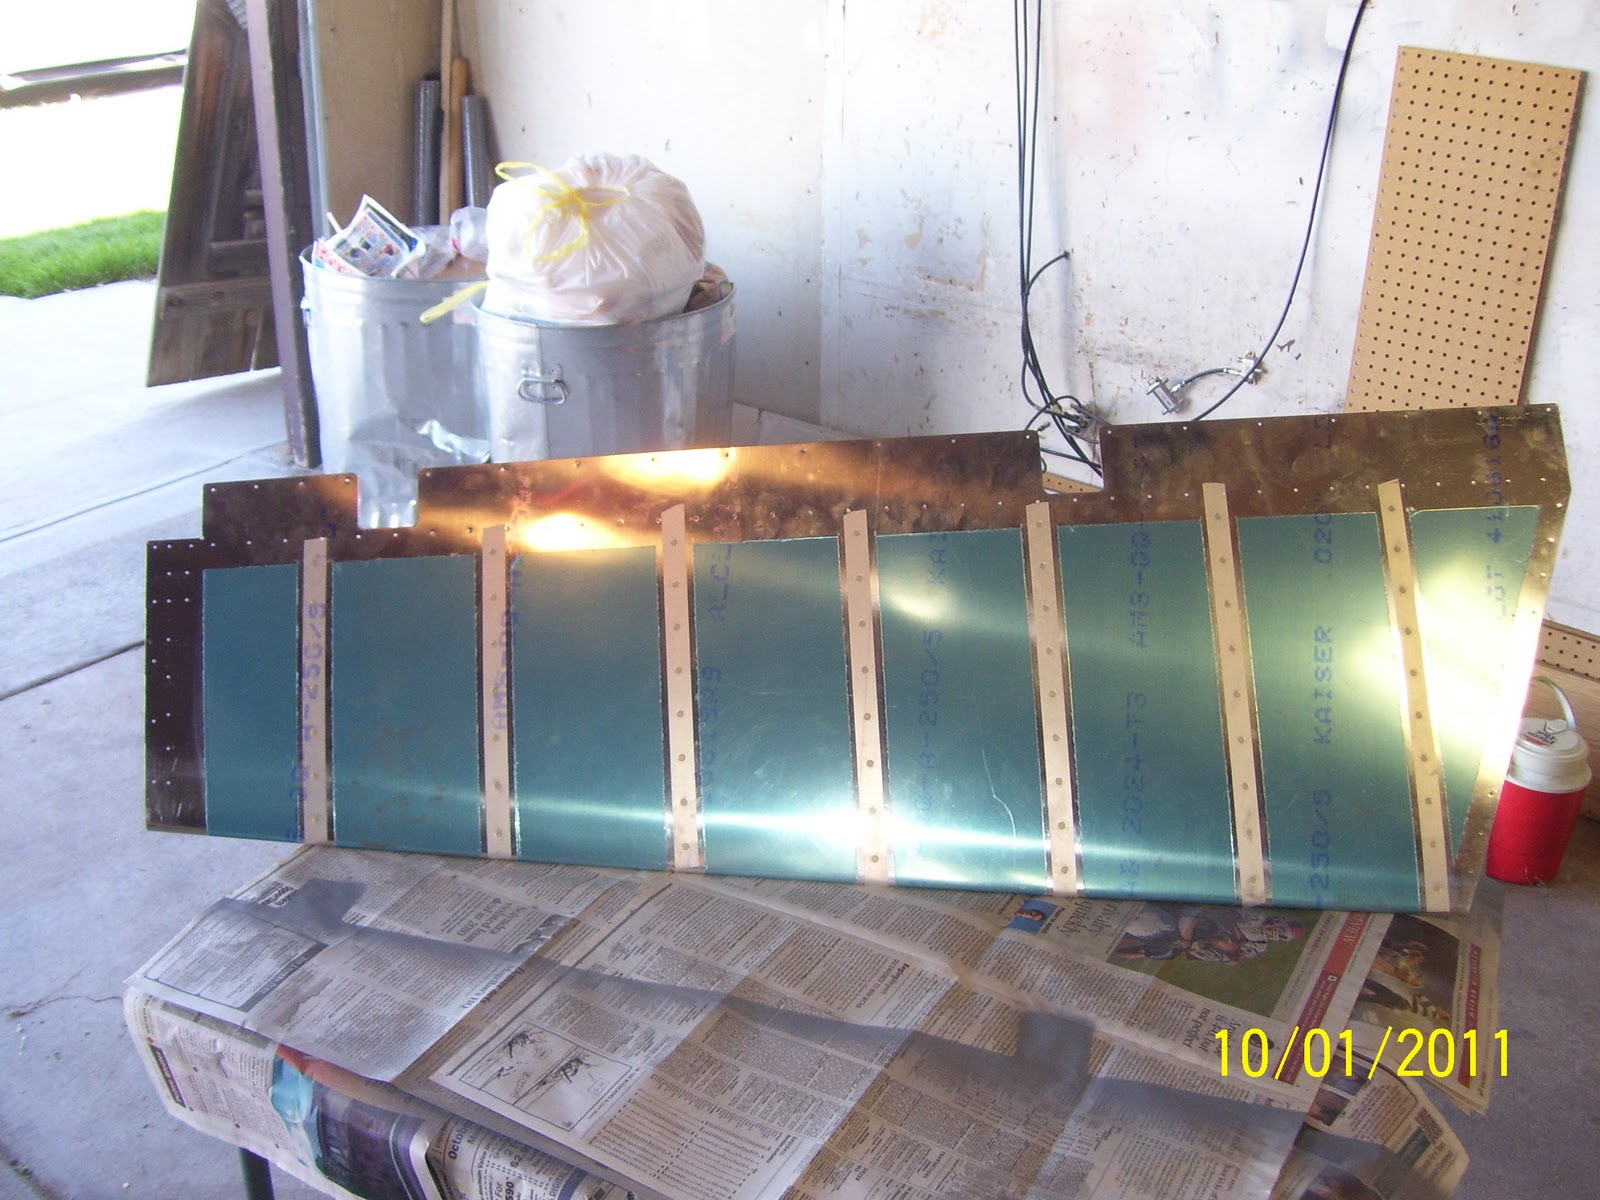
And here are the rivets being taped into place for back riveting, same pocess as was done on the rudder.
And one side rivets all taped in and ready to go
And here is the knee-buster back rivet setup again - just like was done for the rudder:
My friend, neighbor, co-worker, and fellow pilot/flight instructor Kevin Shepard came by on Saturday morning to help me back rivet the stiffeners onto the rudder. They turned out great as shown in the next pic. THANKS KEVIN!!
That was actually quite the task. I had intended on priming everything on Friday evening so that all we had to do was rivet everything on Saturday morning. Well, as it turns out, my other friend ad fellow builder Mike Rettig called me up nad said they were having a movie night. Since the wife and kids had gone to Canon City to visit her parents, I was all alone, and decided to go see a movie. Mike had a really great setup outside on his deck, with a projector and home made screen hanging from his deck posts - friends and neighbors, popcorn and beer, food, and a great movie. What a great time. Anyway, that meant that I had to do everything on Saturday morning as I told Kevin to meet me at 10:00am.
So I was up at the crack of dawn and dawned my respirator and got everything primed in time for Kevin to help me do the riveting.
So with the back riveting done, it was time to bend the trailing edge. This happened on Sunday afternoon after I conned Mike into driving out to help me with the bend. It took us all of about 15 minutes to do the bend, and this was at about 3:00 pm in the afternoon. Then we started talking airplanes and he ended up leaving around 7:00pm. I think he needs to bend his elevators on the RV 10 so I thought he might get some insight as to the process. THANKS MIKE.
This is the outside rib and counter-balance skin assembly for the right elevator, clecoed into place. At this point I was setting the frame in place to get a rough idea of how well the bend had worked out. I had noted after Mike and I were finished that it seemed a bit bulgy in the middle, and I thought I might need to bend it just a little more, but I decided to sleep on it for a bit.
And this is the inboard side, or the side closest to the fuselage side, showing the rib that goes there. As it turns out, As soon as I pulled the vinyl off of the rib, I found nice deep scratch right down the middle of the rib web. I will get Vans to replace this part - even if the scratch only goes no deeper than the alclad, this is a part that I do not want to mess around with. I need total integrity here as this will be a major point of applied force when the stick is moved to raise or lower the elevators.


This last shot shows that the final radius for the elevator is about 1/8 of an inch, same as the rudder. THis pic also shows that the edge is still a bit fat. So I did decide to bend the edge jsut a bit more this evening, and I think I have just about right. Funny how I spent weeks researching this for weeks for the rudder, and now it just does not seem to be that big of a deal. As long as you have a nice straight piece of wood for your bending break, and you ensure that the edge remains consistent across the span of the wood, i.e. one side of the edge is not displaced or angled from the edge of the break more than the other side (edge is not aligned with the edge of the brake), then everything comes out fine.
One more note about the weekend activities. My other friend and builder Ron Duren invited me to a barbeque on Saturday night. He has blown me right out of the water with his progress on his RV - 7. The Tail and wings are done, and the fuselage is in progress. He now has very big pieces of the airplane in his garage. I can't wait until I reach the same point. I took a bunch of pics of his build, and will post some of them later. Another night of great food, great friends, and great times. Ron will obviously be flying well before I am, and I am truly indebted to hime for all his past assistance, and for being the guinnie pig for blazing the airplane building trail that I am able to follow, learning from his mistakes and from his wisdom along the way. THANKS FOR A GREAT TIME RON!
Next for me is the prep of the spar and ribs for the right elevator, and then assembling it. then comes the dreaded left elevator and trim tab assembly. With my chosen implementation, I don't think that the trim tab will be a problem for me.


You're too kind, Bryan. I am always glad to help whenever the need arises. I think it's always good to have a second set of eyes looking at stuff. I agree with your comments about Ron's ship. It made me jealous to see how far he has progressed. Good times!
ReplyDelete