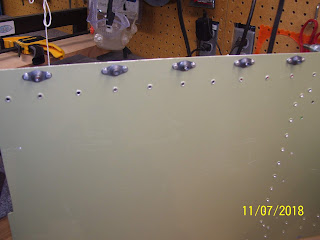
The next pic is blurry but shows the process and positioning of the nut plate on the dies for setting the dimples on each nut plate flange. This also went quickly. There are 14 nut plates for the fuel tank attach portion of the subskin.
The nut plates sat a little proud on the dimples in the subskin, but they actually riveted on quite nicely I think.
With the required dimples completed, everything was clecoed in place:
And here was the creative clamping structure for this round:
I used the pneumatic squeezer to set these rivets. I switched out the dimples dies on the same flange yoke for flat sets, one if which was the same reduced radius die as the female dimple die. I always get nervous when I have to use such a small radius die for setting rivets, especially when the smaller one is the one that must be used to smash the rivet tail down. Everything has to be centered pretty well, ad there is not a lot of room for error. it is very easy to slip off target and cause the rivet to become deformed. Fortunately all the rivets I set were completed successfully, with out the need to drill any of them out, so I was quite pleased with that.
The clamping structure was set up to allow me to pull on the wider top flat set to apply pressure to force the manufactured head of the rivet against the dimple in the skin, and close any gaps between the skin and the nut plate flange on the other side as shown below:
The trick for alignment is to place the 1/3 inch wide set just below the rivet head and slide it up over the head making sure that it is centered as much as possible. Then you make certain that the flat set is truly flat against the rivet head and the skin. One of the biggest problems with this set on an air squeezer is trying to ensure that the set is truly flat. I found that you have to take into account any angle to the skin that might exist ir is created when you apply pressure to the skin and the rivet head. once you know that the rivet set is flat and centered over the rivet, then you are ready to engage the trigger and set the rivet. I always try to position everything so that I am pulling on the rivet head as the plunger goes up from the other side to set the rivet stem.
One other trick that use religiously is to set the air pressure going the squeezer to 75-80 psi max. The instructions with the tool always say to use 90 psi, but I figured a long time ago that this causes the ram to actuate much too quickly and can cause the rivet sets to move out of position just enough to ruin the rivet or the parts. I found that when I reduced the air pressure it was much smoother and less jerky, and the sets tend to stay in position better and you can watch the ram as it comes up to smash the rivet and make sure that it s positioned correctly before you commit to the full smash. The ram still has plenty of force to set the rivet, even though it moves a little slower.
First the rivet goes in the hole:
One down and one to go.....
And one nut plate riveted, 13 more to go:
It was too cold tonight to set the remaining rivets, but I'll get this done as soon as possible. Unfortunately it looks like when I get the tank attach nut plates riveted I am going to need to cut the skin on the LE and then reassemble everything one last time before final riveting of the entire LE so that I can make the file folder template to mark the hole locations for the removable LE skin, and THEN I can drill the remaining nut plate holes to final size, debur the holes, dimple them, and rivet them to the subskin. So the to-do list is getting shorter, but it will still take a lot of time to get to the finish point.


No comments:
Post a Comment