
Getting ready for Airventure
Showing posts with label Motivation. Show all posts
Showing posts with label Motivation. Show all posts
Tuesday, July 6, 2021

Sunday, January 17, 2021
Restarting yet again - a year and half later
Hard to figure out exactly where to start this Blog again. Recap - I screwed up the inner and outer skin of my left wing LE Mode in April of 2019. Tech Counselor came out and we discussed using a planishing hammer and dolly to reform the damage to the outer LE skin and inner subskin. I bought the hammer and the dolly, and was about to attempt the task of re-forming the skin, when I had yet another epiphany.
1. I realized that positioning the dolly had to be done exactly right in a very tight spot inside the LE, and I determined that this would just be next to impossible for me.
2. After having a very honest conversation with myself, I also realized that even if I managed to reform the skins correctly, this mod went wrong almost from the start where I did not create the wood form blocks for the sub skin properly. This meant that curve of the LE of the subskin has NEVER been formed exactly as it should, and leaves a gap between the outer Le skin and the subskin that then causes issues with how the removeable plate would sit when screwed onto the subskin. It also puts additional stress on the rib flanges underneath. IOW, the removable plate will NEVER sit flush the outer skin because of the subskin deformity, and the added stress in the rib might lead to other structural problems later. I should have taken much more care and ensured that the wood form blocks I used to bend the subskin EXACTLY matched from the curvature of the LE Rib so that the radius would have mated with the LE skin correctly.
3. The final straw for me was the realization that, after seeing it all come together, there was a much easier way to approach this whole thing, without the need to use the massive subskin and all the forming, measuring, bending, cutting, laying up, and riveting that was involved. I also realized that I could still attempt this mod AFTER the plane was built per the plans that would take very little time, and could be done using much simpler techniques than my original design.
As a result of this, I decided to abandon the entire mod and order the necessary new parts, including a new left wing LE skin and some ribs to build a stock LE. The only thing I will still do differently is order a left wing LE skin from Vans WITHOUT the cutout for the stall warning vane service access plate.
It is sad to have spent so much time and effort on this, only to reach the conclusion that I need to abandon it. It is even more sad to come to this decision only after assembling and almost completing it. However, I am not sad about having made the attempt, as I learned tons about airplane design in the process, and I now have a very deep appreciation for those that undertake the challenge of designing airplanes from scratch. So my only regret is the time I have lost, but nothing else. Basically it was not until seeing entire mod coming together to figure out that there was a much easier, simpler, less invasive and less time-consuming way to do this. I'll keep the details of that to myself for now.
So what happened after all that?
Instead of working on the fuel tank as I previously stated in my last post, I spent the next couple of months working on some mods for my 14 inch RIGID bandsaw. This saw became notorious for not being very well built to the point that it vibrated so badly that it was difficult to make fine, accurate cuts. With the forming of the forward Fuel tank mounting brackets looming in the distant future that would require the use of my bandsaw, I decided to spend the time to perform several well-documented mods to reduce the vibration and turn it into the tool that it should be. There are numerous You Tube videos on the subject and I watched all of them.
I needed to purchase some new Neoprene tires for both wheels, some longer mounting bolts for the motor as well as the saw base itself, a custom cut piece of 3/4 inch plywood to fit over the top of the mounting stand, and some new composite saw guides. After much work on this, I ended up with a good saw that passes the "nickel" test, where you place a nickel on the saw table on its skinny edge, then turn the saw on. If the saw is balanced properly, the nickel will stay on its edge without falling over. I was able to achieve this to my satisfaction.
The end result was that I could now cut the 1/4 inch thick Fuel Tank Angle Mounting brackets with reasonable accuracy on the bandsaw to reduce the amount of forming work to do after the initial cuts. One of the most challenging parts of the saw mod was the need to trim the 1 inch wide neoprene tires down to about 7/8 inches so that they fit in the wheel tracks properly. This required making a special wood frame and using my belt sander to trim the edges accordingly. That, balancing the wheels, and adding the 3/4 inch plywood base and a new composite "link" belt all contributed to solving the vibration problems with the saw. Unfortunately this was yet another delay in the build.
Then, my wife and I needed to take a much needed vacation together, so spent the next couple of months focusing on a multi-faceted trip the New York for the first time. We spent one week in New York City and did all the NYC things a newbie would want to do - Statue of Liberty/Ellis Island, 9-11 Memorial and Museum visit, which I highly recommend to any red-blooded American, went to a Broadway show, Times Square, Stood outside during a Today Show airing, had a real New York Pizza slice, learned how to ride the subway, went to Grand Central Station, Went to Battery Park, the Fashion district, visited the famous toy store FAO Schwartz, and much more.
Then we flew off to Buffalo and took a shuttle to Niagra Falls, Ontario to see the falls for the first time. We had so much fun there, and the falls were so beautiful, that we both want to go back someday. this all happened in early September of 2019. As the whole world now knows, only a few short months later all of New York and the rest of the world would be shut down and fighting for its life due to the COVID pandemic. I have not been back on the build ever since May of 2019 as the the wind just went out my sails after coming to decision about the mod, and too many other things got in the way. After our vacation, winter and the cold set in yet again, and I still had no heat in my garage.
Then COVID showed up in the spring of 2020, and the massive wild fires in Colorado soon followed, and it was a struggle to stay alive and to breathe through smoke and ash all at the same time. I almost lost relatives in the Troublesome Fire in Grand County - very scary. So airplane building was not on my list of things to do throughout that entire period.
I endured multiple furloughs and layoffs at work last year, only to find myself working 15 hours days, 7 days a week, for at least a couple of months. So you could say that yes, I kept my job, which was a good thing, but at great personal cost to my overall health and well-being. Now we are in 2021, where winter is once again upon me, and still with no heat in my garage. What a wildly exhausting time it has been over the past year and a half.
Is there a plus side to any this? Well, in the interest of counting my blessings, both kids have graduated college, have jobs, and are out of the house and successfully on their own. Several major financial burdens have ended, I have not contracted COVID nor have any of my family members, and COVID vaccinations have begun. Aside from politics and some extremely idiotic people in this world, it seems like the sun may be trying to shine on the world again. So I decided it is also time for me to re-engage with the plane project again. I need to order parts from Vans and finish the wings.
More to come..... Sorry for the long hiatus. Stay safe, respectful, and peaceful everyone. Life is too short. I'll have pics of the bandsaw mod, planishing hammer and dolly, and some other stuff in the next post.
Monday, May 1, 2017
2 Halves Make 1 Whole RV10 Fuselage
Throughout my experience with building an experimental airplane I have been fortunate to come to know many individuals that share the same passion. Through those relationships I have been able to witness and participate in many unique and exciting things. Yesterday I was able to add one more to that list by helping my buddy Mike join both halves of his RV-10 fuselage together.That airplane is so large (Seats 4 people plus a lot of bags) that the fuselage is initially built in two separate sections. Each of these is then joined together at the appropriate time.
This joining together of major airframe parts is something that has always fascinated me. Being a WW II aviation history buff, I am always intrigued when I see film footage of the factories that were creating fighters and bombers in an assembly line. Large overhead cranes and straps with fuselages and wings suspended from them would somehow be guided into place by a handful of humans, and then they would be magically joined together. I guess this fascinates me even more right now, after having been exposed to airplane building techniques, many of which were developed and perfected way back during WW II.
Three of us - Mike, myself, and Jon Banks were all that were needed to complete this tasks. The process we used at Mike's did not require any cranes or heavy weight-bearing straps, but was still just as challenging and fascinating to see it all happen. Mike's tailcone was strapped down on a 4-wheeled flat dolly shown below:

Before we began the joining process the forward section was up on several saw horses. Mike had Built two very interesting dollies for the forward section. They basically looked like two miniaturized sets of landing gear bolted to the center section wing spar flanges. Jon and I both made fun of these rather interesting sets of wheels, but turns out that they more-than served their intended purpose. The first step was to get the forward section off of the saw horses and onto the ground.


The rear of the forward section was temporarily sitting on the two steps that will be utilized by pilot and passenger to enter the cabin of the airplane. I am dubbing the above pic the "midget 10." With that done, the next step was to maneuver both sections and begin the process of aligning them at the proper angles so they could be joined together and secured.
The trick to this turned out to be setting both sections at the proper angle so that all the mating surfaces of both sections would line up correctly. How was done, you might ask? Measuring sophisticated complex angles, or lifting both sections a prescribed amount? Well, it turns out that several pieces of 2 inch thick foam under the rear section, and some boxes full of books were used on the front section to get both pieces at approximately the right angle so they could be joined together.
This task was not easily done in one shot. It took several attempts at adjusting the foam and the boxes either forward or back from their current positions, and then eyeballing the angles and alignment of the mating surfaces of both parts. Then the metal had to be aligned and positioned correctly while the front section was locked into place and the tail was maneuvered forward and from side to side. It was further complicated by the fact that there were several different types of metal to join, and some of it needed to be sandwiched in between metal from the other part, while flanges from the bulkhead and various pieces of aluminum angle all had to be aligned as well. this took several attempts to get right. When we began, the left side aluminum was lining up, but the right side was not. Then one part would go in correctly and another would pop back out..... After messing with this for about 20 minutes, it all finally came together.
Then the task of inserting clecoes into the joined parts began. Getting ALL the rivet holes to line up enough to insert the clecoes was also a challenge for certain areas. Here is Mike with pliers in hand making it happen:

And here is Mike and Jon after the deed was accomplished. This is yet another major milestone in completing the airplane, so smiles are more than appropriate:

Not so easy to move things around anymore, is it?


Here is a pic that shows the final locations of the rear dolly, which has been moved up about halfway to serve as a support for a box that sits under the major support section of the bottom of the forward section and the location of the box being used to support the tail section. The combination of the rear dolly and the wheels mounted on the forward section gives just enough clearance to keep the foot steps off the ground and keeps both sections pretty well lined up.

And finally - Mike at the pilot's position with a makeshift seat in forward section of the cabin. I'm really jealous of this and I can hardly wait until that is me in my fuselage skeleton making airplane noises - a right of passage for builders that reach this important stage of the build.

Then, after all the hard work was done, Mike treated Jon and I to dinner. Thanks for that Mike! Now I can add this to my list of engine hanging and wing joining exercises I have been fortunate to be a part of. Not shown in these pics is the very large top fiberglass section that also joins the two halves together on the upper portion of the fuselage. I imagine Mike will be starting on that work in the not-too-distant future. Lookin' good Mike!
This joining together of major airframe parts is something that has always fascinated me. Being a WW II aviation history buff, I am always intrigued when I see film footage of the factories that were creating fighters and bombers in an assembly line. Large overhead cranes and straps with fuselages and wings suspended from them would somehow be guided into place by a handful of humans, and then they would be magically joined together. I guess this fascinates me even more right now, after having been exposed to airplane building techniques, many of which were developed and perfected way back during WW II.
Three of us - Mike, myself, and Jon Banks were all that were needed to complete this tasks. The process we used at Mike's did not require any cranes or heavy weight-bearing straps, but was still just as challenging and fascinating to see it all happen. Mike's tailcone was strapped down on a 4-wheeled flat dolly shown below:

Before we began the joining process the forward section was up on several saw horses. Mike had Built two very interesting dollies for the forward section. They basically looked like two miniaturized sets of landing gear bolted to the center section wing spar flanges. Jon and I both made fun of these rather interesting sets of wheels, but turns out that they more-than served their intended purpose. The first step was to get the forward section off of the saw horses and onto the ground.


The rear of the forward section was temporarily sitting on the two steps that will be utilized by pilot and passenger to enter the cabin of the airplane. I am dubbing the above pic the "midget 10." With that done, the next step was to maneuver both sections and begin the process of aligning them at the proper angles so they could be joined together and secured.
The trick to this turned out to be setting both sections at the proper angle so that all the mating surfaces of both sections would line up correctly. How was done, you might ask? Measuring sophisticated complex angles, or lifting both sections a prescribed amount? Well, it turns out that several pieces of 2 inch thick foam under the rear section, and some boxes full of books were used on the front section to get both pieces at approximately the right angle so they could be joined together.
This task was not easily done in one shot. It took several attempts at adjusting the foam and the boxes either forward or back from their current positions, and then eyeballing the angles and alignment of the mating surfaces of both parts. Then the metal had to be aligned and positioned correctly while the front section was locked into place and the tail was maneuvered forward and from side to side. It was further complicated by the fact that there were several different types of metal to join, and some of it needed to be sandwiched in between metal from the other part, while flanges from the bulkhead and various pieces of aluminum angle all had to be aligned as well. this took several attempts to get right. When we began, the left side aluminum was lining up, but the right side was not. Then one part would go in correctly and another would pop back out..... After messing with this for about 20 minutes, it all finally came together.
Then the task of inserting clecoes into the joined parts began. Getting ALL the rivet holes to line up enough to insert the clecoes was also a challenge for certain areas. Here is Mike with pliers in hand making it happen:

And here is Mike and Jon after the deed was accomplished. This is yet another major milestone in completing the airplane, so smiles are more than appropriate:

Not so easy to move things around anymore, is it?

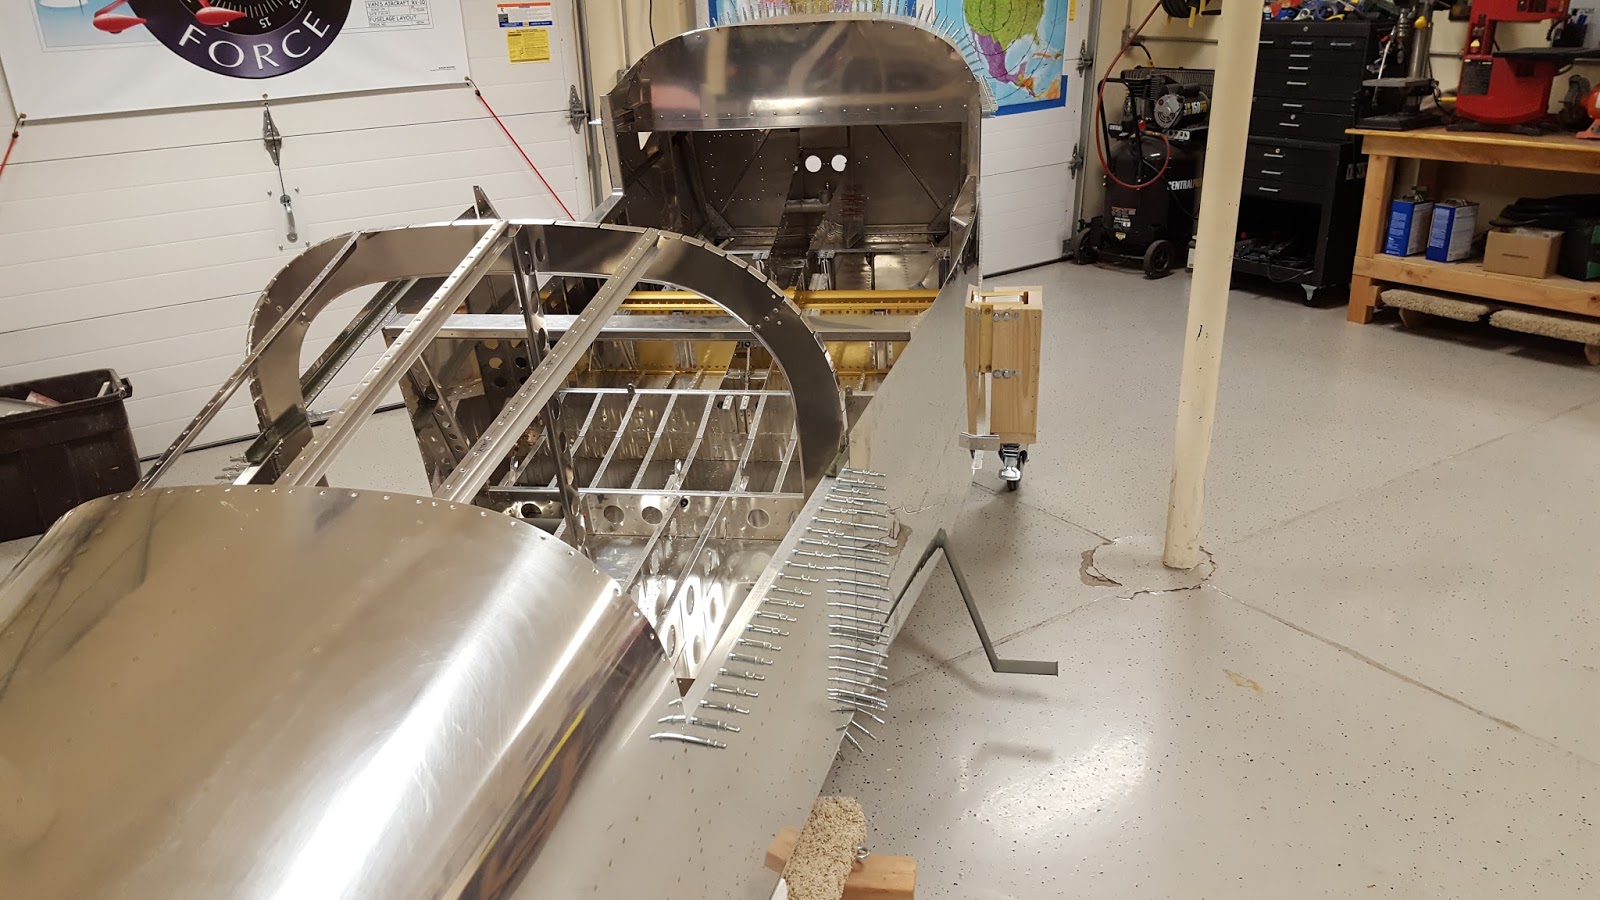
Here is a pic that shows the final locations of the rear dolly, which has been moved up about halfway to serve as a support for a box that sits under the major support section of the bottom of the forward section and the location of the box being used to support the tail section. The combination of the rear dolly and the wheels mounted on the forward section gives just enough clearance to keep the foot steps off the ground and keeps both sections pretty well lined up.

And finally - Mike at the pilot's position with a makeshift seat in forward section of the cabin. I'm really jealous of this and I can hardly wait until that is me in my fuselage skeleton making airplane noises - a right of passage for builders that reach this important stage of the build.

Then, after all the hard work was done, Mike treated Jon and I to dinner. Thanks for that Mike! Now I can add this to my list of engine hanging and wing joining exercises I have been fortunate to be a part of. Not shown in these pics is the very large top fiberglass section that also joins the two halves together on the upper portion of the fuselage. I imagine Mike will be starting on that work in the not-too-distant future. Lookin' good Mike!
Sunday, March 5, 2017
After a long absence........
.....I think it's time to get back to building an airplane. Lets just say, as I have said before, that life keeps getting in the way. The story that follows does have an aviation and airplane-building tie-in at the end, so bear with me as I try to remember how to type blog entries and add relevant pics to my posts.
To fast forward things a bit, starting with my last post, after graduating college, my oldest son managed to get a job, pay off half of his student loans, and buy a house in the Denver area (of all places), all within a few months of his college graduation. The house that he bought needed a lot of work, and so he decided that he and some friends (some of whom had volunteered to help repair and build new homes in New Orleans after Katrina had devastated the area) would basically flip the house, starting with the upstairs.
They completely gutted everything and rebuilt the entire upstairs of the house. One of the last things to go was an old door frame and the front door that went with it. When I saw the existing door for the first time I noted that it was just about to fall over, and you could not even close it completely. The next time I saw the door, it had been completely removed and replaced with a brand new door, and the old front door was laying on its side on the front patio. My son said, " I have no idea what I am going to do with this old door now."
It was then that I had brilliant idea. While looking over the door I noticed that it appeared to be a solid core door. I then asked my son to get me a level or two. I then started to run the level across the door and noticed that it seemed to be very straight. After a few minutes I told my son that I would be happy to take the door off his hands, so we loaded it up in my truck and off I went.
So why did I want that door? There were several reasons, the first of which stems from a problem that I had been dealing with ever since I build the first work benches for my garage-based airplane-building workshop. My original work benches were unfortunately built with 2x4 side braces for each benchtop that were not cut properly at the mill. While I did check them initially to ensure that they were not warped along the wider 4 inch side of the wood, I neglected to verify that they were also true and straight along the skinnier 2 inch side of each board. The shorter side was the one that my work bench tops ended up sitting on. As you may have already guessed, the bench tops soon adopted the shape of the warped side of each 2x4, resulting in about 1/4 inch bend in each bench top. Keep in mind that this was also after applying not one, but two 3/4 inch plywood benchtops for the top. Here is a pic of the original bench shortly after I had completed it in 2009. It makes me sick to my stomach to look at it because the bend in the top is very noticeable to me, and I should have corrected it right then and there.


To fast forward things a bit, starting with my last post, after graduating college, my oldest son managed to get a job, pay off half of his student loans, and buy a house in the Denver area (of all places), all within a few months of his college graduation. The house that he bought needed a lot of work, and so he decided that he and some friends (some of whom had volunteered to help repair and build new homes in New Orleans after Katrina had devastated the area) would basically flip the house, starting with the upstairs.
They completely gutted everything and rebuilt the entire upstairs of the house. One of the last things to go was an old door frame and the front door that went with it. When I saw the existing door for the first time I noted that it was just about to fall over, and you could not even close it completely. The next time I saw the door, it had been completely removed and replaced with a brand new door, and the old front door was laying on its side on the front patio. My son said, " I have no idea what I am going to do with this old door now."
It was then that I had brilliant idea. While looking over the door I noticed that it appeared to be a solid core door. I then asked my son to get me a level or two. I then started to run the level across the door and noticed that it seemed to be very straight. After a few minutes I told my son that I would be happy to take the door off his hands, so we loaded it up in my truck and off I went.
So why did I want that door? There were several reasons, the first of which stems from a problem that I had been dealing with ever since I build the first work benches for my garage-based airplane-building workshop. My original work benches were unfortunately built with 2x4 side braces for each benchtop that were not cut properly at the mill. While I did check them initially to ensure that they were not warped along the wider 4 inch side of the wood, I neglected to verify that they were also true and straight along the skinnier 2 inch side of each board. The shorter side was the one that my work bench tops ended up sitting on. As you may have already guessed, the bench tops soon adopted the shape of the warped side of each 2x4, resulting in about 1/4 inch bend in each bench top. Keep in mind that this was also after applying not one, but two 3/4 inch plywood benchtops for the top. Here is a pic of the original bench shortly after I had completed it in 2009. It makes me sick to my stomach to look at it because the bend in the top is very noticeable to me, and I should have corrected it right then and there.

My "solution" was to place shims in the middle of the bench top to try to level it out as best I could. I have been living with this situation ever since I began my build. This is where the door from my son's house comes in. As soon as I saw that door I knew that it was time to address my crooked workbench problem once and for all. Last fall I began the arduous process of removing all the stuff from my existing bench, unscrewing the bench top and those crappy 2x4 side supports, and I began the process of preparing the door for use as my new benchtop.
One of the key changes I made was to replace those crappy 2x4s with some 1x8 wood from my old wing kit crate. I obviously check those this time to make sure that skinny 1 inch wide edge was straight.
There was one other major reason that I wanted to use the door. My original benches were not wide enough to support my dimpling table from Cleaveland Tools. To fix that problem I had to build a hinged extension to the edge of the bench top. The door is wide enough to support the dimpling table without the need for any extension. So I get a straight bench top and a wide-enough one all at the same time. A win-win.
Here is the "new" bench after completing all the necessary modifications:

It's a little bit thicker, a bit wider, and a bit shorter than the former workbench, but at least I know it's flat. Now perhaps I can get on with the build. Thanks to my son for providing me with a fix to a nagging problem. Sometimes you just have to make changes to the shop before you can proceed with the build. I also need to get heat into my garage somehow to solve another very bad problem in the winter months. I plan on getting back to work on the wings in a few weeks.
Wednesday, June 11, 2014
Right wing top skins deburring progress
Just more of the same - stripped the vinyl off of the larger outboard top skin for the right wing tonight. I have also been watching episodes from the series "From the Ground Up," which, if you have read my early posts, you know that this is one of the catalysts that convinced me to take this journey of building my own airplane. This series is always good motivation for me to continue on, no matter how mundane or insane my current tasks appear to be. At the end you get to watch the finished product (An RV-8) take to the skies for the first time.
Tomorrow I will debur the holes in both top skins, all 80 million of them. OK,so I am exaggerating just a bit, but it sure seems that way. Here is a pic of the right wing top skin with the vinyl removed:
 Next is a pic of the way that I left the bottom skins mounted temporarily to the left wing. As soon as I finish deburring the right wing skins the bottom skins of the left wing will be removed per the instructions so I can begin the process of fitting the left wing leading edge. Sure will be nice to switch from the main skins to the leading edges.
 Since they will be coming back off soon I only clecoed the top rows of the skins in place. No need to lock down the entire skin since they will becoming back off soon.
Really getting the itch to go flying soon,but I still have some things to take care of first.
On a sadder note, it looks like my washing machine, hot water heater, sprinkler system plumbing, and probably my car have all decided to breakdown at the same time. Sucks to be me I guess. Unfortunately no Oshkosh trip for me this year - just can't swing it financially. I am, however, still planning a trip to Boise Idaho in the fall to visit my brother and his family, and to hook up with one of the transition training pilots listed on Vans website to see if I can get some time in an RV-7A to familiarize myself with the flying characteristics. Looking forward to that.
Tomorrow I will debur the holes in both top skins, all 80 million of them. OK,so I am exaggerating just a bit, but it sure seems that way. Here is a pic of the right wing top skin with the vinyl removed:
Really getting the itch to go flying soon,but I still have some things to take care of first.
On a sadder note, it looks like my washing machine, hot water heater, sprinkler system plumbing, and probably my car have all decided to breakdown at the same time. Sucks to be me I guess. Unfortunately no Oshkosh trip for me this year - just can't swing it financially. I am, however, still planning a trip to Boise Idaho in the fall to visit my brother and his family, and to hook up with one of the transition training pilots listed on Vans website to see if I can get some time in an RV-7A to familiarize myself with the flying characteristics. Looking forward to that.
Saturday, June 7, 2014
Can you guess what this is?
Had a bit of a surprise this afternoon while I was outside going over some car-related info with my son Adam who recently received his Colorado Driver's license. (Way to go Adam!)
It looked something like this:
 While I was busy going over the finer points of jumper cable operation with Adam, he suddenly looked up to see what the deep droning noise was coming from the north. He then said - Isn't that plane flying a little low? Not hearing the engines I looked up and for a split second I agreed, and I thought we were looking at an airplane in trouble, heading right for the house! But then my attention focused on what has become a familiar sound to me over the years, and I realized that this this had to be Aluminum Overcast - the EAA B-17 back once again on its annual pilgrimage around the country just before Airventure arrives on Oshkosh Wisconsin in July.
BTW, the above pic does not do the airplane justice, because it WAS flying very low almost directly over the house. I became less worried when I realized that I could hear all 4 of those wright-cyclone engines purring along just fine, and it was maintaining a constant altitude. I assume it was low to avoid the low overcast ceiling that has invaded the Denver area over the weekend.
I am blessed to live where I live, because the path directly over my house is a natural navigation point from south to north for everything from jets flying over mile high stadium before a Bronco game, to Aluminum Overcast and a whole host of other historic warbirds that occasionally fly almost directly over the house. The bird should be here for the next 2 weeks giving rides and promoting EAA. And all this on the heels of the 70th anniversary of D-Day. I certainly paid my respects, and I hope you all did as well. I will NEVER forget.
Now back to the airplane project.....
I spent time today getting the top skins of the left wing installed after deburring both sides of the rivet holes in the skins, as well as both sides of the holes in the top half of each wing rib. Deburring the back side of the rib flanges has to be one of my top 5 least liked things about building an airplane, because ready-made power tool can get into that location to do the job. I had to take my deburring bit and debur all the back side flange holes by hand.Getting in between all those inboard ribs that are very close together was a pain.
Prior to re-installing the skins on the frame, I vacuumed out all the tiny remnants laying on the trailing edge from all the drilling. With the top skins back on I could now remove the bottom skins and begin the process of removing vinyl and deburring all those holes. Here are a couple of pics of the bottom skins after the vinyl was removed.

 I removed the vinyl from the joggled areas for the inspection plates so that I can prime those areas continue to drill out the holes for the nut plates that will eventually need to be installed. I also deburred the edges and corners on the wing walk doubler since those were still pretty rough. Tomorrow I plan on removing the vinyl from the larger outboard bottom wing skin and beginning the deburring process. Then I'll get to do it all over gain for the right wing. (UGGHHH!).
It looked something like this:
BTW, the above pic does not do the airplane justice, because it WAS flying very low almost directly over the house. I became less worried when I realized that I could hear all 4 of those wright-cyclone engines purring along just fine, and it was maintaining a constant altitude. I assume it was low to avoid the low overcast ceiling that has invaded the Denver area over the weekend.
I am blessed to live where I live, because the path directly over my house is a natural navigation point from south to north for everything from jets flying over mile high stadium before a Bronco game, to Aluminum Overcast and a whole host of other historic warbirds that occasionally fly almost directly over the house. The bird should be here for the next 2 weeks giving rides and promoting EAA. And all this on the heels of the 70th anniversary of D-Day. I certainly paid my respects, and I hope you all did as well. I will NEVER forget.
Now back to the airplane project.....
I spent time today getting the top skins of the left wing installed after deburring both sides of the rivet holes in the skins, as well as both sides of the holes in the top half of each wing rib. Deburring the back side of the rib flanges has to be one of my top 5 least liked things about building an airplane, because ready-made power tool can get into that location to do the job. I had to take my deburring bit and debur all the back side flange holes by hand.Getting in between all those inboard ribs that are very close together was a pain.
Prior to re-installing the skins on the frame, I vacuumed out all the tiny remnants laying on the trailing edge from all the drilling. With the top skins back on I could now remove the bottom skins and begin the process of removing vinyl and deburring all those holes. Here are a couple of pics of the bottom skins after the vinyl was removed.
Sunday, June 1, 2014
Removing wing skins and stripping vinyl, and pics of recent visit of two almost completed RV projects
I removed the top outboard wing skin of the left wing and began the process of stripping the vinyl. After the drilling is over you kind of start to dread the deburring part a bit because this must be done on both sides of the skin. SO there are a total of 8 separate wing skins for the top and bottom of both wings(4 per wing), but you have to debur holes on both sides, so that is all the holes on each wing skin times 2 for the front and back. Then you have to debur the holes in the rib and spar flanges - again that is also both sides of each of those. If you focus too much on the large number of holes then you can become overwhelmed sometimes, so it is best just to get started and see how long it takes to get through a certain number of them. Then you will know how long it will take to do the rest of them. When the time comes dimple the skins I will take my time to ensure that I do not create any figure 8 holes in the skins.
Anyway, here is one side of one wing skin with the vinyl removed. The new soldering iron worked much better, but it was not perfect:
 Next is another important pic. When you remove the skins, you realize just how much material was removed during the match drilling exercise. The silver speckles are the chips of aluminum. These all need to be removed.
 And then I took this pic of my makeshift movie night movie screen. It was such a nice weekend after having been such horrible weather around here for the past several weeks that I just felt compelled to get out the king size bed sheet and use some of my clamps for something other than mashing metal parts together. I rig a projector on the opposite end of the garage and connect that to my laptop to show some movies every once in a while. Works pretty well. My seating capacity in the garage is a bit reduced with both wings on the stands, but it still holds a few folks.
 Next are some pics I promised a while back. Thanks to John Tedder and Lyn Langer whose RV-7As are well on their way to becoming real flying machines. I am really interested in Lyn's aircraft because he has a 180 HP IO-360 from Superior with their extremely popular Millineum Cylinders. I just noticed on their website that they have come out with a 195 and 200 HP version that I can build myself by attending their 2 week class. I took a ton of pics but will include a few of them here.
Here is Lyn's engine:
 And the rest of the aircraft. I can't wait until mine is looking like this someday:


John had his wings off while he works on his avionics. I checked out his wing wiring, fuel tanks, and landing light installation....

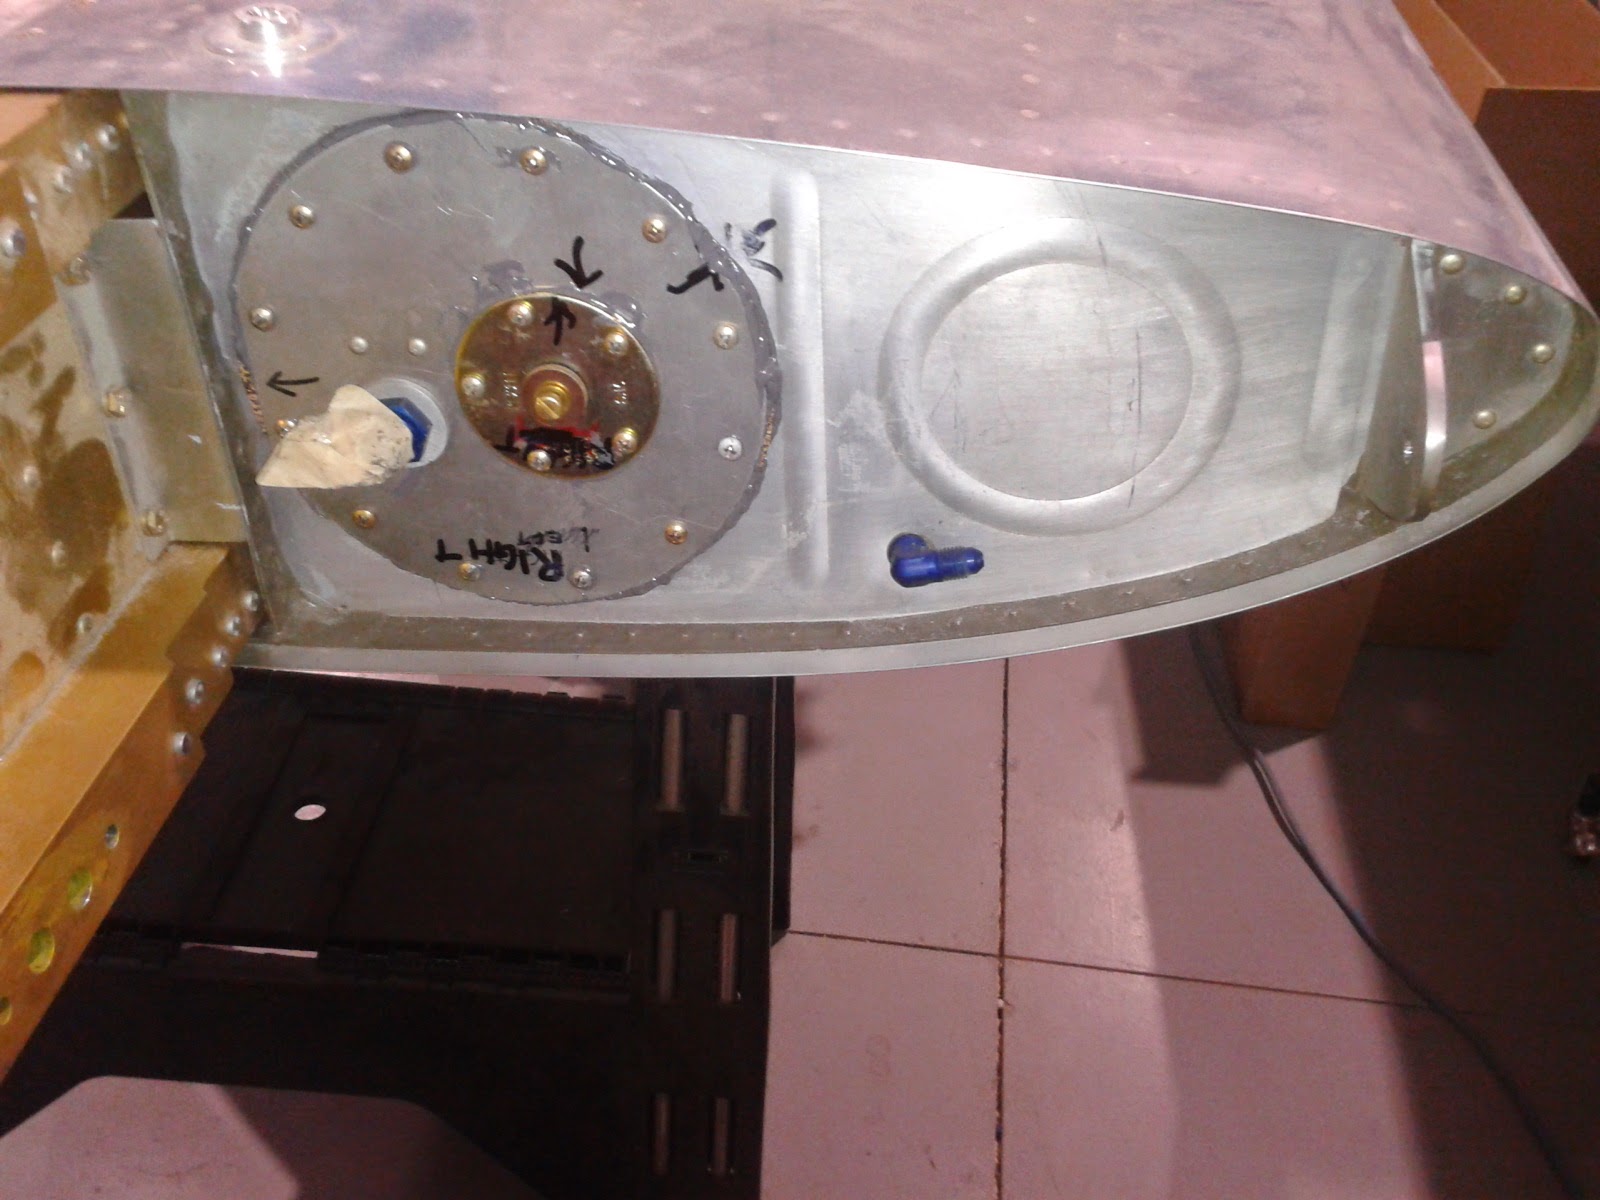 NOthing beats seeing things assembled up close. If you get these opportunities you need to take tons of pics because they will help later. I captured most of Lyn's fuel system routing from the firewall to the fuel servo to the injector manifold and out to the cylinders. Perhaps I'll post some of those pics later on.
All for now. I hope to have all wing skin and rib holes deburred by the end of this week.
Anyway, here is one side of one wing skin with the vinyl removed. The new soldering iron worked much better, but it was not perfect:
Here is Lyn's engine:
John had his wings off while he works on his avionics. I checked out his wing wiring, fuel tanks, and landing light installation....
All for now. I hope to have all wing skin and rib holes deburred by the end of this week.
Sunday, October 13, 2013
Planting seeds for future aviators, or just a fun outing with my niece and her kids and Mike and his family
A couple of weeks ago I finally hit the weather jackpot and found enough sunshine and fair winds in the forecast to be able to to take my niece and her kids for a fun ride down to KCOS, and Mike Rettig came along in a separate C172 with his family. Here are some pics of my young relatives having a really fun time in the cockpit of the KC-97-turned into a restaurant.
First is a pic of Mike's daughter - she was just barely able to climp up into the pilots seat, and I did not do this justice by getting a frontal happy face shot, so the one from the rear will have to do. I think that Mike probably has much better pics that he took!

Next are the pics of My niece's two boys - I don't think I could have made them smile any bigger!


First is a pic of Mike's daughter - she was just barely able to climp up into the pilots seat, and I did not do this justice by getting a frontal happy face shot, so the one from the rear will have to do. I think that Mike probably has much better pics that he took!

Next are the pics of My niece's two boys - I don't think I could have made them smile any bigger!


Saturday, October 5, 2013
The nightmare is almost over.......
As of this morning all of the major upstairs bathroom remodel work is done. Unfortunately all attempts to stop the leaking of the downstairs shower have failed, and I am all but convinced that the problem is with the drain that this stupid moron we hired to the work way back in March absolutely screwed it up. Now that I have a functional (and quite nice looking) upstairs bathroom again, I will wait until next year to start the process of ripping the shower out and re-doing that myself.
I desparately want to get back to airplane building. This house of mine has sucked enough life out of me this year, and it is time that I get my own life back for a change. My only real saving grace throughout this whole affair has been taking time out to fly young eagles at the monthly EAA Chapter 301 rallies held at KFTG, and working with Mike Rettig to get his Flight review current. Mike's reccurency training was capped off with a great experience last weekend when both of us rented two different C-172s from a local flying club and we both accomplished a couple of "firsts" with our respective flights.
In my case I had been trying to take my niece and her two boys, ages 7 and 3, up in a GA airplane for the first time.We had been trying for over a month but seemed to hit bad weather each time until last week.
In Mike's case it was his first flight with the family,which now includes his wife and their new daughter. Mike is a good pilot, and it was very satisfying for me as a flight instructor to see him get back in the air again after a long respit from flying. Thanks for the opportunity to get you back in the air Mike!
In all cases the weather finally turned out great, and all passengers and pilots made it safely to our destination and back. The destination,by the way, was a short trip to KCOS in Colorado Springs, where we then procured two very nice courtesy cars from the JetCenter FBO, and drove all of an eigth of a mile from the airport to get to a place known as SOLOs, or it is also known as The Airplane Restaurant. This is a fantastic place to go for a $200.00 hamburger. The restaurant actually incorporates almost all of a complete KC-97 air refuleing tanker from the 50s and 60s that served in the USAF during that time. The plane was procured and converted into a restaurant where you can actually sit inside the fueslage of the plane and eat a nicely prepared meal. I made reservations for all of us to sit in the plane, since there are a limited number of seats that are actually in the plane. The rest of the restaurant is in the main building, and there are all sorts of model plane displays and memorabilia to become absorbed in after you finish your meal. The cockpit has been largely preserved in an "as original" state,with the original cockpit radios, levers, and switches all still very much intact.
A great time was had by all, and both flights went very well. I am very proud of my niece and both of my great nephews for being comfortable with using the headsets, and for following my instructions when I needed to talk on the radio. The oldest one even got to fly the plane a little and he was excited about that.
So the act of actually flying every so often has helped me tremendously to get through all the trials and tribulations with the house projects, and now it is time to put aside foolish house things and move back into building mode. I am spending the rest of this weekend getting my shop back in order, and preparing to re-engage with the build, right at the point where I left off, which was getting ready to prep, clean and prime all of my Wing ribs.
Of course, another saving grace for me was to be able to attend Airventure in Oshkosh for my 4th year in a row. There is so much to recount from that trip that I will do so in a separate post. For all you serious builders out there, do not forget to keep your flying skills up during the build.
I desparately want to get back to airplane building. This house of mine has sucked enough life out of me this year, and it is time that I get my own life back for a change. My only real saving grace throughout this whole affair has been taking time out to fly young eagles at the monthly EAA Chapter 301 rallies held at KFTG, and working with Mike Rettig to get his Flight review current. Mike's reccurency training was capped off with a great experience last weekend when both of us rented two different C-172s from a local flying club and we both accomplished a couple of "firsts" with our respective flights.
In my case I had been trying to take my niece and her two boys, ages 7 and 3, up in a GA airplane for the first time.We had been trying for over a month but seemed to hit bad weather each time until last week.
In Mike's case it was his first flight with the family,which now includes his wife and their new daughter. Mike is a good pilot, and it was very satisfying for me as a flight instructor to see him get back in the air again after a long respit from flying. Thanks for the opportunity to get you back in the air Mike!
In all cases the weather finally turned out great, and all passengers and pilots made it safely to our destination and back. The destination,by the way, was a short trip to KCOS in Colorado Springs, where we then procured two very nice courtesy cars from the JetCenter FBO, and drove all of an eigth of a mile from the airport to get to a place known as SOLOs, or it is also known as The Airplane Restaurant. This is a fantastic place to go for a $200.00 hamburger. The restaurant actually incorporates almost all of a complete KC-97 air refuleing tanker from the 50s and 60s that served in the USAF during that time. The plane was procured and converted into a restaurant where you can actually sit inside the fueslage of the plane and eat a nicely prepared meal. I made reservations for all of us to sit in the plane, since there are a limited number of seats that are actually in the plane. The rest of the restaurant is in the main building, and there are all sorts of model plane displays and memorabilia to become absorbed in after you finish your meal. The cockpit has been largely preserved in an "as original" state,with the original cockpit radios, levers, and switches all still very much intact.
A great time was had by all, and both flights went very well. I am very proud of my niece and both of my great nephews for being comfortable with using the headsets, and for following my instructions when I needed to talk on the radio. The oldest one even got to fly the plane a little and he was excited about that.
So the act of actually flying every so often has helped me tremendously to get through all the trials and tribulations with the house projects, and now it is time to put aside foolish house things and move back into building mode. I am spending the rest of this weekend getting my shop back in order, and preparing to re-engage with the build, right at the point where I left off, which was getting ready to prep, clean and prime all of my Wing ribs.
Of course, another saving grace for me was to be able to attend Airventure in Oshkosh for my 4th year in a row. There is so much to recount from that trip that I will do so in a separate post. For all you serious builders out there, do not forget to keep your flying skills up during the build.
Sunday, April 21, 2013
An Exhausting Weekend at SportAir Workshop
So comes gthe end of my vacation week. What better way to do that than to attend another weekend SportAir Workshop held by the EAA at RedStone College near KBJC. This is a very well known School for Aircraft Mechanics. This time the class was for Composite Construction techniques, aka fiberglass, carbon fiber, and other materials used in aircraft construction. My main focus for attending this class was to determine what I can use to fabricate the fake machine gun farings for the leading edges of my wings. Many of the others in my class were from the boating or race car genres, and others were building aircraft completely out of composite materials by using plans and not kits.
This class, as with all of the other classes, provides invaluable information, and for the $350.00 price tag you need to soak up as much of it as possible. There are at least 2 or 3 more of these classes I intend to take in the future, including, welding, firewall forward, and maintaining your aircraft. These will come later on, but for now I will add this latest class to my existing list of attended classes, including basic sheet metal, RV construction techniques, and Electrical systems.
While there on Saturday Mike Rettig (attending the electrical class) and I stopped by the hangar where the builds for Bob Markert (RV8) and Sean Thomas wage on. Sean has now passed me up and is working on his fuel tanks. I got to see some Proseal action in progress, so that was good. I learned from him to use a technique where I will use a scale that can read in gram units to measure out the proseal by measuring the correct amounts for each of the two parts of this stuff, then mix together in a separate cup, then take a plastic bag and place the mixture inside it, and then cut abottom corner out the bag, and using it like a cake frosting decorator, squeeze the mixture onto an appropriate syringe, which I will then use to apply the proseal in precisely the areas that I need.
Bob Markert is still wrapping up some wing stuff and working on his fuselage. It is great to see both a completed RV8 (Jim gray), and Bobs fuselage under construction, all in the same hangar. I took some additional photos of Bob's planned parking brake mechanism, ELT mount, access door for back side of the avionics bay, and his static port assembly. One other item that I was not aware that he was going to add was a prefabricated removeable Smoke Tank, which I also intend to install on my aircraft. Jim Gray also has this same tank for his aircraft, so I will have lots of knowledgeable folks to ask questions about all this when the time comes.
First pic is of Bob's Fuel Pump assembly. taken from the front of the firewall looking down from the top. The issue with this little assembly is about the tight space with which to make bends in the fuel lines. Bob spoke about providing bends in the line to provide some flex capability, which apparently does not exist if the lines are left too straight. Not sure I understand all that yet, but in time I will I am sure. Wow, those sure are some tight 90 degree bends.

Next shot is of the parking brake assembly. That is all I know about it at this point, but I plan on putting one on my plane so I will be paying close attention to how Bob does his. This was taken from the front again looking rearward:

And now from the cockpit side:

Next is the smoke tank. There is another version with a smaller tank that I think that Sean said he was going to put in his plane, and I may end up doing the same, but this is a typical full size tank that is used for those that are so inclined.


Next is Bob's Static source plumbing in the back of the fuselage. I ahve the fittings for all this already. Just need a fuselage to mount them on!


the last two pics show the Adel clamps and nuts/bolts used to atach everything to the bulkhead.
NOw on to the sport air composites class. I managed to get a few pics of some of the activity today. We learned how to use a bagging technique for vacuum forming that allows the parts to cure more quickly and also provide a much better finish by extruding all excess epoxy from the parts during the process. THis was very cool to witness, but it does involve some tools and know how in order to do it correctly.
First is instructor Scott Vanderveen getting ready to place some NACA vents fabricated from clay molds under the vacuum. There were about 14 of us in the class, so doing all of these at the same time presented some challenges.
The blue plastic is a self adhesive vacuum bagging vinyl material with some double sided sealing tape applied to the bottom layer. The red stuff on top of each part is a perforated teflon coated release material that allows excess epoxy to be extruded and separated from the parts.

Next is a heat pamp area and our primary working table where we made all are creations come to life. For the class you will make a canard airfoil section with a spar cap and foam core, a polystyrene foam and fiberglass sandwich that later becomes a partial wing spar assembly, and the naca vents shown above.


Next is the modeling clay that is used to form molds. You can apparently get this from Hobby Lobby locally. Sounds like time for a trip to the hobby store.

Next is a pic of what I think is just bed batting material that you can get from Joanns or any fabric store. this is used to help maintain a constant temperature while under the vacuum.

then the top layer of the bag goes down, and theother side of the tape, which actually resembles the clay or caulk, is exposed:

Then some pics of the vacuum pump assembly and process:


And finally the pump turned on the vacuum being applied:

And lastly, once the vacuum started working we had to try to massage the top of the bag around the parts. Mine did not turn out so well because the vaccum did not apply evently around the part and I could not get the wrinkles in the bag totally removed.

what I got most from this class was the confidence to be able to to acquire some supplies and create some mock ups from which I can fabricate my own machine gun composite parts. It will be a lot of fun, albeit time consuming, to fabricate everything and seee how it turns out. Totally worth while and highly recommended if you are even thinking about building an airplane.
To be continued.......
This class, as with all of the other classes, provides invaluable information, and for the $350.00 price tag you need to soak up as much of it as possible. There are at least 2 or 3 more of these classes I intend to take in the future, including, welding, firewall forward, and maintaining your aircraft. These will come later on, but for now I will add this latest class to my existing list of attended classes, including basic sheet metal, RV construction techniques, and Electrical systems.
While there on Saturday Mike Rettig (attending the electrical class) and I stopped by the hangar where the builds for Bob Markert (RV8) and Sean Thomas wage on. Sean has now passed me up and is working on his fuel tanks. I got to see some Proseal action in progress, so that was good. I learned from him to use a technique where I will use a scale that can read in gram units to measure out the proseal by measuring the correct amounts for each of the two parts of this stuff, then mix together in a separate cup, then take a plastic bag and place the mixture inside it, and then cut abottom corner out the bag, and using it like a cake frosting decorator, squeeze the mixture onto an appropriate syringe, which I will then use to apply the proseal in precisely the areas that I need.
Bob Markert is still wrapping up some wing stuff and working on his fuselage. It is great to see both a completed RV8 (Jim gray), and Bobs fuselage under construction, all in the same hangar. I took some additional photos of Bob's planned parking brake mechanism, ELT mount, access door for back side of the avionics bay, and his static port assembly. One other item that I was not aware that he was going to add was a prefabricated removeable Smoke Tank, which I also intend to install on my aircraft. Jim Gray also has this same tank for his aircraft, so I will have lots of knowledgeable folks to ask questions about all this when the time comes.
First pic is of Bob's Fuel Pump assembly. taken from the front of the firewall looking down from the top. The issue with this little assembly is about the tight space with which to make bends in the fuel lines. Bob spoke about providing bends in the line to provide some flex capability, which apparently does not exist if the lines are left too straight. Not sure I understand all that yet, but in time I will I am sure. Wow, those sure are some tight 90 degree bends.

Next shot is of the parking brake assembly. That is all I know about it at this point, but I plan on putting one on my plane so I will be paying close attention to how Bob does his. This was taken from the front again looking rearward:

And now from the cockpit side:

Next is the smoke tank. There is another version with a smaller tank that I think that Sean said he was going to put in his plane, and I may end up doing the same, but this is a typical full size tank that is used for those that are so inclined.


Next is Bob's Static source plumbing in the back of the fuselage. I ahve the fittings for all this already. Just need a fuselage to mount them on!


the last two pics show the Adel clamps and nuts/bolts used to atach everything to the bulkhead.
NOw on to the sport air composites class. I managed to get a few pics of some of the activity today. We learned how to use a bagging technique for vacuum forming that allows the parts to cure more quickly and also provide a much better finish by extruding all excess epoxy from the parts during the process. THis was very cool to witness, but it does involve some tools and know how in order to do it correctly.
First is instructor Scott Vanderveen getting ready to place some NACA vents fabricated from clay molds under the vacuum. There were about 14 of us in the class, so doing all of these at the same time presented some challenges.
The blue plastic is a self adhesive vacuum bagging vinyl material with some double sided sealing tape applied to the bottom layer. The red stuff on top of each part is a perforated teflon coated release material that allows excess epoxy to be extruded and separated from the parts.

Next is a heat pamp area and our primary working table where we made all are creations come to life. For the class you will make a canard airfoil section with a spar cap and foam core, a polystyrene foam and fiberglass sandwich that later becomes a partial wing spar assembly, and the naca vents shown above.


Next is the modeling clay that is used to form molds. You can apparently get this from Hobby Lobby locally. Sounds like time for a trip to the hobby store.

Next is a pic of what I think is just bed batting material that you can get from Joanns or any fabric store. this is used to help maintain a constant temperature while under the vacuum.

then the top layer of the bag goes down, and theother side of the tape, which actually resembles the clay or caulk, is exposed:

Then some pics of the vacuum pump assembly and process:


And finally the pump turned on the vacuum being applied:

And lastly, once the vacuum started working we had to try to massage the top of the bag around the parts. Mine did not turn out so well because the vaccum did not apply evently around the part and I could not get the wrinkles in the bag totally removed.

what I got most from this class was the confidence to be able to to acquire some supplies and create some mock ups from which I can fabricate my own machine gun composite parts. It will be a lot of fun, albeit time consuming, to fabricate everything and seee how it turns out. Totally worth while and highly recommended if you are even thinking about building an airplane.
To be continued.......
Monday, February 25, 2013
A Young Eagles Flight Adventure - - NOT!
Editors Note****** I revamped this story just a bit to make it easier to read and corrected some obvious grammatical and spelling errors. Apologize to my readers for that. This version should be much better.
It turned out to be a pretty nice airplane work session over the weekend, despite getting nailed with tons of snow Saturday evening into Sunday. Before I cover the details of the build, there is something else I thought might be worth mentioning that happened to me early Saturday morning. It concerns a matter of aviation safety, and I thought that other pilots might benefit from it.
I was planning on flying Young Eagles Saturday morning at KFTG for the second YE rally of the year. YE flights have become so popular that the chapter rallies that are held each month are booked at least a year or more in advance, and EAA Chapter 301 cranks out about 50+ first flights for kids during each and every rally. I feel privileged to participate in this event, and even moreso when I get to fly.
Anyway, since I do not yet own my own airplane, I have to resort to renting an airplane from the local flying club. One thing that really concerns me is how extremely expensive renting an airplane has become compared to when I first learned to fly in 1980. I am frankly a bit shocked at the state and age of equipment that exists in most flying club fleets these days, compared to the grossly out of proportion rental rates that they charge. Personally I think it is just another example of American greed at work here, but I digress.
Chalk it all up to another of what I would rate as my top 5 reasons for wanting to build and own my own bird. The aircraft that are currently available for rent are a mix of old and new, and the equipment and avionics in these older model aircraft is pretty lacking. The problem that I see is that they are charging expensive rates for newer aircraft of the same model, and they are also basically charging you the same rate for an aircraft that, from an equipment/avionics perspective, does not even come close to what the newer airplanes have. I can't believe that the cost of insurance, maintenance, and fuel are making these older airplanes just as expensive to fly as the newer ones. In fact, I think what is really going on is that they are using the older aircraft in the fleet to help cover the actual cost of renting the overly expensive newer models. This is nothing short of robbery IMHO, and is truly a sad state of affairs for those wanting to learn how to fly today.
Anyway, I had scheduled a C-182 for the flight on Saturday, and the weather was perfect, except for it being extremely cold and prone to frost in the morning. Gee - sounds like deja vu from the first time I did this in November of last year. So I arrived at the airport (KAPA) early in the morning before the club opened. I had scheduled an early morning departure so I could arrive at KFTG by 0745 local for the briefing. The club places the aircraft books and keys in a lockbox and you get the combo the day before so you can retrieve it without waiting for the office to open up.
So I opened the lockbox, and my airplane book is nowhere to be found. A couple of folks with access to the office had also shown up early, so I was able to sneak into the office, and sure enough, found my airplane book sitting neatly on the shelf. Not to worry yet - perhaps it went down for maintenance, but I would have expected a note or a phone call had that been the case - but I received neither. Anyway, I retrieved the airplane book and headed out to do the preflight so I could be on my way.
I opened the airplane up, and alas - it was almost starved of all fuel. This is not uncommon for a C-182, which is a prime cross country airplane, having flown several hundred hours in them during my former years as a Civil Air Patrol Search and Rescue Pilot. Still no problem - called the fuel truck and the fuel was on the way. Then I turned on the Master switch to lower the flaps and began my preflight - so far so good. Everything else inside the cabin checked out, or so I thought, so I then proceeded outside to walk around the airplane. As I reached the tail one of things that is routinely done is to check for freedom of movement of the control surfaces. This is done by physically grabbing the elevators and such and moving them gently from one extreme to the other. If everything is normal, you hear and feel nothing other than the smooth operation of the counterbalance springs, and perhaps some slight noise from the hinges that attach it to the HS. Unfortunately for me, I hear this very loud squeal and a very distinct grinding noise, all coming from inside the cabin. I returned to the cabin to move the controls this time to see if I get the same noise. Sure enough - the co-pilot side control yoke was starting to bind on something, but the pilot side still felt OK. Both yokes are joined together behind the panel so that either of them can control the same control surface.
This became an instant deal breaker for me. Sure, I could overcome the slight binding with normal control pressure, and the noise, while disturbing, was not ultra-overpowering to me - just annoying enough to catch my attention. The problem was, and my thought process was, what if it gets worse after I become airborne - what then? What if they totally freeze up during a critical phase of the flight? Even more importantly, what if I encounter this problem with a Young Eagle and their parents onboard for their very first small airplane flight? I was not willing to even remotely consider that possibility. So the decision to abort became relatively easy when I took the well-being of my passengers into account.
Having had this grinding noise type of problem before, I new that it had something to do with the mounting bracket or bearing on the copilot side controls. Unfortunately, since the pilot and copilot control yokes are mechanically joined together, they both need to be working properly or else you may have a problem.
By now I recognized that I was starting to experience something that I have taught countless other pilots to recognize over the years. I call it the "3 strikes and your out rule," but it is also better known as the "catastrophic chain of events" in most post mortum NTSB accident reports. No matter what you call it, it often times leads to an undesireable outcome for a pilot and their passengers. The premise is that most aircraft accidents are not attributed to just one single factor, but are usually comprised of a series of linked events that lead the pilot further and further toward a devastating outcome, driven by the series of actions or inactions taken by the pilot. Pilots must learn to recognize when they enter into this situation, and then take the necessary action to break the chain.
Strike 1: The airplane book was not available, making me late and pressuring me ever so slightly to hurry up and get going. There was a possibility that the airplane had been grounded without my knowing it. Action - I chose to preflight anyway and then further assess the situation after that was done.
Strike 2: No fuel in the airplane - more time wasted - more pressure to hurry, but this was also expected, and was of the reasons why I arrived early enough take care of it.
Strike 3: Grinding noise and binding of the control yoke - Ok - this was not something I was willing to compomise on. If it don't work right, and the potential outcome might be very bad - don't risk it. I broke the chain right here.
And then came yet another strike. Strike 4! It was as if it was affirming my decision not to fly, or at least that is how I took it. I needed to raise the flaps back up and secure the airplane so I could return to the office. But when I actuated the switch, nothing happened. No upward travel at all. I then thought I could try to lower the flaps all they way down and then back up to see if that would work, and it did, for a moment anyway. The flaps came back up to the point where they had about another 10-15 degrees of travel remaining, and then the flap motor cut in and out several times until they finally retracted to the full up position.
I returned to the office, reported the problems to the dispatcher, who by this time had opened the office, and then I left for home. The one thing that disturbs me is that the airplane had flown the day before, and I can almost assure you without a doubt that the control yoke was exhibiting the same behavior on that flight, but they flew it anyway.
It is decisions like this that face pilots on every single flight, no matter if it is an airliner or a small GA airplane, some of the decisions that must be made are very much the same. I wanted to jot down this experience in my blog to hopefully benefit any fellow pilots that may read it. I wanted to reaffirm to others that there is absolutely nothing wrong with saying that you probably won't get to go flying today... Better to live and fly another day than to die and never get the opportunity to do it again. Extra vigilance must also be applied when flying unfamiliar rental aircraft that may be in less than "mint" condition.
I was proud of myself for making the decision to stop the ever-progressing chain of events that were unfolding before my eyes, but still frustrated about the whole experience, and the realization that I was not going to get to participate in this month's YE rally. This is the reality of being a pilot -sometimes you just have to say "not today."
Instead, I chose to view this experience positively as follows:
-I went home and started working on MY airplane - so the day was not a total loss at all.
-I am using these experiences as strong motivators to finish my project someday. I am so sick and tired of dealing with flying rental airplanes, and schedules that don't match mine, and airport security crap, etc., that I am more than willing to continue the long and expensive process to one day own and operate an airplane that I built with my own two hands.
-I may have saved someone's life by taking the action that I did to ground the airplane and demand that it be repaired. That is perhaps the most rewarding feeling of all, and in the end is really what all the preflight preparation is all about.
The moral to the other pilots out there:
Don't forget about the reasons why you perform every step of the preflight checklist, and how important it is to do it right, and to pay attention to what your senses are telling you. Part of the problem is that flying has become so reliable these days that we rarely have to face a problem serious enough to force us to make an outright no-go kind of decision.
So if this sort of thing happens to you, recognize the events that are unfolding around you, evaluate your situation and potential options, understand the risks for taking each option, and make the correct decision - even if the decision you will have to make is to stay on the ground.
Fly safe, and all you builders out there don't forget to fly every once in a while!
It turned out to be a pretty nice airplane work session over the weekend, despite getting nailed with tons of snow Saturday evening into Sunday. Before I cover the details of the build, there is something else I thought might be worth mentioning that happened to me early Saturday morning. It concerns a matter of aviation safety, and I thought that other pilots might benefit from it.
I was planning on flying Young Eagles Saturday morning at KFTG for the second YE rally of the year. YE flights have become so popular that the chapter rallies that are held each month are booked at least a year or more in advance, and EAA Chapter 301 cranks out about 50+ first flights for kids during each and every rally. I feel privileged to participate in this event, and even moreso when I get to fly.
Anyway, since I do not yet own my own airplane, I have to resort to renting an airplane from the local flying club. One thing that really concerns me is how extremely expensive renting an airplane has become compared to when I first learned to fly in 1980. I am frankly a bit shocked at the state and age of equipment that exists in most flying club fleets these days, compared to the grossly out of proportion rental rates that they charge. Personally I think it is just another example of American greed at work here, but I digress.
Chalk it all up to another of what I would rate as my top 5 reasons for wanting to build and own my own bird. The aircraft that are currently available for rent are a mix of old and new, and the equipment and avionics in these older model aircraft is pretty lacking. The problem that I see is that they are charging expensive rates for newer aircraft of the same model, and they are also basically charging you the same rate for an aircraft that, from an equipment/avionics perspective, does not even come close to what the newer airplanes have. I can't believe that the cost of insurance, maintenance, and fuel are making these older airplanes just as expensive to fly as the newer ones. In fact, I think what is really going on is that they are using the older aircraft in the fleet to help cover the actual cost of renting the overly expensive newer models. This is nothing short of robbery IMHO, and is truly a sad state of affairs for those wanting to learn how to fly today.
Anyway, I had scheduled a C-182 for the flight on Saturday, and the weather was perfect, except for it being extremely cold and prone to frost in the morning. Gee - sounds like deja vu from the first time I did this in November of last year. So I arrived at the airport (KAPA) early in the morning before the club opened. I had scheduled an early morning departure so I could arrive at KFTG by 0745 local for the briefing. The club places the aircraft books and keys in a lockbox and you get the combo the day before so you can retrieve it without waiting for the office to open up.
So I opened the lockbox, and my airplane book is nowhere to be found. A couple of folks with access to the office had also shown up early, so I was able to sneak into the office, and sure enough, found my airplane book sitting neatly on the shelf. Not to worry yet - perhaps it went down for maintenance, but I would have expected a note or a phone call had that been the case - but I received neither. Anyway, I retrieved the airplane book and headed out to do the preflight so I could be on my way.
I opened the airplane up, and alas - it was almost starved of all fuel. This is not uncommon for a C-182, which is a prime cross country airplane, having flown several hundred hours in them during my former years as a Civil Air Patrol Search and Rescue Pilot. Still no problem - called the fuel truck and the fuel was on the way. Then I turned on the Master switch to lower the flaps and began my preflight - so far so good. Everything else inside the cabin checked out, or so I thought, so I then proceeded outside to walk around the airplane. As I reached the tail one of things that is routinely done is to check for freedom of movement of the control surfaces. This is done by physically grabbing the elevators and such and moving them gently from one extreme to the other. If everything is normal, you hear and feel nothing other than the smooth operation of the counterbalance springs, and perhaps some slight noise from the hinges that attach it to the HS. Unfortunately for me, I hear this very loud squeal and a very distinct grinding noise, all coming from inside the cabin. I returned to the cabin to move the controls this time to see if I get the same noise. Sure enough - the co-pilot side control yoke was starting to bind on something, but the pilot side still felt OK. Both yokes are joined together behind the panel so that either of them can control the same control surface.
This became an instant deal breaker for me. Sure, I could overcome the slight binding with normal control pressure, and the noise, while disturbing, was not ultra-overpowering to me - just annoying enough to catch my attention. The problem was, and my thought process was, what if it gets worse after I become airborne - what then? What if they totally freeze up during a critical phase of the flight? Even more importantly, what if I encounter this problem with a Young Eagle and their parents onboard for their very first small airplane flight? I was not willing to even remotely consider that possibility. So the decision to abort became relatively easy when I took the well-being of my passengers into account.
Having had this grinding noise type of problem before, I new that it had something to do with the mounting bracket or bearing on the copilot side controls. Unfortunately, since the pilot and copilot control yokes are mechanically joined together, they both need to be working properly or else you may have a problem.
By now I recognized that I was starting to experience something that I have taught countless other pilots to recognize over the years. I call it the "3 strikes and your out rule," but it is also better known as the "catastrophic chain of events" in most post mortum NTSB accident reports. No matter what you call it, it often times leads to an undesireable outcome for a pilot and their passengers. The premise is that most aircraft accidents are not attributed to just one single factor, but are usually comprised of a series of linked events that lead the pilot further and further toward a devastating outcome, driven by the series of actions or inactions taken by the pilot. Pilots must learn to recognize when they enter into this situation, and then take the necessary action to break the chain.
Strike 1: The airplane book was not available, making me late and pressuring me ever so slightly to hurry up and get going. There was a possibility that the airplane had been grounded without my knowing it. Action - I chose to preflight anyway and then further assess the situation after that was done.
Strike 2: No fuel in the airplane - more time wasted - more pressure to hurry, but this was also expected, and was of the reasons why I arrived early enough take care of it.
Strike 3: Grinding noise and binding of the control yoke - Ok - this was not something I was willing to compomise on. If it don't work right, and the potential outcome might be very bad - don't risk it. I broke the chain right here.
And then came yet another strike. Strike 4! It was as if it was affirming my decision not to fly, or at least that is how I took it. I needed to raise the flaps back up and secure the airplane so I could return to the office. But when I actuated the switch, nothing happened. No upward travel at all. I then thought I could try to lower the flaps all they way down and then back up to see if that would work, and it did, for a moment anyway. The flaps came back up to the point where they had about another 10-15 degrees of travel remaining, and then the flap motor cut in and out several times until they finally retracted to the full up position.
I returned to the office, reported the problems to the dispatcher, who by this time had opened the office, and then I left for home. The one thing that disturbs me is that the airplane had flown the day before, and I can almost assure you without a doubt that the control yoke was exhibiting the same behavior on that flight, but they flew it anyway.
It is decisions like this that face pilots on every single flight, no matter if it is an airliner or a small GA airplane, some of the decisions that must be made are very much the same. I wanted to jot down this experience in my blog to hopefully benefit any fellow pilots that may read it. I wanted to reaffirm to others that there is absolutely nothing wrong with saying that you probably won't get to go flying today... Better to live and fly another day than to die and never get the opportunity to do it again. Extra vigilance must also be applied when flying unfamiliar rental aircraft that may be in less than "mint" condition.
I was proud of myself for making the decision to stop the ever-progressing chain of events that were unfolding before my eyes, but still frustrated about the whole experience, and the realization that I was not going to get to participate in this month's YE rally. This is the reality of being a pilot -sometimes you just have to say "not today."
Instead, I chose to view this experience positively as follows:
-I went home and started working on MY airplane - so the day was not a total loss at all.
-I am using these experiences as strong motivators to finish my project someday. I am so sick and tired of dealing with flying rental airplanes, and schedules that don't match mine, and airport security crap, etc., that I am more than willing to continue the long and expensive process to one day own and operate an airplane that I built with my own two hands.
-I may have saved someone's life by taking the action that I did to ground the airplane and demand that it be repaired. That is perhaps the most rewarding feeling of all, and in the end is really what all the preflight preparation is all about.
The moral to the other pilots out there:
Don't forget about the reasons why you perform every step of the preflight checklist, and how important it is to do it right, and to pay attention to what your senses are telling you. Part of the problem is that flying has become so reliable these days that we rarely have to face a problem serious enough to force us to make an outright no-go kind of decision.
So if this sort of thing happens to you, recognize the events that are unfolding around you, evaluate your situation and potential options, understand the risks for taking each option, and make the correct decision - even if the decision you will have to make is to stay on the ground.
Fly safe, and all you builders out there don't forget to fly every once in a while!
Tuesday, February 5, 2013
Cutting support angle brackets
Tonight I measured and cut my 1 1/4 inch x 1/8 inch thick steel angle in 4 pieces, each 13 inches long. I used the recprocating saw with the metal cutting blade - the same one I used to bevel the corners of the wing stands. This was like cutting through butter compared to the 1/4 inch thick wing stands, so it went fairly quickly.
The widest part of the wing spars is about 7.75 inches wide, so a one foot long piece of angle would allow the spar to just fit nicely on the entire support. Since 4 inches are aligned with the inside edge of the wing stand, that leaves 9 inches for the spars to rest on, which should be plenty. I opted to cut them a little longer than necessary, mostly to allow for the 1/4 to 1/2 inch adjustment that may be needed to level each angle after attaching them to my wing stands.
I also measured and marked the 4 support angles for the first of two holes that need to be drilled in each support bracket - one for the attachment bolt to the post, and the other to accept the bracket that will hold the 5/16 inch threaded rod. I expect to be drilling most of the remaining holes tomorrow after work.
No pics tonight, but I did manage to visit Aaron Miller's build log to check up on his progress since we got the wing stands welded together. This post shows some pics he took of me "in action" with a welder in my hand. Dangerous stuff for sure! Looks like he is up and running with both his wings. I envy the room he has in his basement. Before long he will be wheeling his entire airplane out of the basement and onto his taxi way where he will taxi all the way to the runway for his first flight.
ON another note - Looks like Van's has officially indicated on their facebook page that they have reached a new milestone of 8000 flying RVs! What an amazing accomplishment, considering that they were already the most popular flying kit airplane manufacturer when they only had 6500 of them flying not so long ago. Guess I better get busy and finish this thing!
And finally, looks like friend and fellow builder Ron Duren made the big move to KBJC last weekend. Congrats to him - he really put in a lot of work to get things to this point, and I think he is well on his way to a probable first flight some time this coming spring.
The widest part of the wing spars is about 7.75 inches wide, so a one foot long piece of angle would allow the spar to just fit nicely on the entire support. Since 4 inches are aligned with the inside edge of the wing stand, that leaves 9 inches for the spars to rest on, which should be plenty. I opted to cut them a little longer than necessary, mostly to allow for the 1/4 to 1/2 inch adjustment that may be needed to level each angle after attaching them to my wing stands.
I also measured and marked the 4 support angles for the first of two holes that need to be drilled in each support bracket - one for the attachment bolt to the post, and the other to accept the bracket that will hold the 5/16 inch threaded rod. I expect to be drilling most of the remaining holes tomorrow after work.
No pics tonight, but I did manage to visit Aaron Miller's build log to check up on his progress since we got the wing stands welded together. This post shows some pics he took of me "in action" with a welder in my hand. Dangerous stuff for sure! Looks like he is up and running with both his wings. I envy the room he has in his basement. Before long he will be wheeling his entire airplane out of the basement and onto his taxi way where he will taxi all the way to the runway for his first flight.
ON another note - Looks like Van's has officially indicated on their facebook page that they have reached a new milestone of 8000 flying RVs! What an amazing accomplishment, considering that they were already the most popular flying kit airplane manufacturer when they only had 6500 of them flying not so long ago. Guess I better get busy and finish this thing!
And finally, looks like friend and fellow builder Ron Duren made the big move to KBJC last weekend. Congrats to him - he really put in a lot of work to get things to this point, and I think he is well on his way to a probable first flight some time this coming spring.
Monday, January 14, 2013
Wing spars relocated back on the work bench
As part of my ongoing major re-organization effort of the garage, I managed to clear off enough space from the work benches to allow me to move the spars from the shelf on the wall to the benches. I had not seen them for a while, and it felt good to get them down from "storage" so I can start match drilling ribs and skins and such.
The only problem I encountered whne attempting to move them from the shelf to the bench was that all of the parts that were stored on the shelf had been buried by almost 1 inch of shingle remnant when the jerks put my new roof on the house. THey did a great job cleaning up around the perimeter of the house but nobody even mentioned anything about checking and cleaning up my garage. This really pissed me off, but at the same time I realized that this was mostly my fault for leaving them "in harms way" adn not covering them with a tarp or something. I guess I just did not expect to ahve that much crap fall down into the garage.
IN any event, it looks like I was able to vacuum up most of the stuff, but this kind of thing always makes me nervous when I start thinking about all the little pieces tht may still be buried underneath the metal that will not show their ugly face until the vibration from the finished plane finally jars them loose, adn then who know what crevace they may find to deposit themselves into that end up affecting a critical flight control or something.
Here is the first of several pics - lovely shingle crap and sawdust all over my left elevator, and most certainly inside the bay where the electric servo and linkage goes - the one place that I really don't want to have any of this crap in my airplane, where it can be fatal if something goes wrong.
Edit - and a happy new year to me!! Turns out that blogspot has had problems with uploading images apparently since clear back on January 4. Smells like a virus or even better a ploy to push users away from IE and onto Google chrome or Firefox browsers. Having recently had problems at work with Firefox's latest release, I am now leary of downloading anyone's browser. That said, it does seem that Firefox v 17.0.1 does not have the problem that IE does (do NOT under any circumstances install Firefox v 18.0 - very bad!).
Anyway, to continue - here is the pics of my roof debris covered airplane parts, starting with the left elevator:
 Next is the rear spar:


And on a happier note, here are the main wing spars back on the bench. Unfortunately, my HS is still on the table in front of the bench, and I need to finish up some touch up work on the HS so I can hang it back up on the wall to free up the table so I can start attaching ribs - it just never ends.

Still dealing with another deep freeze that has put the stops on anything in the garage. Now working on the cleanup of the benches in the basement - getting tired of living in the junk heap of a house. Almost ready to break out the two fire pits that I own and start some serious burning!
And finally, this is better late than never I guess. A couple of weeks ago I attended a hangar party up at KBJC for a gathering of RV folks across the state. Compliments to Bob Market, who owns this awesome hangar which will soon house Ron Duren's RV-7. I met several people that I had never met before, and made some new friends along the way. Here is a list of things that happened up there:
1. Got a close up view of Sean Thomas' Metal Wing stands. I will post some additional pics of that in another post, but here is a teaser pic for now. Sean is doing a great job.

2. Finally got to see Sean B, who had some very bad luck last summer after his house, and nearly completed RV7 were lost in a large fire near Colorado Springs. It was really great to see him and to find out that he is actually back to building another 7 again and doing his best to put the fire behind him. Kudos to you Sean. I admire your intestinal fortitude! KPR my friend.
3. I got to meet Jim Gray, owner and builder of the 2010 grand champion homebuilt award at Oshkosh for his beautifully finished RV-8, which was finished in the colors of the Jolly Roger Squadron seen in so many movies, including Top Gun and GI Jane. I took a ton of pics and got to pick Jim's brain for some building tips for such things as the forward baggage door, etc.

4. As if that was not enough, I then got a chance to talk with Bob Markert, who is now working on his fuselage. Get ready for alot of green - I just love the color of the primer he is using:
 Note the mockup of the instrument panel - alot of Garmin goodies going in this one. He also has a rear seat throttle that I am also considering putting in the back as a safety feature more than anything else. I am NOT going to put the rear rudder pedals in mine - too many stories from other folks about ineffective control and uncomfortable foot position for the rear seat occupant. here is the forward throttle quadrant - very similar to what I am going to do.

And the rear throttle:

And here is shot of an improvement over the stock landing gear provided by Vans - Grove lnding gear struts are made from one piece leaf spring steel (I think), and they are designed to carry the hydraulic brake fluid inside the actual strut instead of from a separate brake line that is typically strapped to the the landing gear strut. These also serve to eliminate the need to make fairings for the landing gear legs since they already come aerodynamically shaped.

And finally a shot of one of the auxiliary fuel tanks that fit at the tip of each wing. These are from SafeAir and are very expensive (about 1500.00 for the pair), and they give you about an hour of extra fuel. I plan on getting the bungle kit which is simply the fuel line fitting that is added to the main fuel tank which connects to the fuel line coming from the aux tank shown below. I will simply cap this off for potential future use shold I decide to add the aux tanks at a later time. Part of the tank fits inside the wing tip (bottom of pic), and the rest of it (long tube) fits inside the lightening holes of the outer wing ribs. It was very cool to see these up close.

Then Bob showed me a custom windscreen that he ordered from the same company that makes the canopies for Vans. The stock canopy comes molded as one full unit that must be cut and trimmed to create the wind screen and the separate bubble canopy. I had no idea that you could order just the wind screen by itself. I learn something every day.
So it was one hangar, good friends, good food, good conversation, and a mind blowing awesome experience to see flying RVs and RVs under construction all in the same place. It certainly had an airplane factory feel to it. Now I just need to get back to pounding some rivets! All for now.
The only problem I encountered whne attempting to move them from the shelf to the bench was that all of the parts that were stored on the shelf had been buried by almost 1 inch of shingle remnant when the jerks put my new roof on the house. THey did a great job cleaning up around the perimeter of the house but nobody even mentioned anything about checking and cleaning up my garage. This really pissed me off, but at the same time I realized that this was mostly my fault for leaving them "in harms way" adn not covering them with a tarp or something. I guess I just did not expect to ahve that much crap fall down into the garage.
IN any event, it looks like I was able to vacuum up most of the stuff, but this kind of thing always makes me nervous when I start thinking about all the little pieces tht may still be buried underneath the metal that will not show their ugly face until the vibration from the finished plane finally jars them loose, adn then who know what crevace they may find to deposit themselves into that end up affecting a critical flight control or something.
Here is the first of several pics - lovely shingle crap and sawdust all over my left elevator, and most certainly inside the bay where the electric servo and linkage goes - the one place that I really don't want to have any of this crap in my airplane, where it can be fatal if something goes wrong.
Edit - and a happy new year to me!! Turns out that blogspot has had problems with uploading images apparently since clear back on January 4. Smells like a virus or even better a ploy to push users away from IE and onto Google chrome or Firefox browsers. Having recently had problems at work with Firefox's latest release, I am now leary of downloading anyone's browser. That said, it does seem that Firefox v 17.0.1 does not have the problem that IE does (do NOT under any circumstances install Firefox v 18.0 - very bad!).
Anyway, to continue - here is the pics of my roof debris covered airplane parts, starting with the left elevator:


And on a happier note, here are the main wing spars back on the bench. Unfortunately, my HS is still on the table in front of the bench, and I need to finish up some touch up work on the HS so I can hang it back up on the wall to free up the table so I can start attaching ribs - it just never ends.

Still dealing with another deep freeze that has put the stops on anything in the garage. Now working on the cleanup of the benches in the basement - getting tired of living in the junk heap of a house. Almost ready to break out the two fire pits that I own and start some serious burning!
And finally, this is better late than never I guess. A couple of weeks ago I attended a hangar party up at KBJC for a gathering of RV folks across the state. Compliments to Bob Market, who owns this awesome hangar which will soon house Ron Duren's RV-7. I met several people that I had never met before, and made some new friends along the way. Here is a list of things that happened up there:
1. Got a close up view of Sean Thomas' Metal Wing stands. I will post some additional pics of that in another post, but here is a teaser pic for now. Sean is doing a great job.

2. Finally got to see Sean B, who had some very bad luck last summer after his house, and nearly completed RV7 were lost in a large fire near Colorado Springs. It was really great to see him and to find out that he is actually back to building another 7 again and doing his best to put the fire behind him. Kudos to you Sean. I admire your intestinal fortitude! KPR my friend.
3. I got to meet Jim Gray, owner and builder of the 2010 grand champion homebuilt award at Oshkosh for his beautifully finished RV-8, which was finished in the colors of the Jolly Roger Squadron seen in so many movies, including Top Gun and GI Jane. I took a ton of pics and got to pick Jim's brain for some building tips for such things as the forward baggage door, etc.

4. As if that was not enough, I then got a chance to talk with Bob Markert, who is now working on his fuselage. Get ready for alot of green - I just love the color of the primer he is using:


And the rear throttle:

And here is shot of an improvement over the stock landing gear provided by Vans - Grove lnding gear struts are made from one piece leaf spring steel (I think), and they are designed to carry the hydraulic brake fluid inside the actual strut instead of from a separate brake line that is typically strapped to the the landing gear strut. These also serve to eliminate the need to make fairings for the landing gear legs since they already come aerodynamically shaped.
And finally a shot of one of the auxiliary fuel tanks that fit at the tip of each wing. These are from SafeAir and are very expensive (about 1500.00 for the pair), and they give you about an hour of extra fuel. I plan on getting the bungle kit which is simply the fuel line fitting that is added to the main fuel tank which connects to the fuel line coming from the aux tank shown below. I will simply cap this off for potential future use shold I decide to add the aux tanks at a later time. Part of the tank fits inside the wing tip (bottom of pic), and the rest of it (long tube) fits inside the lightening holes of the outer wing ribs. It was very cool to see these up close.

Then Bob showed me a custom windscreen that he ordered from the same company that makes the canopies for Vans. The stock canopy comes molded as one full unit that must be cut and trimmed to create the wind screen and the separate bubble canopy. I had no idea that you could order just the wind screen by itself. I learn something every day.
So it was one hangar, good friends, good food, good conversation, and a mind blowing awesome experience to see flying RVs and RVs under construction all in the same place. It certainly had an airplane factory feel to it. Now I just need to get back to pounding some rivets! All for now.
Subscribe to:
Posts (Atom)